What Do Good Cannabis Seeds Look Like?


Open the pack. Hold one seed to the light. A good seed looks finished, firm, and intact. Pretty stripes help. They are not the whole story.
Hey, you’ve been there. The envelope hits the kitchen table. Your first-time buyer nerves kick in. You tip the pack, and a few little ovals roll into your palm. Now you’re stuck asking the same question every new grower asks: what do good cannabis seeds look like, and which ones should you actually plant?
Well, looks can help. They can’t do all the work. A seed is a tiny lunchbox with a baby plant inside. If that box is finished and sealed, you’ve got a shot. If it’s soft, pale, cracked, or hollow, you’re gambling with a tent slot you can’t spare.
This guide is for the first-time buyer who just opened a pack, the bagseed grower sorting keepers from duds, the outdoor Canadian grower checking mail-order seeds after a cold shipping week, and the stealth micro-grower who can’t waste a 2×2 on a dead seed. You’ll learn the fast visual checks, the specs that matter, and the stuff the shell will never tell you.
A 60-Second Pack Check Before You Plant
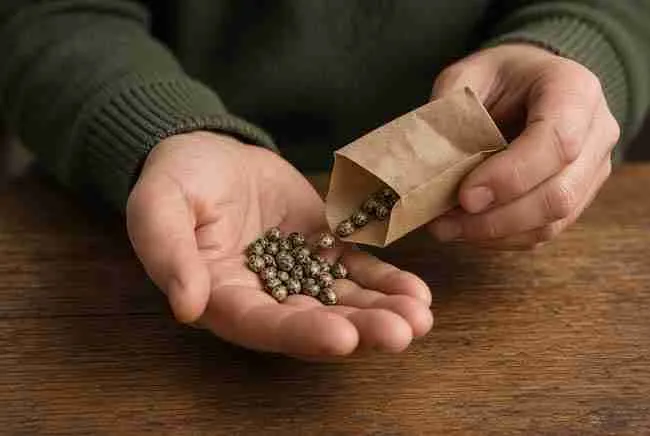
Don’t overthink the first look. You only need a minute. Dump the seeds onto a clean, dry plate. Use a window or a desk lamp. Turn each seed with a dry finger. You’re hunting for “done,” not “pretty.”
A finished seed feels like a tiny pebble. It has a closed seam. It isn’t squishy. It isn’t paper-thin. After that, you can worry about stripes, size, and color.
However, one ugly seed in a strong pack doesn’t mean the breeder failed you. Shipping rubs coats. Handling knocks off shine. Genetics also make some lines smaller than others. So stay calm, then sort.
The Five Traits That Matter First
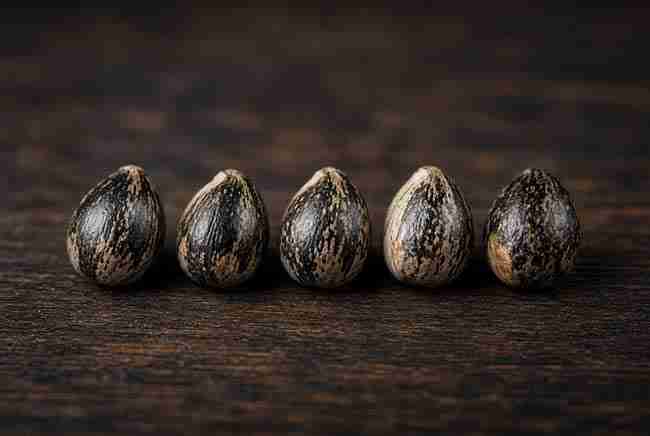
Look for these five things before you do any water test:
- Color that says ripe, not raw. Think tan, brown, grey, or near-black. Not mint-green. Not chalk-white.
- A hard shell. Gentle pressure shouldn’t crush it.
- A plump teardrop shape. One end is a bit pointy. The other is rounder.
- A slight sheen. Not greasy. Not dusty.
- No deep cracks, chips, or open seams.
If a seed hits four or five of those, it’s a planter. If it misses most of them, set it aside. You can still try it later in a cup you don’t care about.
What You Can Ignore on First Glance
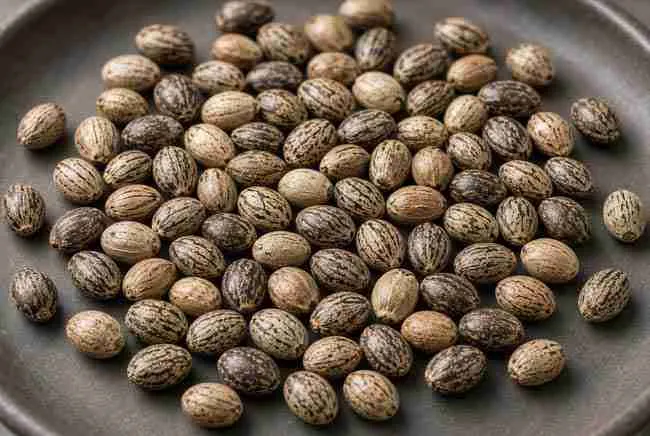
Skip the beauty contest. Matching colors in one pack look nice, but they don’t prove better genetics. A seed without tiger stripes can still be a beast. A small seed from an autoflower pack can still pop fast and finish outdoors in a short Canadian summer.
Also ignore light scuffs. Those are often just the thin outer skin getting rubbed in the vial. That’s cosmetic. The embryo sits inside. As long as the hull is closed and hard, don’t toss it for looking “plain.”
Color, Pattern, and Sheen
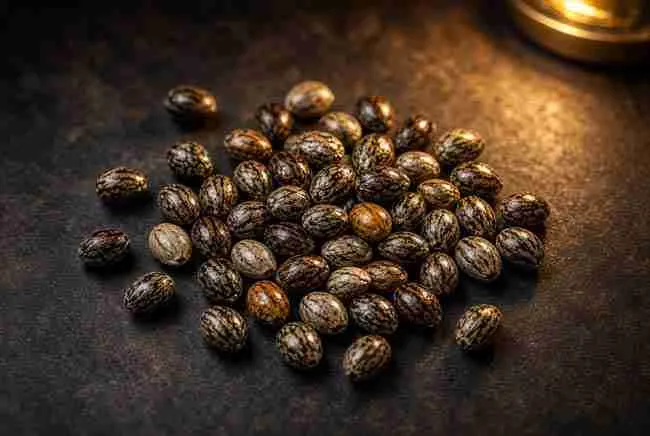
Color is the first thing your eye grabs. That’s fine. Just don’t let color become the whole verdict. Ripe seeds usually darken as the coat hardens on the plant. Unripe seeds stay pale because they never finished that job.
Sheen is the quiet clue people miss. A mature coat often looks a little waxy in side light. Old, baked, or badly stored seeds look flat and dusty, like they sat in a drawer too long.
Brown, Tan, Grey, and Near-Black Seeds
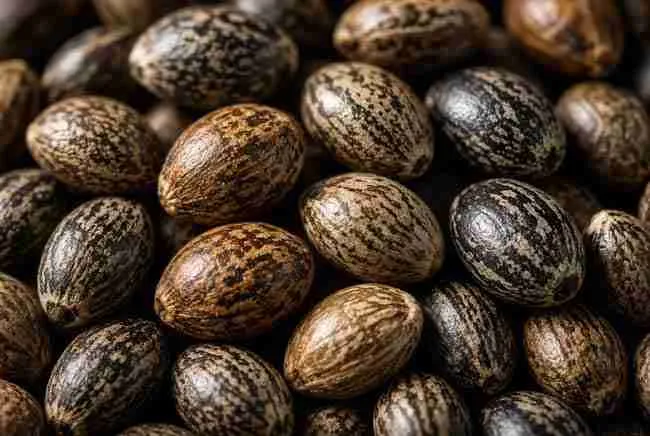
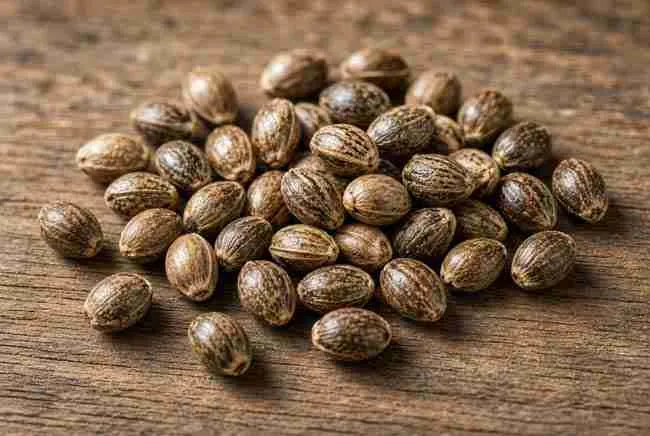
Most good cannabis seeds look like tiny river stones. You’ll see warm brown, khaki tan, slate grey, and sometimes a coat so dark it reads almost black. Mottling is common. One side can be darker than the other. That’s normal.
Near-black can mean fully ripe. It can also mean a dry, older seed if the shell feels brittle. So pair color with feel. A dark seed that still feels dense and a bit glossy is usually a keeper. A dark seed that crumbles like burnt toast is tired.
Spec snapshot for ripe color:
- Common ripe range: tan to dark brown or grey
- Optional mottling: stripes, speckles, turtle-shell patches
- Sheen: faint wax, not plastic shine
- Feel: hard, not chalky
White, Green, or Chalky Seeds
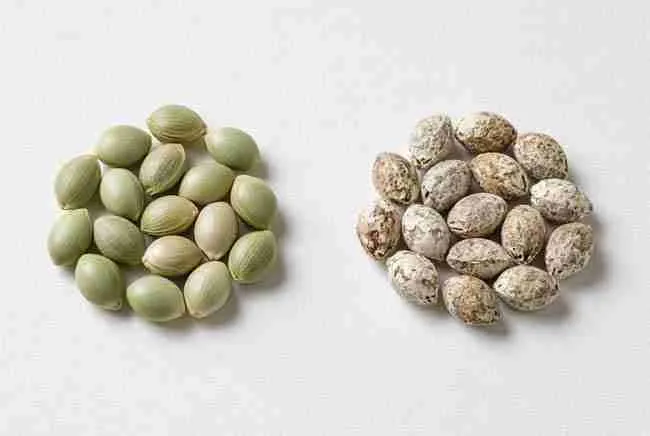
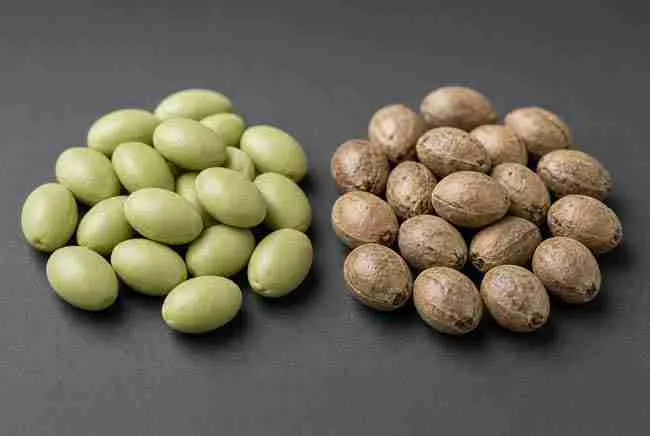
White, cream, and green seeds are the classic “too soon” look. They often came off the plant before the coat lignified. That’s a fancy way to say the shell never turned into armor. Those seeds crush easy. They also run low on stored food for the first root.
Chalky seeds are a different problem. They look faded, powdery, and tired. Heat, light, and dry air can do that in storage. A chalky coat doesn’t always mean dead. It does mean the odds dropped. If you’re a stealth micro-grower with four plant holes, don’t spend one on chalk unless it’s a rare keeper you already love.
Real-life example: a buddy of mine found pale green seeds in a bag of outdoor bud. Two of ten cracked the paper towel. Both seedlings were weak and slow. The dark, hard seeds from the same jar popped in two days and stood up straight. Same room. Same water. Different starting fuel.
Tiger Stripes Are Nice, Not Required
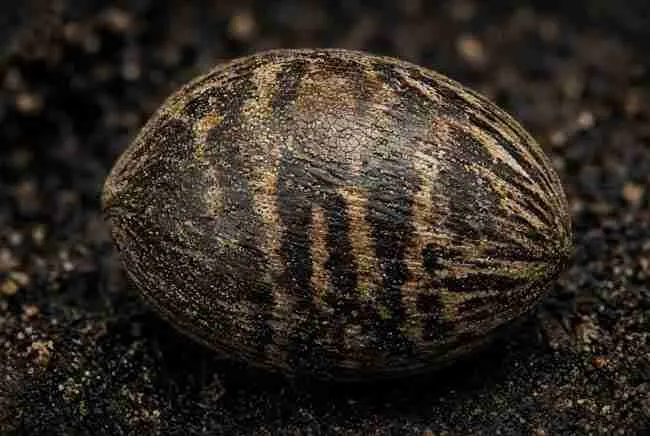
Tiger stripes look cool. No argument there. Those dark bands sit on the outer coat. They often show up late in seed ripening, so they can hint that the seed had time to finish. Some strains just paint more stripes than others. Some barely paint at all.
Don’t treat stripes like a trophy. A plain brown seed with a hard shell can outgrow a striped seed that got cooked in a hot mailbox. Stripes also rub off. That’s why a pack can look mixed after shipping even when every seed came from the same ripe plant.
Why Some Mature Seeds Look Plain After Shipping
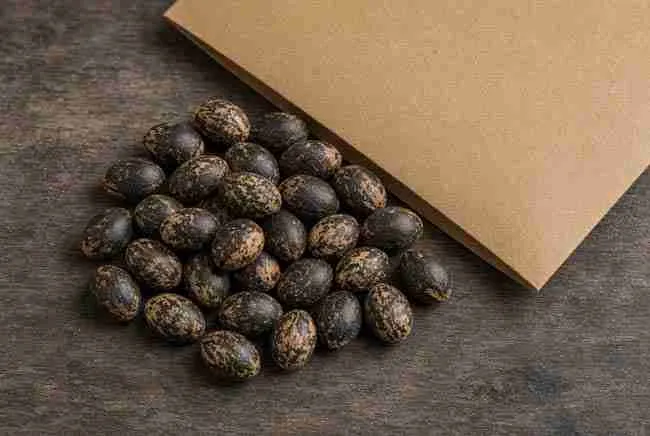
Picture a Canadian winter shipment. The pack sits in a truck. It gets shaken, chilled, then warmed on your kitchen counter. That thin dark skin can scuff. What’s left is a tan mosaic. New growers panic and think they got duds. Not so fast.
Worn mature seeds stay plump. They still pinch hard. The seam is closed. Immature seeds look flat, soft, and green-white even before shipping. Learn that difference and you’ll stop tossing good stock.
Tip for mail-order seeds: open the pack over a plate, not over the sink. Count them. Note any crushed ones. Then store the keepers in a cool, dark, dry spot until germ day.
Size and Shape That Signal a Finished Seed
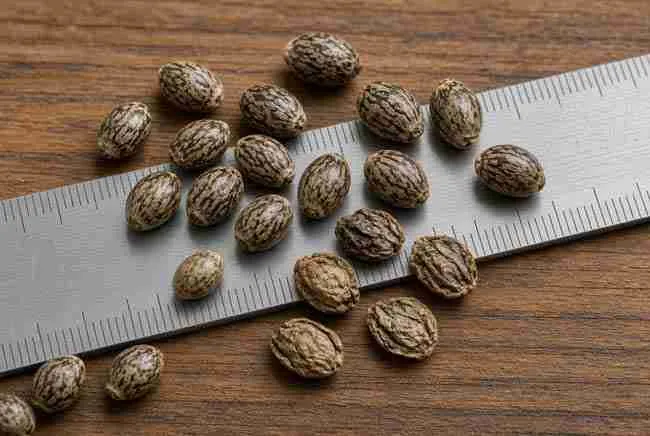
Shape tells you more than size. A finished seed is usually an oval or a little teardrop. One end tapers. That’s often where the first root wants out. The round end sat in the flower. If that round end looks caved in, the seed may have quit early.
Size jumps around by strain. Some indica-leaning lines make chunky seeds. Some sativa and ruderalis lines make smaller ones. Same pack can hold both. That’s genetics, not a packing error.
Teardrop vs Flat or Shriveled
A good teardrop looks filled out, like a tiny football that ate lunch. A flat seed looks pressed. A shriveled seed looks like a raisin. Flat and shriveled seeds often lack a full embryo or dried out too hard.
Hold two seeds side by side. The keeper has a smooth curve. The suspect has dents, wrinkles, or a collapsed belly. You don’t need a microscope for this. Your eyes will get it in one glance.
Why Small Seeds Are Not Automatically Weak
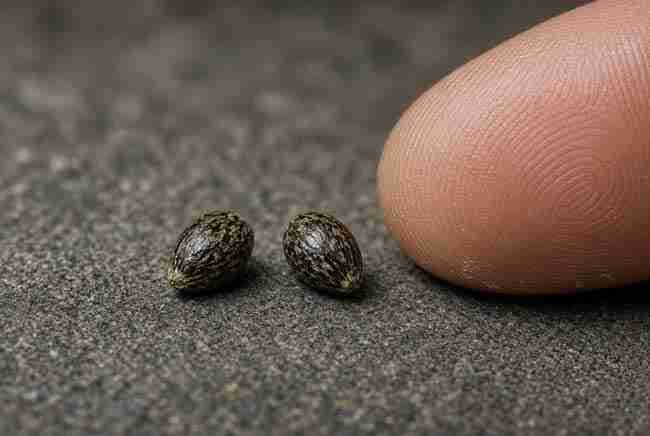
Old-school talk says “big seed, big plant.” That’s a catchy line. It’s also sloppy. Breeders select for the plant, not for a giant hull. Small seeds can still make full plants because the blueprint lives in the embryo, not in the coat thickness.
So if your autoflower pack looks like peppercorns, don’t freak out. Check hardness and shape instead. A small, hard, mottled seed is a worker. A large, soft, pale seed is a maybe.
Good rule: compare seeds to their own pack, not to a photo on the internet. Packs have a “family look.” The odd flat one is the outlier.
Autoflower Packs vs Photoperiod Packs
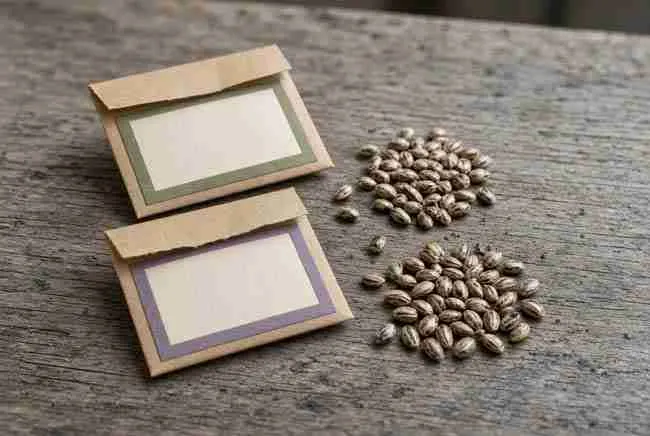
Autoflower seeds often run a bit smaller. Ruderalis ancestry can do that. Photoperiod seeds can look chunkier, but not always. You can’t glance at a seed and call it an auto or a photo. The label does that job. The shell won’t.
What you can do is match expectations to your space. A stealth micro-grower in a closet wants seeds that look viable because there’s no spare square foot. An outdoor Canadian grower with a short season wants seeds that look mature enough to pop on time. In both cases, “finished and firm” beats “biggest in the photo.”
Hard Shell vs Soft, Cracked, or Papery Seeds
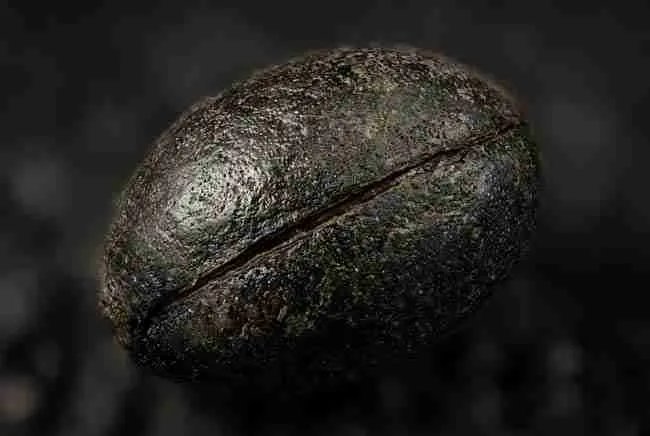
If you remember one physical check, remember this: the coat should act like a helmet. A ripe helmet is thin but tough. An unripe helmet is soft. An old helmet can get brittle and split.
Papery seeds feel light, like there’s air inside. Dense seeds feel heavier than they look. You won’t need a lab scale. Your fingers learn fast.
The Gentle Pinch Check
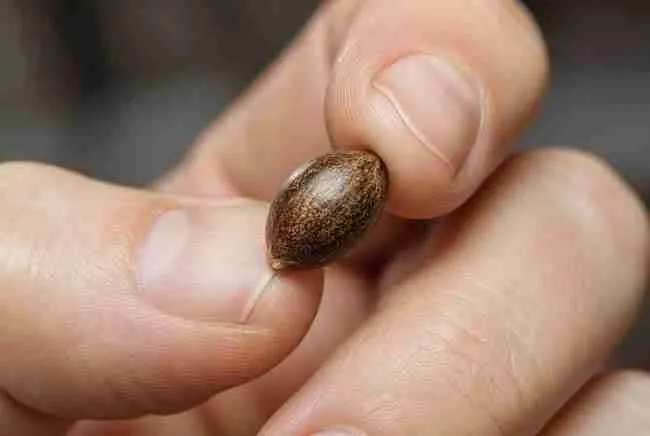
Wash and dry your hands. Pick up one seed. Squeeze it like you’d test a grape, not like you’d crack a nut. A good seed doesn’t squash. It may not even notice you.
If it pops, crumbs, or dents deep, it’s a poor bet. Don’t rage-pinch the whole pack. You can ruin keepers that way. Test the ugly ones first. Leave the best-looking seeds alone if they already passed the eye test.
Spec for the pinch:
- Pressure: light to medium, not a death grip
- Pass: no crush, no flex like rubber
- Fail: crack, flatten, or flake
Hairline Cracks, Dents, and Open Seams
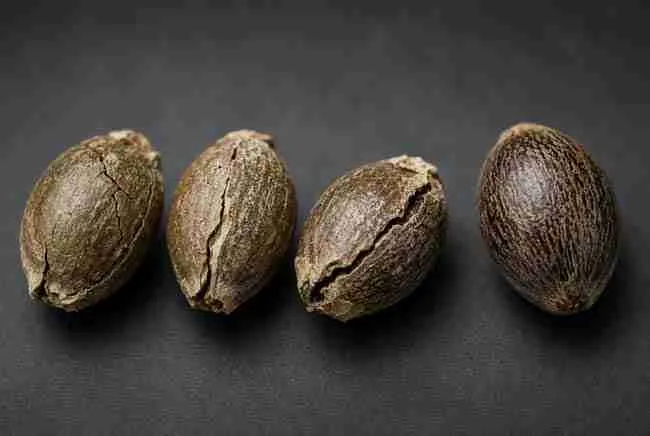
A hairline crack is a leak. Water can rush in too fast. Mold can sneak in. The embryo can dry out. Small surface scuffs are fine. A split seam is not.
Look along the ridge that runs the long way. That’s the natural opening line. If it’s already gaping, skip it for your main run. You can still toss that seed in a practice cup if you like experiments.
Dents from rough handling are a grey area. A shallow dent on a hard, dark seed can still pop. A deep dent on a pale seed usually won’t.
Dull, Dusty, or Brittle Coats
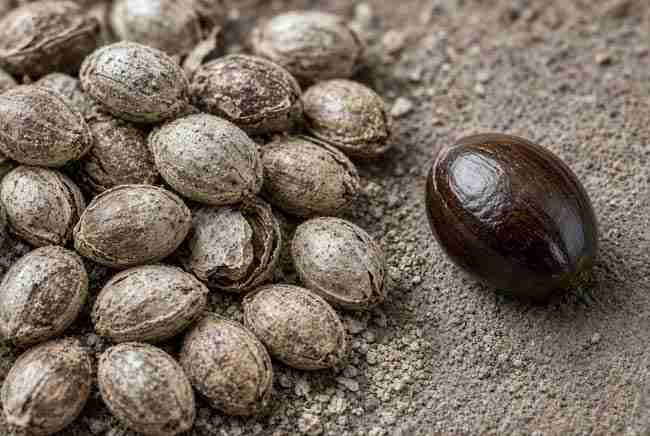
Fresh-enough seeds often keep a quiet glow. Brittle seeds snap. Dusty seeds look like they’ve been sitting near a heater. Heat is the silent killer in winter shipping and in summer glove boxes.
If your outdoor Canadian grower pack arrived after a cold snap, let it warm to room temp before you open it. Condensation on a freezing seed is a rotten surprise. Then check for dull, chalky coats. Those seeds go to the “try last” pile.
Good Seed vs Bad Seed at a Glance
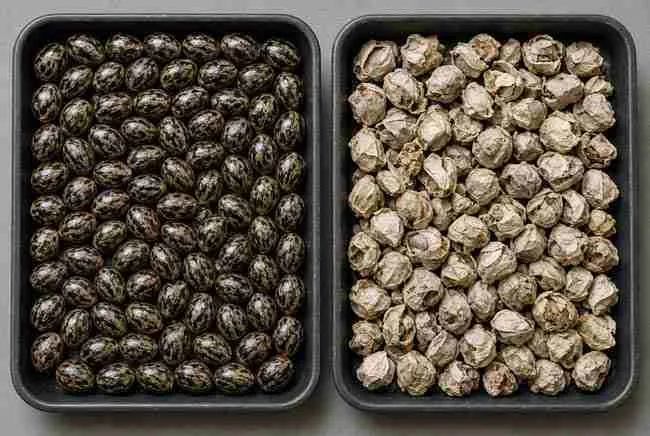
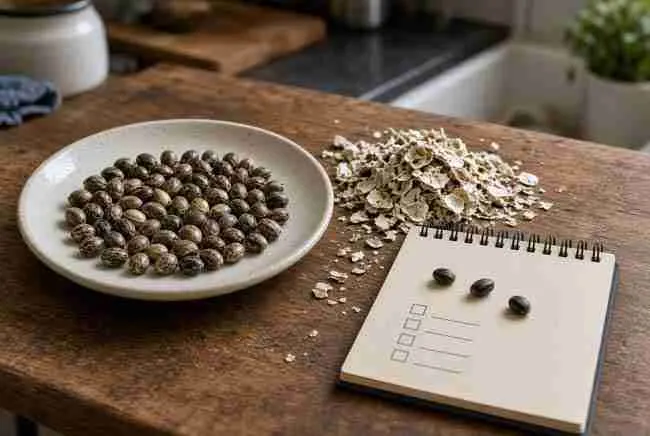
Here’s the kitchen-table version. Left side is the seed you plant first. Right side is the seed you don’t trust with your only tent slot.
Good signs:
- Tan, brown, grey, or near-black
- Plump teardrop
- Hard shell
- Slight sheen
- Closed seam
- Optional stripes
Bad signs:
- White, green, or yellow-pale
- Flat, shriveled, or hollow feel
- Soft or papery
- Chalky dust
- Cracks, chips, open seams
- Mold specks or a sour smell
Visual Specs You Can Measure
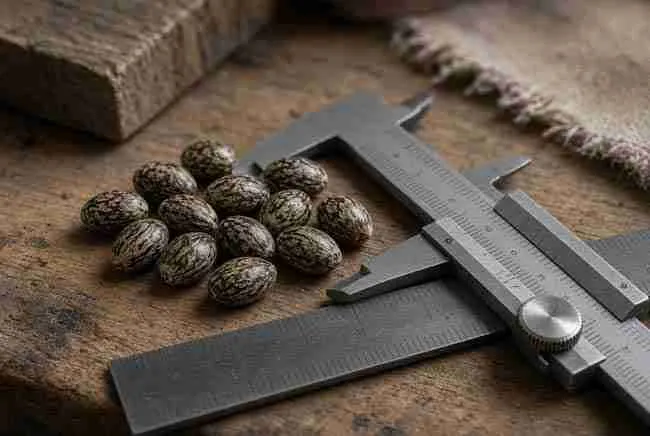
You don’t need a lab. A ruler still helps when you’re learning.
Typical finished cannabis seed specs:
- Length: about 2 to 5 mm
- Width: about 1.5 to 3 mm
- Shape: oval or teardrop, not a pancake
- Coat: hard, intact, dry to the touch
- Moisture in storage: keep seeds dry and cool, not in a steamy bathroom
- Germ check window: many healthy seeds crack in 24 to 72 hours in a warm, damp paper towel
Those numbers are ranges, not laws. An auto seed at 2.5 mm can be perfect. A 5 mm seed with a split seam is still a risk.
Pros and Cons of Judging Seeds by Looks
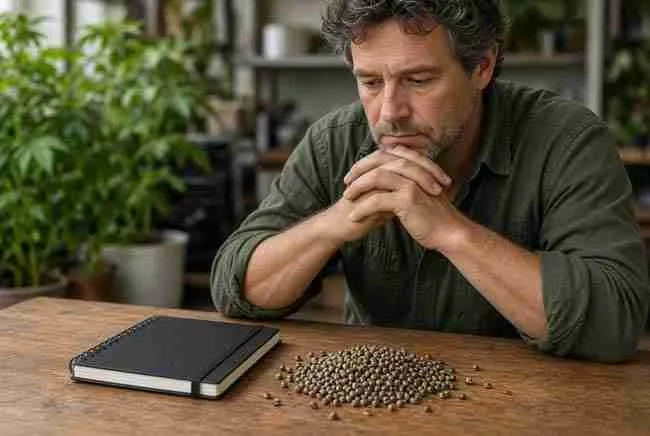
Pros:
- It’s fast. You can sort a pack before dinner.
- It catches the obvious duds: green, crushed, moldy.
- It saves soil, cubes, and time.
- It teaches your eye, which gets sharper every run.
Cons:
- Looks can’t read THC, CBD, or terpenes.
- Looks can’t call sex on regular seeds.
- Looks can’t promise yield.
- Worn ripe seeds get tossed by mistake.
- The float test, used alone, lies more than people think.
So use looks as a filter. Don’t use looks as a fortune teller.
Quick Home Checks After the Visual Pass
Once the eyes and fingers have voted, you can add a simple test. Keep it honest. No test beats a living taproot.
Why the Float Test Is Only a Hint
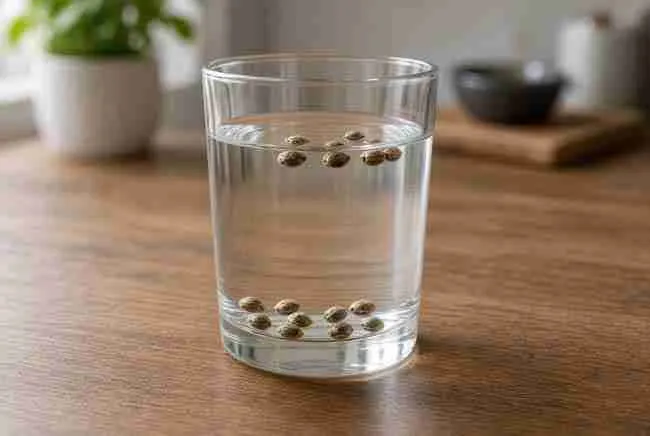
The float test is famous. Drop seeds in room-temp water. Wait an hour or two. Sinkers are called good. Floaters are called dead. That’s the street version. The fine print is messier.
Some good seeds float at first because the coat is water-resistant. They sink after they drink. Some weak seeds sink because they’re waterlogged and still won’t grow. Air bubbles stick to coats and fake a float. So the glass is a hint, not a judge.
If you do it anyway:
- Use clean room-temp water
- Wait 1 to 2 hours, not overnight unless you plan to germ right there
- Plant sinkers the same day
- Don’t dry and store wet seeds
A first-time buyer should not soak a whole expensive pack “just to see.” Sort by eye first. Soak only what you’ll plant now.
When Germination Is the Only Honest Answer
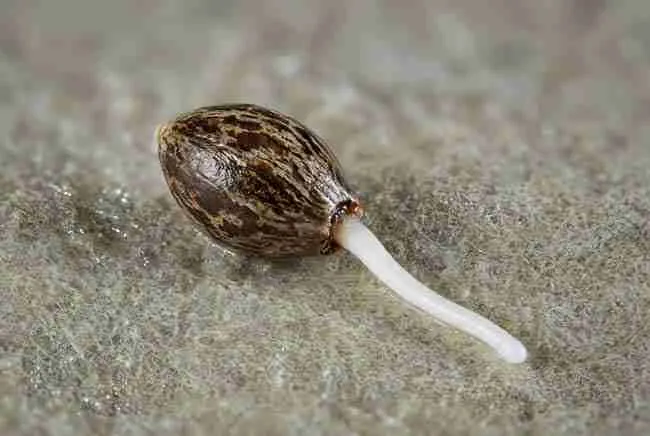
Want the truth? Give the seed a damp paper towel, darkness, and gentle warmth. A lot of home growers like about 22 to 26°C. Keep the towel moist, not dripping. Check once or twice a day. A white taproot means the seed was alive. No root after several days means it wasn’t, or the setup was off.
That’s the pudding. Looks got you to the starting line. The taproot finishes the race.
Stealth tip: germ in a labeled container so you don’t mix strains. Micro-grows punish mix-ups. One mystery plant can wreck a canopy plan.
What Looks Cannot Tell You
This is the part that saves you from folklore. The coat is packaging. The plant is the letter inside. You can’t read the letter through the envelope.
Potency, Sex, and Yield Are Not on the Shell
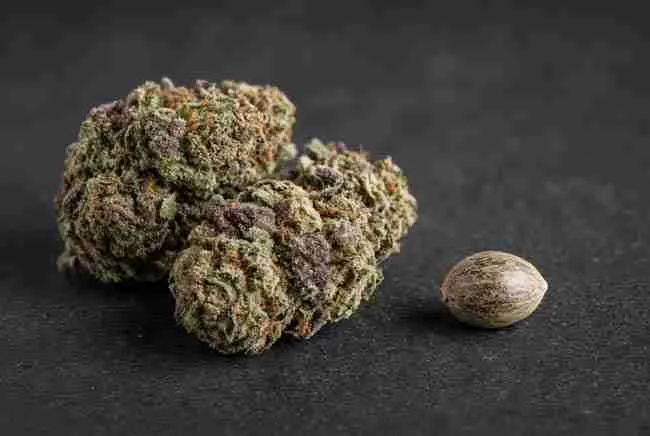
A darker seed is not a higher THC seed. A striped seed is not a heavier yielder. A fat seed is not automatically female. Regular seeds still split male and female the old way. Feminized packs are feminized because of breeding work, not because the seeds look “girly.
Yield comes from genetics plus your light, pots, feed, and time. A gorgeous seed in a dark, hot cupboard still makes a sad plant. An average-looking seed under a steady light can stack flowers like a champ.
Bagseed vs Bank Seed Appearance
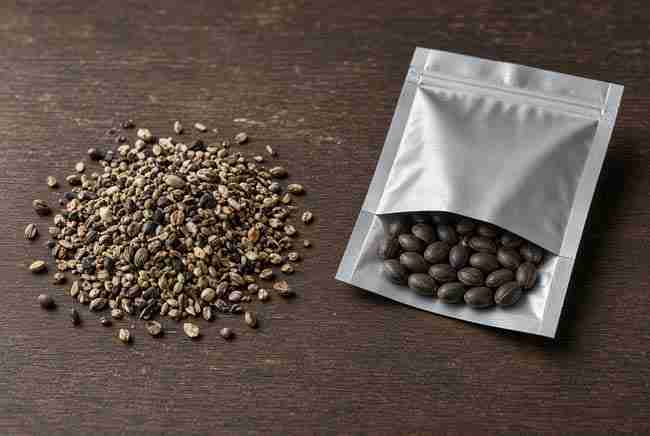
Bagseed is the surprise seed in finished flower. It can look wild. Sizes mix. Colors mix. Some are immature because the plant got pollinated late. A few can be gems. Many are mutts with unknown dad plants.
Bank seeds usually look more even. They were ripened on purpose, cleaned, and stored. They still won’t all match like beads. Good banks send mature, hard seeds. They don’t send a fashion lineup.
If you’re a bagseed grower hunting keepers, sort hard. Plant the plump, firm ones first. Keep notes. The plant in week six tells you more than the shell ever did.
Common Mix-Ups Growers Make
Most mistakes come from old forum rules that got copied too many times. Let’s clear the big ones so you don’t toss good seeds or plant junk.
Immature Seeds vs Worn Mature Seeds
Immature: pale green or white, soft, often smaller, sometimes still a little “fresh” looking, weak pinch.
Worn mature: tan or brown after the dark skin rubbed off, still plump, still hard, closed seam, maybe duller but not chalk-rotten.
Opening the pack after a rough trip, those worn seeds can look boring. Plant the boring hard ones. Skip the pretty-soft ones. That flip saves more grows than any lucky charm.
Hemp Seeds, Flower Seeds, and Lookalikes
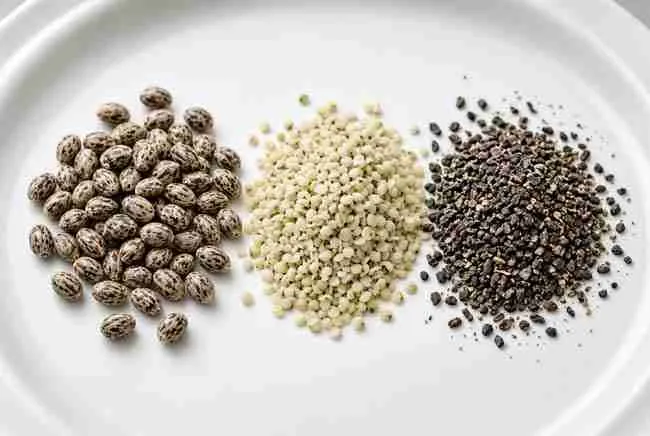
Hemp hearts from the grocery store are hulled. They’re pale and soft. They won’t grow your garden. Whole hemp seed can look close to cannabis seed because, well, they’re cousins. Size and stripe patterns overlap. You tell them apart by source, not by a magic marking.
Tomato seeds, pepper seeds, and some flower seeds get tossed into the “is this weed?” pile by new eyes. Cannabis seeds are usually 2 to 5 mm, hard, and mottled. They are not flat like tomato seeds. When in doubt, trust the pack you bought, not a seed you found in the spice drawer.
FAQs
What do immature cannabis seeds look like?
They look undercooked. Pale green, off-white, or very light tan. Soft if you pinch. Often thinner. They may lack mottling. Germ rates drop hard because the baby plant and its lunch never finished packing.
Do good weed seeds have to be dark?
No. Darker often means more ripe, but ripe also comes in tan and medium brown. Some lines stay lighter even when they’re ready. Judge hardness and shape with the color. Don’t crown the darkest seed king by default.
Should every seed have tiger stripes?
No. Stripes are a bonus clue, not a rule. Plenty of keepers wear a plain coat. Stripes can also rub off in the vial. If the seed is plump and tough, missing stripes are not a deal breaker.
Can a pale tan seed still sprout?
Yes, if it’s mature and firm. Pale tan after handling is common. Pale green and squishy is the danger zone. When you’re unsure, germ one tan seed in a towel before you commit the whole pack.
Do indica and sativa seeds look different?
Not in a way you can trust. You will hear that indica seeds are fatter and sativa seeds are longer. Sometimes a pack leans that way. Plenty of hybrids smash that idea. Read the strain name. Don’t try to guess lineage from the hull.
Do good seeds always sink in water?
No. Many good seeds sink after they drink. Some good seeds float for a while. Some duds sink. Use the glass as a maybe. Use the taproot as a yes.
Final Pack-Opening Checklist

Do this every time a pack lands:
- Warm the pack to room temp if it came in from the cold.
- Open it over a dry plate.
- Count the seeds.
- Sort by eye: plump and intact versus flat, green, or cracked.
- Pinch only the suspects.
- Keep the keepers in a cool, dark, dry container.
- Germ what you’ll plant now. Don’t soak the stash for fun.
- Write the date and strain in your notes. Future you will thank you.
What do good cannabis seeds look like at the end of all this? They look finished. Firm. Intact. Maybe striped. Maybe plain. They look like they can hold a living start through the first wet night and the first stretch toward light.
You came in as a first-time buyer, a bagseed sorter, an outdoor Canadian grower, or a stealth micro-grower with no spare holes. Same advice fits all four. Trust the hard little oval in your hand. Then let the taproot have the last word.