Ventilation for a Cannabis Grow: Exhaust, Intake, and the Air in the Canopy


Originally published 1 March 2023. Updated 1 October 2026.
Ventilation for a cannabis grow is three jobs that get sold as one fan. Something has to push the hot, wet, smelly air out. Something has to let fresh air in to replace it. Something small has to keep that air moving through the leaves so a wet pocket does not sit inside a cola. A clip fan does not do the first job. An exhaust fan does not do the third. The guides that rank for this all land on the same check: the tent walls bow in a little, the duct actually leaves the room, and the carbon is in the path of the air that exits. If any one of those is missing, you can own a loud fan and still grow mold or perfume the hallway.
Send the hot air out, and let fresh air in low
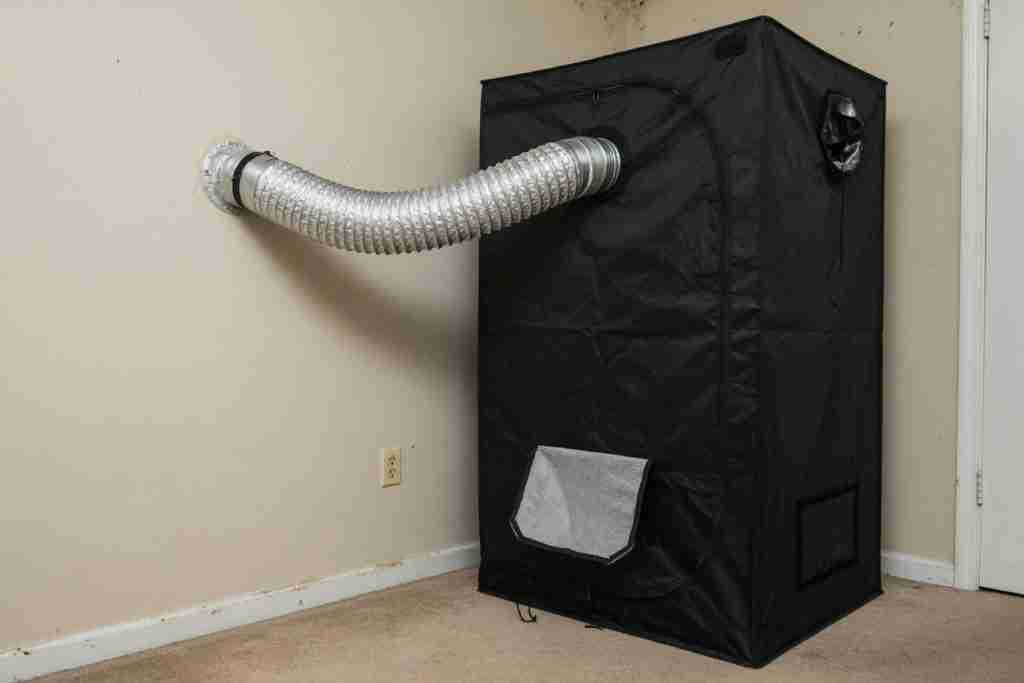
That duct is doing the part people skip. It leaves the tent and it leaves the room. Hot air rises, so the exhaust port sits high. The mesh vent near the floor is the intake, on a different face of the tent, so the fresh air has to cross the plants before it gets sucked out the top. If you dump the exhaust behind the tent, into the same closet the intake is breathing, you are stirring your own heat and your own smell. The fan sounds busy. The room does not get better.
Most home tents do not need a second fan blowing air in. The exhaust creates a slight pull, and the open lower vents feed it. That is passive intake, and it is enough when the vents are actually open and the duct run is short. You add a powered intake when the tent is large, the intake has to travel through a long duct, or the room outside the tent is so stale that the vents have nothing useful to pull. If you do add that fan, it has to move less air than the exhaust. A stronger intake blows the walls out and pushes unfiltered air through every zipper.
Zip the door and look at the walls with the exhaust running. A gentle bow inward is the picture you want. The tent is under negative pressure, which means the only easy way out is through the filter. Walls sucked flat against the poles mean the intake is choked or the fan is simply too fast for the openings you gave it. Open another low vent, or turn the fan down. Walls pushed outward mean air is leaving through the seams, and the filter never sees it. More exhaust, or less intake fan. The check takes ten seconds and it tells you more than the number on the box.
The cubic feet, then what the filter steals
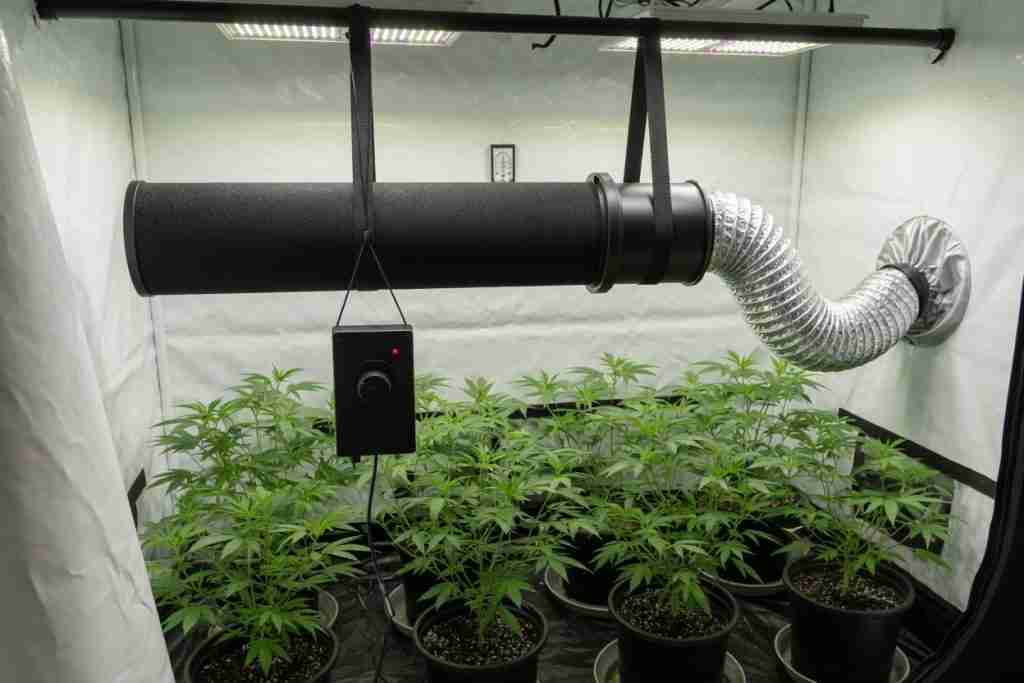
Work the volume before you shop. Length times width times height, in feet, is the air inside the tent. A 4 by 4 tent that is 7 feet tall holds 112 cubic feet. If you want that volume replaced about once a minute, you need 112 cubic feet per minute of air that actually moves. Once every two or three minutes is the slower end of what grow rooms use when the tent is already cool and dry. Heat, a full canopy, and a carbon filter push you toward the faster end.
The CFM printed on a fan is free air. No filter, no duct, no bend. A carbon filter and a few feet of flex duct commonly eat a quarter to half of that rating, and each sharp bend takes a little more. A fan whose sticker says 112 CFM will not exchange a 112-cubic-foot tent once a minute after you hang a filter on it. For that 4 by 4, a fan rated around 200 CFM is a practical place to start, and then you turn it down if the walls collapse and the plants are cold. It is a starting point, not a lab result. A hot lung room, an old HPS, or a duct that wanders across the ceiling will ask for more. A cool LED in a short, straight run will ask for less.
Diameter follows the same idea, without a chart pretending to be exact. A 4-inch inline fan is the small-tent size, the 2 by 2 and the 2 by 4. A 6-inch fan is what most 4 by 4 and 5 by 5 home tents end up on, because the filter and the duct need the extra rating. Step up to 8 inches when the tent is bigger, the duct is long, or you are still hot with a 6-inch fan that is already working. Buying the giant fan and running it wide open is how a tent sounds like a vacuum and the intake howls. A larger fan on a lower speed is usually quieter than a small fan screaming, and a speed controller is the part that lets you make that choice. Hang the fan on straps. Bolted to the tent pole, it turns the whole frame into a speaker.
A short tent does not get to skip the filter because the canister will not fit under the lamp. Hang the filter in the lung room, outside the fabric, and run a sealed duct from a high port to that filter, then the fan, then the exit. Every joint before the carbon has to be tight. A loose clamp on that outside run is a smell leak the tent’s negative pressure will not catch, because the leak is already past the tent. If the filter fits inside, keep it there. Fewer joints, and you can see when the sock is dirty without taking the system apart.
The filter only scrubs air that goes through it
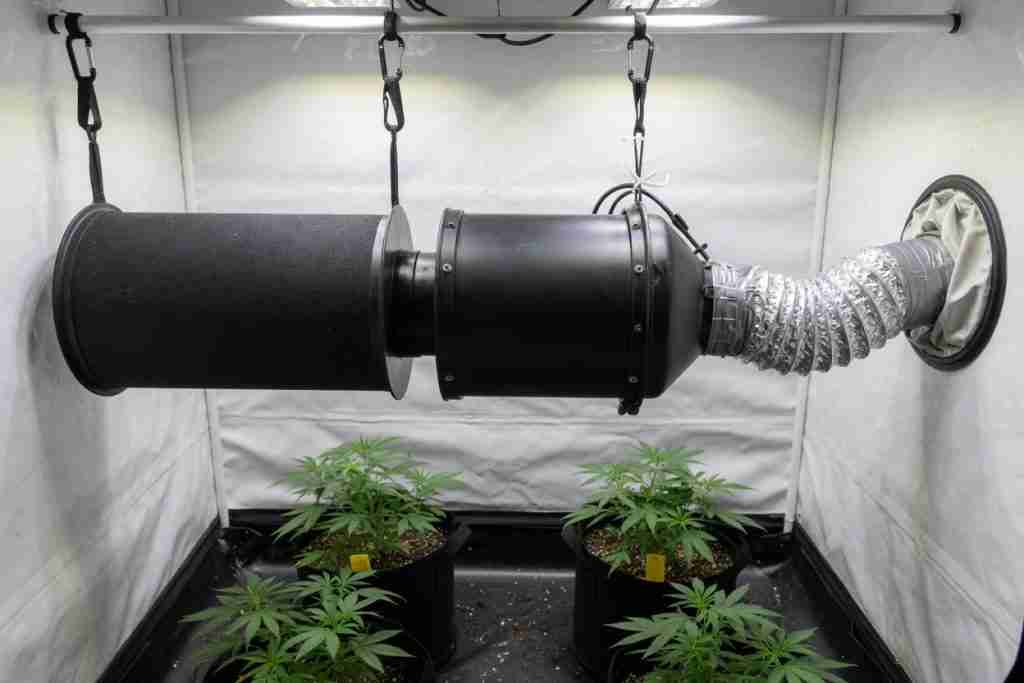
The line in that photo is the order that works. Air enters the carbon filter, the fan pulls it through, and the duct carries what is left out of the tent. Filter, then fan, then the shortest duct you can live with. The filter hangs high, where the heat and the smell collect. The open end of the canister is the intake. If you reverse it and blow raw tent air into the fan first, you can still scrub some odor, and you also load the fan with dust and make the motor work against a bad path. Pull through the carbon.
Match the filter to the fan, not to a wish about the room. A filter rated well under the fan’s CFM becomes a plug. The fan strains, the tent stops exchanging, and the smell finds the zipper. A filter rated at or a bit above the fan is the ordinary match. The cloth sock on the outside is a prefilter. Wash or replace that sock when it looks grey. Dust is what reaches the carbon and spends it early. The carbon itself is done when the tent is under negative pressure, the sock is clean, and you can still smell the flower in the hall. A year to two years is a common home span. A tent that stays wet uses the carbon up faster. There is no date on the calendar that replaces the sniff test.
Keep the duct short and boring. A long floppy run with three hard bends is a second filter you did not mean to install. Support it so it does not kink behind the tent, because a crushed section can cut the airflow in half while the fan still sounds fine. If the only place the air can go is back into the lung room, the filter has to be doing its job and that room needs its own air. The better exit is outside, or into a space you are not also using as the intake. Smell in the hallway with a new filter is almost always pressure or a leak in the duct, not a mystery strain.
Flower is when the zipper test gets serious
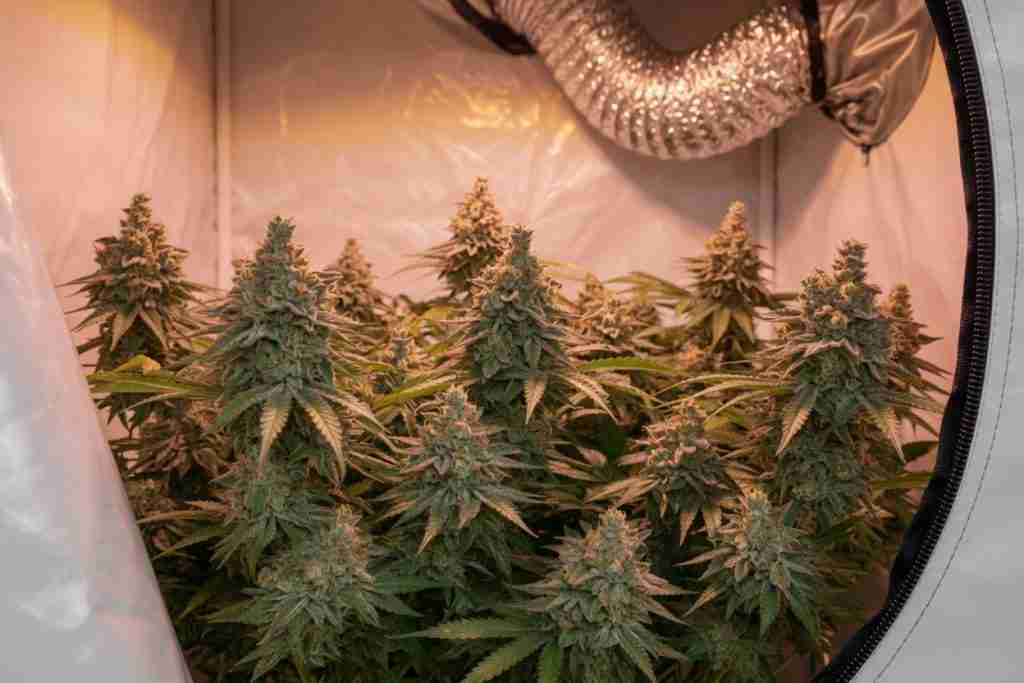
A plant in veg smells like a tomato leaf if you are lucky. A plant in flower smells like the jar you are trying not to advertise. Marijuana at week six will find every gap you ignored in week two. Run the exhaust through veg and flower, including the dark period. Turning it off at night because the light is cool is how the humidity spikes and how the smell sits in the room until morning. Odor peaks late, when the resin does. If the tent only passes the sniff test in veg, it was never finished.
Once a month, with the fan off, look at three things. The prefilter sock, because a clogged sock turns a correctly sized fan into a small one. The duct, because a sag becomes a kink you will not hear. The straps, because a fan that has crept on its hanger rattles the pole and eventually cracks a joint. A bearing that screams is a motor working too hard, usually against a loaded filter, and it gets worse until the fan simply stops on a hot afternoon. Washing the sock and straightening the duct changes the climate. Wiping the tent wall does not.
Stir the leaves. Do not sandblast them.
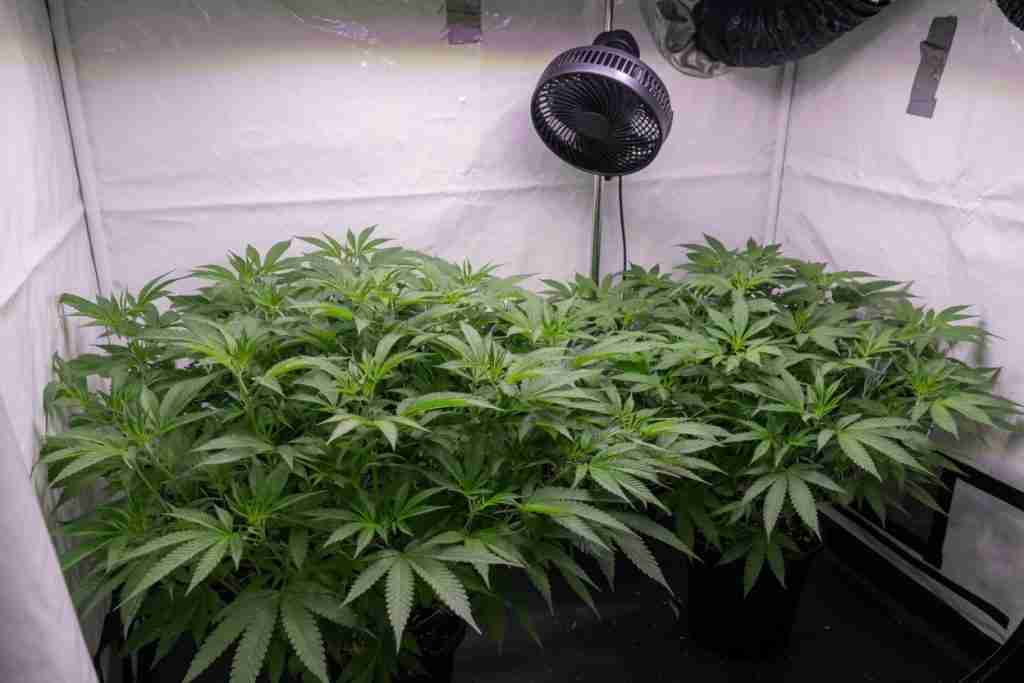
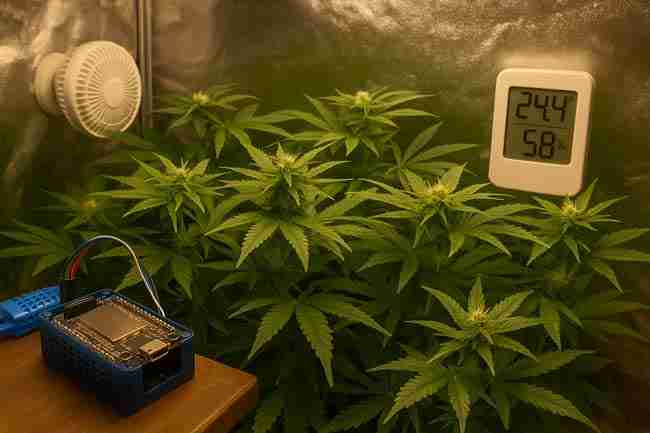
The fan over that canopy is not ventilation. It does not remove heat, it does not bring in carbon dioxide, and it does not scrub smell. It breaks up the still layer of wet air that forms under a leaf and inside a dense top. That still air is where powdery mildew starts on a fan leaf and where bud rot starts in a cola that never dries between waterings. You want the leaves to tremble. You do not want them flagged out horizontal, and you do not want one cola taking the blast while the back corner never moves.
Clip the fan above the canopy or off to the side, and aim it so the air arrives as a breeze, the way the fan in that photo sits back from the tops. Two small fans on opposite corners beat one strong fan pointed at the buds. Oscillating is better than a fixed blast, because a leaf that never gets a break develops wind burn that looks like a nutrient problem. In a 4 by 4, one fan often leaves a dead corner. Walk the tent with the back of your hand at bud height. If a spot feels still and warmer than the door, that spot needs air.
Do not aim that fan straight into the exhaust port. Fresh air should come in low, cross the canopy, and only then leave at the top. If it comes in the bottom vent and flies up the nearest wall into the duct, the middle of the tent never sees it. The CFM number still looks fine. The plants in the center are growing in a closet. Point the breeze across the tops, away from the port, and let the intake air do some traveling before it gets thrown out.
Seedlings are the exception you will overdo. A clip fan that is right for a bushy veg plant will lay a week-old seedling on the soil and keep it there. For the first stretch, point the fan at the tent wall and let the air bounce, or set it on the lowest speed farther away. Exhaust can still run. The plants are small. The wind does not have to be. Stems that never feel a breeze stay weak, and then they fall over the first time you raise the fan. Give them a light movement early. Save the real breeze for when they have nodes to spare.
Do not use the clip fan as a substitute for a fan that is too small on the exhaust. Stirring wet air in a closed box makes the wet air even. If the walls are slack, the intake is shut, or the duct is kinked, fix that before you buy a third oscillating fan. The vegetative stage guide is the climate those fans are trying to hold: roughly the low-to-mid 70s °F and humidity around 55 to 65 percent once the plants are established. Seedlings want it a bit more humid than that. A wind tunnel does not replace the missing humidity. It just dries the leaves unevenly.
When the lights go out, the humidity jumps
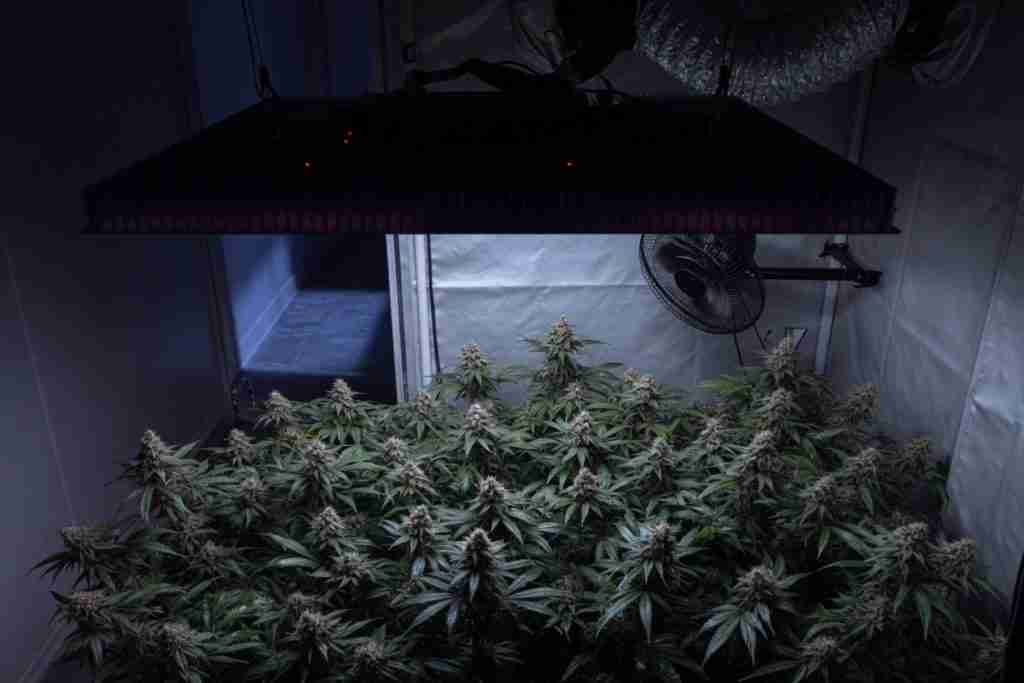
Temperature falls as soon as the lamp clicks off. Relative humidity rises in the same air, because cooler air holds less water. A controller that only watches temperature will shut the exhaust down at lights-out and leave the tent muggy for twelve hours. That is the window where a fat cola stays wet. Leave the exhaust on a lower speed through the dark if the tent still climbs above the humidity you want. The clip fans stay on too. They are cheap to run, and the still air at 2 a.m. is the air that causes the problem.
In late flower, aim nearer 40 to 50 percent relative humidity, with air actually moving through the flowers. The bud quality guide is the rest of that finish, and bud rot is what you get when a cola stays wet inside while the tent’s average number looks fine. The flowering stage guide is the week-by-week picture. Exhaust is the first tool for that water. A dehumidifier is the second tool, and only after the air is already being exchanged. The same rule as a greenhouse: move the wet air out before you park a machine in the corner to wring out a sealed box. A dehumidifier inside a tiny tent with the exhaust off just makes heat, and the plants hand the water right back.
Heat, fresh air, and the fan you should slow down
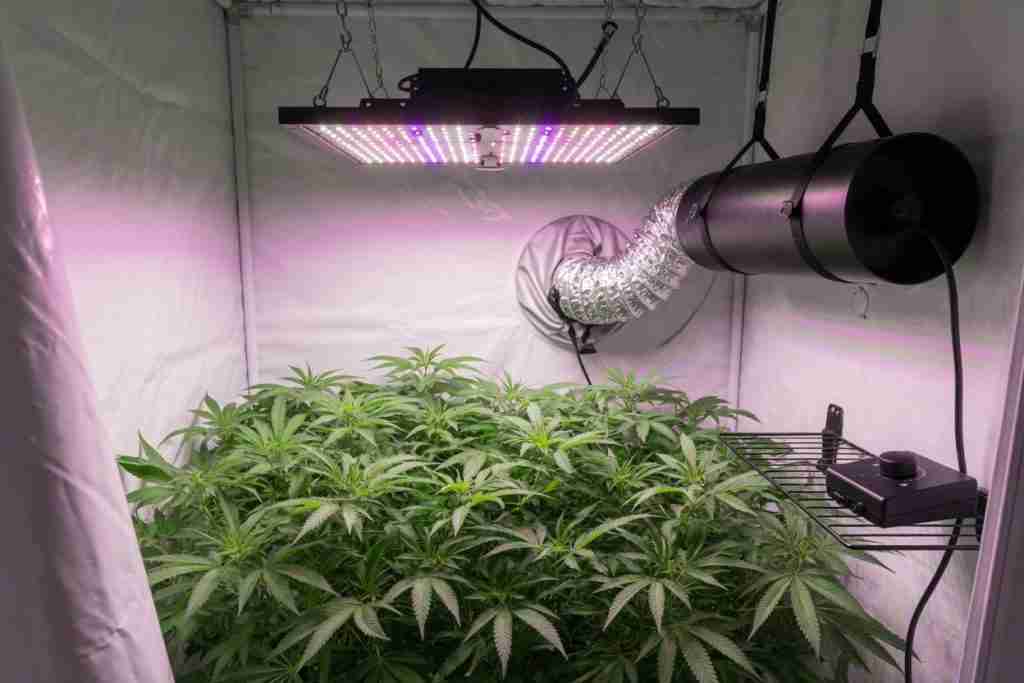
An old high-pressure sodium lamp is a heater with a spectrum attached. The exhaust on that tent is doing temperature control as much as anything else, and you will run it harder. A modern LED still warms a small tent, and it still leaves you with a canopy full of transpired water. People who switch to LEDs and then unplug the exhaust because “it doesn’t get hot” grow a cool, wet, stale tent. The lighting guide is the heat side of that choice. Ventilation is what you do with the heat after you have made it. If the tent sits more than a few degrees above the lung room with the fan already moving real air, the lamp is too close, the duct is restricted, or the room outside the tent is the thing that is hot.
The other direction is just as common. A fan sized for August, left on high in January, pulls cold air across the pots and the leaves claw like a deficiency. Slow the fan until the walls still bow in and the tent holds the temperature you actually want. If the intake is a window in a cold climate, the plants are growing in outdoor air with a lamp over them. The guide to keeping a grow warm is that problem. Do not solve it by zipping every vent and turning the exhaust off. You will keep the heat, and you will keep the humidity and the smell with it.
Fresh air is also how an open tent gets its carbon dioxide. The plants use what is in the room, and the exhaust brings more. That is enough for a normal home grow. Bottled CO2 is a different machine: a sealed room, air conditioning instead of air exchange, and a controller that holds a level. If you are exchanging the tent every minute or two, the gas you release leaves with the exhaust. The CO2 guide is worth reading before you buy a tank for a tent that is deliberately full of holes. Do not add CO2 to a room you are also trying to empty.
The indoor growers guide is the rest of the room this fan is serving. Ventilation will not fix a light that burns the tops, a pot that never dries, or a plant count that has turned the tent into a solid wall of leaf. It will decide whether the climate you think you set is the climate at the bud. A thermometer on the tent pole, above the canopy, in the path of the clip fan, lies. Put one at the tops, out of the direct blast, and believe that one.
When something is wrong, change one thing and look again. Smell in the hall: check the bow of the walls, then the duct joints, then the prefilter, then the age of the carbon. Tent too hot: intake open, duct unkinked, fan actually spinning, lamp raised. Tent too cold: fan slower, not vents taped shut. Leaves flagging at one cola: move the clip fan, do not add nutrients. Humidity stuck high with the exhaust already exchanging the room: the air coming in is wet, and that is when a dehumidifier in the lung room earns its keep. A new carbon filter will not dry a swamp, and a bigger clip fan will not hide a duct that dumps into the closet.
The weed you are trying to finish is mostly water until the air lets it dry on the plant. Move that air out from the top, let fresh air in from the bottom, and keep a breeze in the canopy that the leaves can live with. Size the fan for the tent you have after the filter, not for the number in a comment. If the walls bow in a little and the hallway stays quiet, the system is doing the job. If they do not, no amount of gear on the floor beside the tent is ventilation yet.
A photoperiod in a tent with this kind of air will veg and flower on the light schedule you give it. An autoflower uses the same fans and the same humidity problem. The plant does not care what the fan brand is. It cares whether the air at the leaf is fresh, and whether the air inside the flower is moving. Set that up before you hunt a deficiency that is really a closed box.