Using DWC Hydroponics to Grow Cannabis


Using DWC hydroponics to grow cannabis puts the roots in a light-proof bucket of nutrient solution and leaves them there. An air pump and a stone run the whole time the plant is in that bucket, lights on or lights off. You do not carry a watering can to it. A marijuana plant grows quickly here when the water stays cool, the bubbles stay fine, and the pH still sits where you left it. A weed plant in a warm, quiet tank does the opposite. The leaves tell you late. The bucket tells you the same morning, if you look.
The plant is held in a net pot of clay pebbles, usually with a small starter cube around the stem. Roots leave the cube and hang in the solution. Food is a hydroponic base, mixed first, then brought to pH. Between full changes you replace the plain water the plant drank, so the strength does not creep up while you are busy. Light stays off the water. That is the method. The rest of this page is what those jobs look like on a normal Tuesday, and which of them actually ends a run.
Soil, coco, and a drip line that returns to a tank are other ways to grow, and they are already compared on the hydroponic growers guide. That guide also walks a multi-bucket layout. This page is one bucket and one plant. When several buckets share one reservoir, that shared tank is the next build, and it stays on the guide instead of being copied here. A bucket with no air pump is a different method too. If the stone is not bubbling, you are not running deep water culture.
In Canada a plant in a bucket still counts toward four plants per household, not per adult. Quebec prohibits recreational home growing. Manitoba allows indoor growing only, for adults 19 and older, since 1 May 2025. Outside Canada, follow the rule where you live.
Using DWC Hydroponics to Grow Cannabis

The lid is the part you live with. The net pot sits in it, the clay holds the plant up, and the airline is the line you should be able to follow with a finger back to a pump that is still running. A white crust on that plastic is dried solution. Wipe it off. It is not a cue to mix the next batch stronger. Splash and evaporation leave salt on the lid while the water below gets stronger or weaker for reasons of its own. The pen sorts that out. The crust cannot.
Keep the bucket and the lid opaque. A clear tote grows algae on the walls, and algae spends the oxygen the pump is there to dissolve. If you can see the solution through the hole where the airline enters, tape that hole. A lid left off so you can admire the roots is a light leak and an evaporation path. Evaporation concentrates whatever is already dissolved. Put the lid back on when the check is finished. The running state of this system is a closed, dark tank with air moving through it, not an open bowl under the fixture.
Volume is the other real choice. A five-gallon bucket is the usual first plant, and it swings. pH, strength, and temperature all move faster when there is less water under the leaves. A larger light-proof tote slows those three swings, which starts to matter once the plant is drinking hard in flower. Either size works if you check it every day.
One plant goes in the bucket. Two plants in one net pot become a root tangle and a feeding argument you cannot referee, because you have one pen reading and two mouths. An autoflower does not sit in veg for months while you wait for a clock. It flowers on its own schedule and it drinks hard once it does. Start it at the low end of the strength band and step up only as the plant steps up. A photoperiod can veg until you change the light. Those hours live on the vegetative stage page. The bucket does not rewrite them.
Roots with steady water, a measured feed, and oxygen can build a top faster in veg than the same plant in a slow soil, when the tank stays stable. That is not a heavier harvest written in advance, and it is not a shorter flowering clock. A hot reservoir, a pump that died at lights-out, or a pen you stopped trusting hands the time back as brown roots and a stalled plant. The roots page shows what firm cannabis roots look like before you decide a smelly bucket only needs another bottle.
One Opaque Bucket

Rinse new clay until the water runs clear. Dust from the bag clouds the reservoir and coats the stone, and a coated stone starts making big, lazy bubbles. Used pebbles pick up dark mineral stains. Stains are ordinary on clay that has already done a run. A sour smell is not. If the pebbles smell rotten, they do not go back in with the next plant. Pack the net pot so the stem stands in drier pebbles up top and the moisture stays down at the cube. A stem sitting in solution rots at the base while the roots underneath can still look passable for a few days. That surprise starts with the waterline, not with the brand printed on the base nutrient.
Cut the lid so the lip of the net pot rests on the plastic and the basket hangs free. A sloppy hole drops the pot into the tank and leaves a bright ring of solution around the rim. That ring is a light leak, and the walls go green later. The basket cannot fall through, the stem stays above the splash, and the airline must not kink when the lid goes down. A larger multi-site build is already on the hydroponic guide.
The cube just meets the water
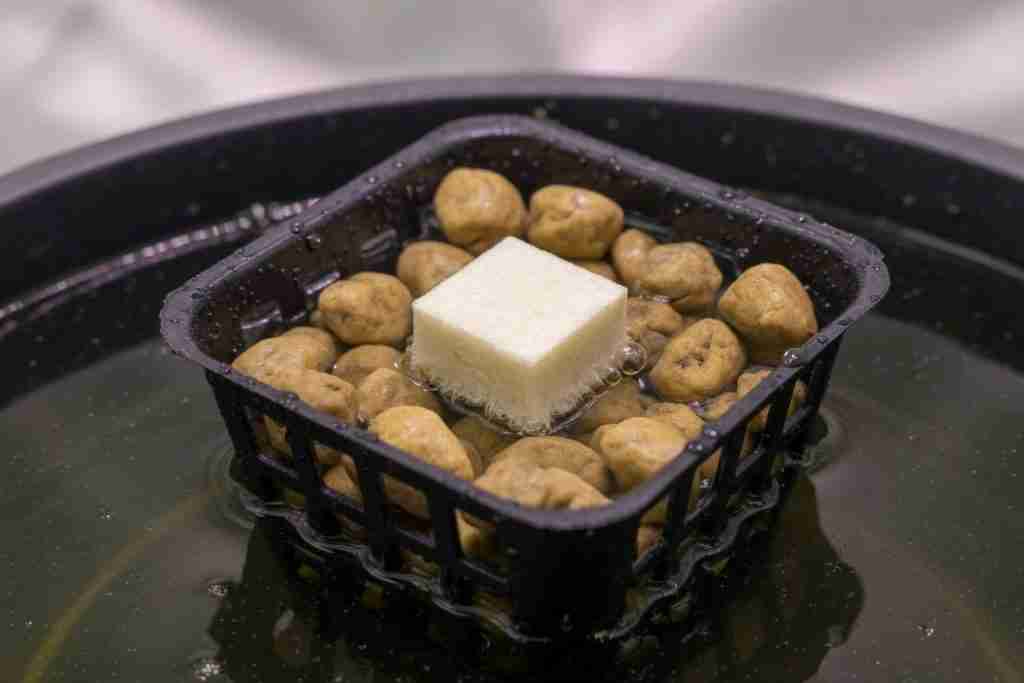
Set the reservoir so the water just wets the bottom of the starter cube. The cube should be damp at the base and dry around the stem. A seedling standing in a deep, full-strength solution drowns before the roots exit, and then the top wilts in a tank that looks full of food. Read the pen in the units printed on it, and stay on that scale for the whole run. A seedling, or a clone that has just pushed white roots, starts around 0.4 to 0.8. Veg sits about 1.0 to 1.6. Early flower sits about 1.4 to 1.8. Later flower, and the plain-water finish, are laid out on the EC by phase page. Raising the number because the plant looks hungry is how a small bucket gets salted.
Hunger in this system is often a pH miss or a warm night, not an empty bottle. If the tank numbers have been inside the band for a week and a leaf still shows a clear pattern, use the deficiency page and match the pattern. Do not diagnose from one pale fan the morning after a wild swing. The seedling stage page covers the first nodes and how far the light sits while the plant is still small. Move a plant into this bucket when a short root system can reach the water, not while it is still a seed on a paper towel.
An unrooted cutting does not go into a full reservoir. A cutting that already has white roots can take the net pot the same way a seedling does, at that same low starting strength. How those roots are made is the clone page. There is no separate dose with the word bucket in front of it. If the plant is coming out of soil, wash the soil off before those roots touch this water. The soil-to-hydro page is that move. Dirt left on the roots feeds a film, and the film is the thing you spent money on an air pump to avoid.
Once a hand of roots is hanging and the tips are bright, let the level sit a little lower so more of the root mass hangs in the splash and the stem stays dry. Do not drop it so far that the stone sucks air. The stone stays under water. Upper roots use the oxygen at the agitated surface. Lower roots drink. Both happen in one bucket when the level is a decision you wrote down, not an accident you notice on Friday because the leaves flagged.
The pump stays above the line


The pump is the loud half of the system, and it lives above the waterline. Fit a check valve on the airline so a power cut cannot siphon the reservoir back into the pump housing. The stone sits low in the bucket, airline running to it, and it runs every hour the plant is alive, including the dark period. Tying the pump to the light timer feels tidy because the timer is already plugged in. Roots then sit in still water all night. That is a suffocation schedule. It is not a way to save the stone.
Fine bubbles across the whole surface are the air check you can do without a lab. Fresh water near 20°C saturates around 9 milligrams of oxygen per litre. A dead pump will not get you there, and warm water will not hold it. A stone that only releases a few large blobs is too small for the volume, or it is clogged with clay dust and dried salt. Big bubbles push water around. A cloud of fine bubbles is what loads the water. When the boil turns coarse, replace the stone. Swapping nutrient brands does not clean the pores.
If the pump stops and the water is warm, roots can collapse in a matter of hours. Cooler water buys some time, not a day of silence. When the power comes back, smell the tank and look at the roots before you top off and leave. A second pump on the shelf is the spare that matters. A backup bottle does not move oxygen. If the tent air runs hot, set the pump where it breathes cooler room air. If the room is cold enough that the reservoir falls well under 18°C, warm the room on the warm-space page. A heater in the bucket is how a cold dawn becomes cooked roots after lunch.
Daily Reservoir Checks

Stay on one bottled program for the run. A hydro base, mixed in the order that label prints, is the feed. The jug is only the container. Chasing a different brand every time a leaf pales makes the notes useless. The synthetic fertilizer page is why you finish the program you started. Organic meals, compost tea, and kelp meal stay out. They feed a film, and the film spends the oxygen. A filtered seaweed extract belongs only when the label says it is clean enough for hydroponics and the solution is not already at the strength you wanted. Rates for that extract are on the seaweed page.
If a hydroponic silica is part of the program, it goes into the water first and circulates before the base. The order used across these guides, silica, then calcium when the water is empty, then base, then pH, is on the nutrition page. This page does not reprint the measuring spoons. Tap water you have never tested spends part of the strength budget before the first dose of base goes in. Very empty water, the kind from a reverse-osmosis filter, needs the calcium the bottle assumed would already be there. The hardness page holds that table. Skip a second calcium essay piled on a base that already carried it.
Fill the bucket, add the parts, and let the pump run until the solution is one mixture. A pen dipped into a pocket of unmixed base will be wrong ten minutes later. Then read temperature, pH, and strength, and write the three numbers down. Tomorrow’s line is how a drift becomes visible.
The morning round stays short because a short round actually happens.
- The pump is humming and the surface is a fine boil, not a few fat blobs.
- The waterline is where you left it, or you can say why it moved.
- Water temperature is still around 18 to 20°C.
- pH is still 5.5 to 6.0 after the mix has had time to circulate.
- Strength is still inside the band for this stage, on the scale printed on the pen.
Leaves lag that list. A yellow fan on Wednesday is often Tuesday’s pH, or a reservoir that warmed under the fixture while the room still felt fine. Fix the bucket before you reach for a new bottle. A watering habit from soil does not transfer. You are not deciding whether the pot is dry. You are deciding whether the solution the roots already live in is still fit to be there.
pH after the mix
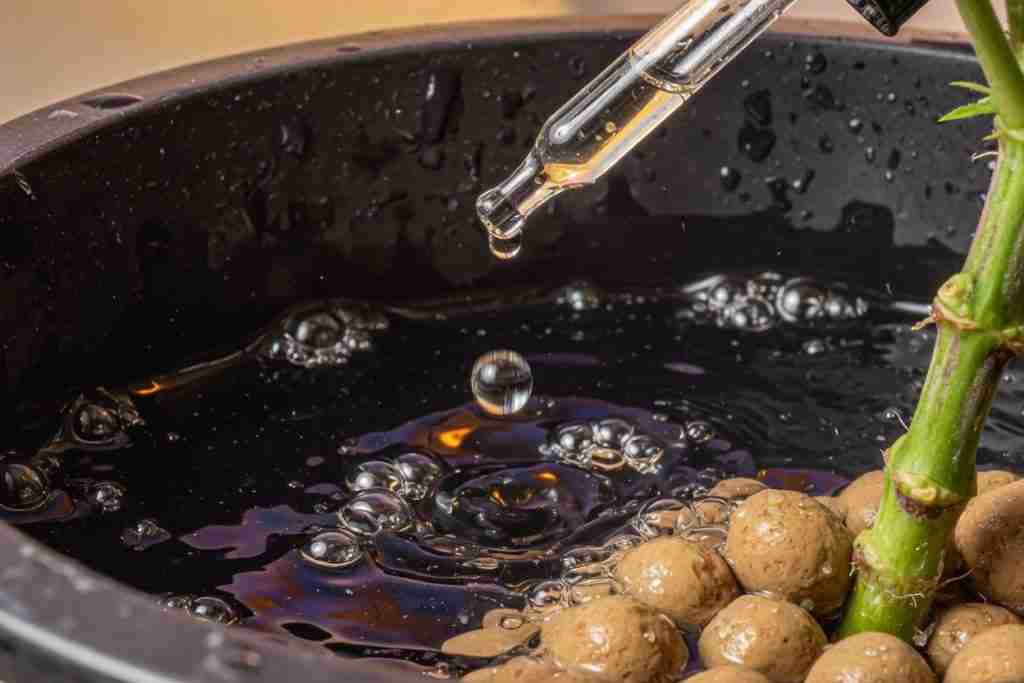
Nutrients go in, then the pH. In this bucket the band to live in is 5.5 to 6.0. A soil pot is often held higher, and that higher target does not come with the plant when you move it. The pH page keeps the comparison if you also run pots. Check the reservoir every day. A five-gallon volume can drift overnight once the plant is drinking, and there is less buffering here than in a soil mix that still has some carbonate in it. Adjust with a small shot, let the pump circulate, and read again. A heavy pour that chases the pen usually overshoots. Food that was already dissolved then sits where the roots take it up poorly. The tank did not run out of nutrient. The pH parked it.
Two pens that disagree are a calibration job, not a plant job. Rinse the probe and calibrate before you rewrite the tank. Give a fresh mix a few minutes of bubbles before you trust the number. If the readings have been right and the leaf pattern is still there a week later, match it on the deficiency page instead of stacking another part into a base that was already complete.
Cool water, running air
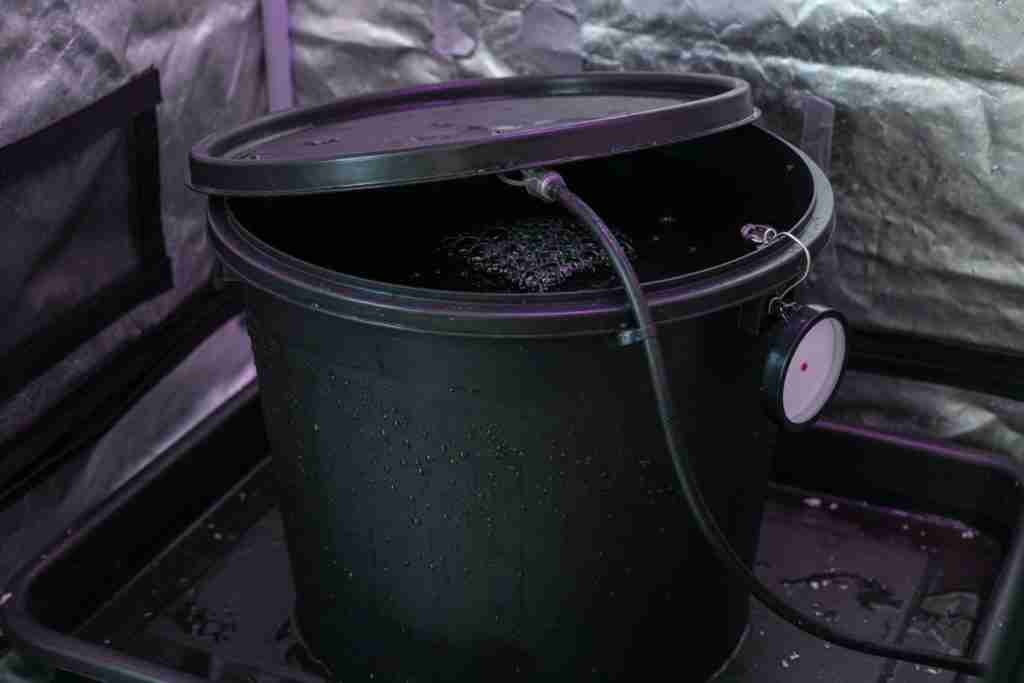
Hold the reservoir around 18 to 20°C, which is 65 to 68°F. Once the water sits above about 22°C, 72°F, it carries less oxygen, and brown slime is the usual thing that follows. Room air can feel pleasant while the bucket under the fixture is the warm object in the tent. The thermometer goes in the water. A dial on the wall is measuring a different thing, and it will lie to you on the day that matters. Beads of condensation on the outside of a dark bucket are not a fault. A reservoir that has taken on the day’s heat is the fault you are budgeting for.
Keep the bucket out of the light’s direct blast and off the driver or any other warm box. A frozen water bottle, floated for part of the afternoon, can pull a creeping tank back down. Lift it out before it becomes a warm addition you never wrote down. If the tent stays hot for the whole lights-on stretch, a chiller is what holds 18 to 20°C. Bottles are a bridge. A larger volume swings more slowly. None of that replaces a pump that is off.
Top-Ups, Changes, and White Roots
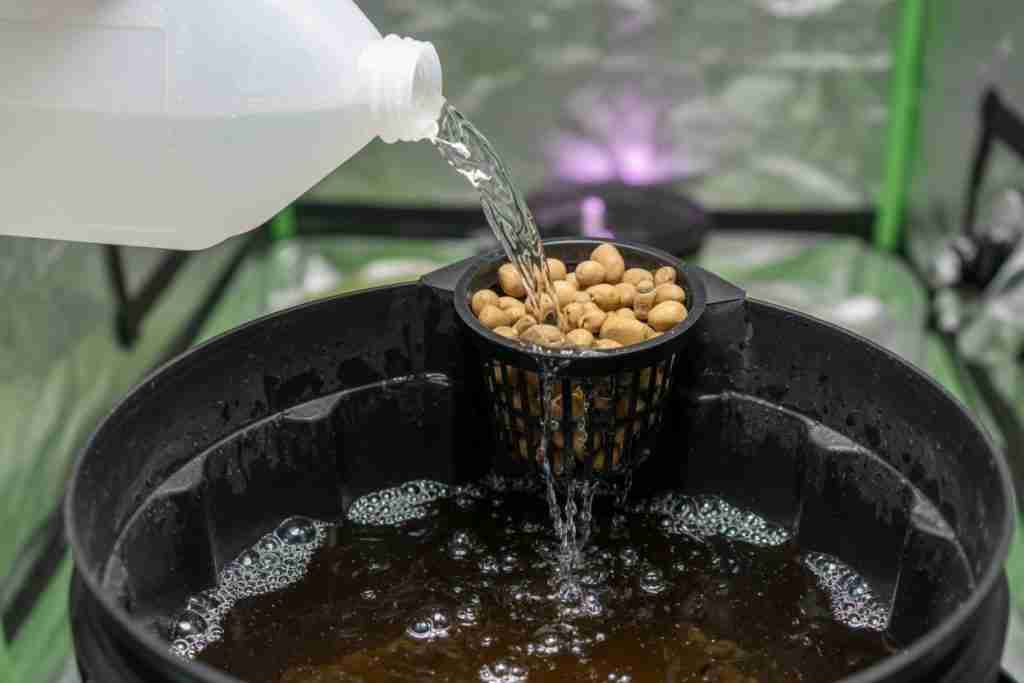
Between full changes, replace what the plant drank with plain water you have already brought into the pH band. In a bucket the plant often drinks water faster than it removes salt, so the strength climbs when every top-up is more nutrient solution. A Monday reading of 1.3 in veg can be 1.6 by Wednesday after two feed-strength top-ups and a thirsty day, and the leaves never asked for that jump. Plain water was the refill. The other pattern is the plant eating ahead of its drinking. Monday at 1.4 and Friday at 1.1, with the level still reasonable, means the solution is tired. That is a change day. It is not a reason to pour a heavier mix on top of what is already in there.
Pour into the reservoir and keep the stream off the stem. If the net pot is the opening you have, water that runs through the clay still lands in the tank, which is what you wanted, as long as it does not sit around the stem. A five-gallon bucket in flower can drop a long way in one warm day. Look at the line before you trust a pen that “has not moved.” Strength can look steady in a tank that is half gone, because you are reading what remains, not what the roots will meet after you finally add a gallon at lights-out. Add the plain water when you see the line move, then read the pen again after it has mixed.
Dump and remix about every 7 to 10 days. Sooner if the bucket smells like a pond, if you cannot hold the temperature, or if the level crashes. Mix the new solution, circulate it, and set the pH before you lift the plant. Roots parked in an empty bucket inside a hot tent, while you look for a jug, is an injury on its own. Siphon the old solution, wipe the film at the old waterline, and set the plant back at the depth you meant. Do not stretch one tank across two or three weeks because the top is still green. Spent solution drifts in pH and in the balance of what is left, and the following week becomes a correction instead of a feed.
The flowering stage page owns the light change, the stretch, and the decision to cut. Flowers follow that clock and the plant in the tent. Wet roots do not stand in for it. A last swap toward plain water is reservoir housekeeping so you are not drying a crop that finished in a strong leftover mix. It does not rewrite the flower, and it is not a potency trick. The flush page is where those finish trials are compared. When you cut is still a flower decision, made on the plant you have, not a percentage you memorized for every cultivar.
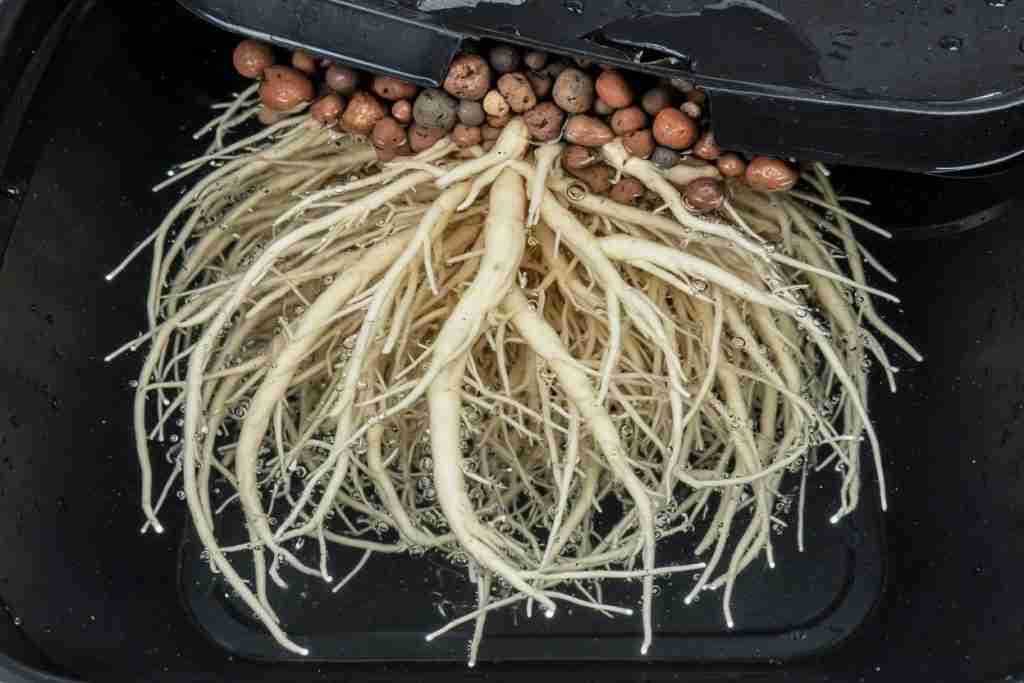
Cream-white or pale roots, with bright tips, are what you want when the lid comes up. Brown, slick roots and a swamp smell come from warm water, light in the tank, or air that stopped. They are not a request for a stronger feed. If the roots are already slick, the rinse, the lighter mix, the air, and the cooler water are on the root rot page. A soil inoculant does not replace a running stone. The fungi page sorts a root problem from a leaf problem. Nothing from the kitchen goes in this reservoir.

A canopy at this stage still depends on the bucket under it. Support the main stem from above the pot. Clay does not anchor a heavy cola the way packed soil does, and a lean into the net pot puts the stem in the splash. While the lid is up, check the undersides of the leaves. Fungus gnats are less common without soil. Spider mites and aphids still ride in on clones and sleeves. If you spray, keep it off open flowers. Scout first, on the pest management page. A film on a fan and a bad smell in the tank do not share one fix.
When the run is over, empty the bucket, wipe the ring at the waterline, and replace a stone that has gone coarse. Rinse clay that still smells like wet stone, and throw out clay that smells rotten. The next plant should not inherit the last film. A long photoperiod under a hot fixture spends the crop fighting water temperature, and no jug repairs a reservoir that lives above 22°C. Pump, waterline, temperature, pH, and strength are the log. Change the tank when it smells or when the week is up, whichever comes first.