


Cannabis Rain-Shelters That Don’t Trap Humidity: Designs That Work


You love growing outdoors because sunlight is free, rain is free, and—let’s be honest—the plants look gorgeous in the yard. But that same rain can turn into a sticky mess if your shelter holds moisture like a wet sock. When buds sit in trapped humidity, bud rot (Botrytis) can show up fast. That’s why you need a cannabis rain shelter that kicks out moist air while still blocking rain. Not fancy. Not fussy. Just smart.
Below, you’ll learn the why, the how, and the exact designs that work in real weather (coastal fog, inland thunderstorms, shoulder-season drizzle—yep, all of it). You’ll get build specs, easy rules of thumb, tables you can print, and step-by-step plans you can use today in Canada or the United States. No fluff. Lots of airflow.
Why Bud Rot Happens (And Why Some Shelters Make It Worse)
When a plant is wet and the air around it can’t move, moisture hangs out inside the buds. Buds are like tiny forests—deep, dense, and full of little places where water can hide. If that wet air just sits there, spores say, “Party time!” and boom: bud rot.
What actually drives bud rot?
- Wet surfaces + trapped humid air: Rain, fog, or heavy dew wet the plant. Without airflow, the water doesn’t leave.
- No temperature escape hatch: Warm air rises. If you don’t give that warm, damp air a high vent to leave, it lingers.
- Condensation rain: Warm moist air hits a cool roof, makes droplets, and drips back on your flowers—like a mini rainstorm inside your tent.
Bottom line: If your shelter blocks rain but also blocks airflow, it’s a bud rot incubator. Your cannabis rain shelter must protect from above and breathe from all sides and the roof peak.
Core Principles of a Breathable Cannabis Rain Shelter

Think of your shelter like a big umbrella with lungs.
Rule #1: Keep Rain Off, Keep Air Moving
Your shelter’s first job is to shed rain; its second job—just as important—is to move air. When air can’t exit, moisture hangs around and causes trouble. Make sure you plan a path: dry air in low, damp warm air out high.
Rule #2: Vent High and Low (The “Stack Effect”)
Warm air rises. Give it a high exit. Cool air enters down low. With both, air flows naturally even when winds are calm. Without a high vent, the shelter feels like a steamed bun. With a high vent, it breathes.
Rule #3: Use Breathable Covers—Not Just Plastic
Plastic is great at shedding rain, but most plastics don’t let water vapor pass through. Breathable covers (think breathable membranes or shade cloth sidewalls) let vapor escape while blocking drops. You can pair a solid roof with breathable sides or use a water-shedding membrane with a rated moisture vapor transmission rate (MVTR). Higher MVTR = better “exhale.”
Rule #4: Roof Shape and Drip Management
A steep roof sheds water fast. Drip edges and gutters pull water away from the canopy and root zone. Overhangs stop sideways rain from sneaking in. A small ridge gap (protected from direct rain) lets steam out the top—no fuss.
Rule #5: Use the Wind (Don’t Fight It)
Face a big opening slightly off the prevailing wind so you catch a breeze without turning your shelter into a kite. Openable sides (roll-ups or removable panels) let you tune airflow on the fly.
Materials: What Actually Breathes and What Lasts

Here’s a quick reference to help you pick the right skin for your cannabis rain shelter. (Values are practical grower guidance; use ranges to compare.)
| Material / Cover Type | Rain Protection | Breathability (MVTR) | Light Transmission | Durability | Cost | Best Use |
|---|---|---|---|---|---|---|
| Clear polycarbonate roof panels (corrugated) | Excellent | None | High | 7–10 yrs | $$–$$$ | Roof only paired with breathable sides |
| Breathable roof membrane (HDPE/PP with micro-porous coating) | Very good | Medium–High | Medium–High | 3–5 yrs | $$ | Full roof where you need “exhale” |
| Woven polyethylene tarp (heavy-duty) | Very good | Low | Medium | 2–4 yrs | $–$$ | Roof with big vent gaps; add breathable sides |
| Shade cloth (30–50%) | Poor (blocks some drizzle only) | High | High | 3–6 yrs | $–$$ | Sidewalls and gables; not a roof in heavy rain |
| Landscape fabric (spunbond PP) | Fair (sheds light rain) | Medium–High | Medium | 1–3 yrs | $ | Temporary roof skins + high pitch |
| Canvas/polycotton treated | Good | Medium | Medium | 2–4 yrs | $$ | Rustic roofs, heavy but forgiving |
| Greenhouse film (UV-stable PE) | Excellent | None | Very high | 2–4 yrs | $–$$ | Use only with large ridge + roll-up sides |
Tip: Pair a solid, rain-proof roof (polycarbonate or tarp) with breathable sides (shade cloth) and a protected ridge vent. That combo is simple, tough, and airy.
Seven Proven Cannabis Rain Shelter Designs That Don’t Trap Humidity

Below are field-tested builds you can size up or down. Each one lets you block rain while letting moisture out. Pick your flavor, your budget, and your wind load.
1) A-Frame Breathable Tarp with Ridge Gap (Fast, Cheap, Effective)
How it works: Two tarp planes meet at a peak like a tent. You leave a 2–4 inch (5–10 cm) ridge gap under a small “cap” strip or ridge cap to keep rain out but let steam out.
Specs (typical 6 × 10 ft / 1.8 × 3.0 m bay):
- Roof pitch: 35–45°
- Ridge gap: 2–4 in (5–10 cm) with a small overlapping “hat” strip
- Side clearance to ground: 12–24 in (30–60 cm) open for intake
- Overhang: 6–12 in (15–30 cm) each side
Build steps:
- Set two rows of stakes or T-posts, 6–10 ft apart.
- Lash a ridge pole.
- Drape two heavy-duty woven tarps; overlap at the ridge.
- Add a narrow ridge cap (tarp strip) over the peak; secure.
- Keep the lower edges off the ground for intake.
- Guy lines for wind.
Pros: Quick, cheap, surprisingly airy.
Cons: Tarps can flap; aesthetics are… tarp-y.
Best for: Small grow areas, quick builds, shoulder season.
2) Hoop House with Roll-Up Sides and a Ridge Vent (Classic, Tunable)

How it works: PVC, EMT, or metal hoops form a tunnel. A solid roof (greenhouse film or polycarbonate) sheds rain. Roll-up sides in shade cloth or film let you dump humidity any time. Add a small ridge vent or vented end caps.
Specs (10 × 12 ft / 3.0 × 3.7 m module):
- Roof: polycarbonate panels or greenhouse film
- Sides: roll-up shade cloth, 30–50%
- Ridge vent: 2–6 in (5–15 cm), shielded
- Side opening height: at least 24 in (60 cm)
- Door: full-height end door; add gable vent
Pros: High control, great airflow, good light.
Cons: More parts, needs careful anchoring.
Best for: Medium to large runs of plants, longer seasons.
3) Lean-To with Clear Corrugated Roof and Open Gables (Simple and Strong)

How it works: A single-slope roof fixed to posts or a shed wall. Use clear corrugated panels for the roof. Leave open gable ends and breathable side infill to let air cruise through.
Specs (8 × 12 ft / 2.4 × 3.7 m):
- Pitch: 3:12 to 6:12
- Eave height: 6.5–8 ft (2–2.4 m)
- Overhang: 12–16 in (30–40 cm)
- Sides: shade cloth panels; removable
Pros: Rigid, clean, long-lasting.
Cons: Needs a sturdy frame and fasteners.
Best for: Permanent grow spots, repeated seasons.
4) Pergola “Umbrella Roof” with Offset Panels (Shade + Rain Shed)

How it works: A pergola frame with spaced purlins. On top, mount offset clear panels like shingles so rain sheds, but gaps between panels vent hot air.
Specs (any footprint; example 10 × 10 ft / 3 × 3 m):
- Panel overlap: 2–3 in (5–8 cm); leave 0.5–1 in (1–2.5 cm) air gaps
- Ceiling gap above canopy: 18–24 in (45–60 cm)
- Gable vents open; sides can be shade cloth
Pros: Very breathable, looks nice, diffused light.
Cons: Not 100% rain-tight in wind-driven storms; more carpentry.
Best for: Warmer, breezy spots; style + function.
5) Cantilevered “Plant Hats” (Individual Rain Caps)
How it works: Give each plant its own mini roof—like a wide-brim hat on a post. The air is totally open all around.
Specs per plant:
- Hat diameter: 24–36 in (60–90 cm)
- Height above top colas: 12–16 in (30–40 cm)
- Tilt: 5–10° for drip
- Material: rigid plastic or small corrugated circle
Pros: Maximum airflow; zero sidewalls; easy to move.
Cons: Only blocks direct rain; not great in sideways storms.
Best for: Dry or breezy areas; late-season drizzle insurance.
6) Rain Skirt + Windward Baffle for Pots (Low-Cost, High-Air)
How it works: For potted plants, create a rain skirt—a narrow roof band just over the canopy edge—plus a windward baffle to stop sideways rain. The top stays open to the sky for airflow, but the bud faces don’t get hammered by rain.
Specs:
- Skirt width: 8–12 in (20–30 cm) around the canopy edge
- Gap above canopy: 6–12 in (15–30 cm)
- Baffle: shade cloth panel on windward side, 24–36 in (60–90 cm) tall
Pros: Dirt cheap, super breathable.
Cons: Not full rain protection; more of a shield.
Best for: Good airflow locations, late flower polish.
7) Pop-Up Canopy Retrofit (Turn EZ-Up into “EZ-Air”)
How it works: Take a standard pop-up canopy and add vents. Cut screened triangles at the peak (most frames have a double top you can modify). Replace vinyl sidewalls with 30–50% shade cloth curtains and leave a gap at the bottom for intake.
Specs:
- Peak vents: two 10–14 in (25–35 cm) triangles
- Side gaps: 6–12 in (15–30 cm) at bottom
- Curtain sides: shade cloth with roll-up ties
Pros: Fast, portable, good emergency shelter.
Cons: Stock models trap heat without mods; must secure well.
Best for: Temporary weather windows, harvest-time protection.
Airflow Made Easy (Without Scary Math)

You don’t need calculus to make air move. Use these simple rules:
- High vent + low intake: Always both. No exceptions.
- 10–20% open walls: Keep at least 10% of total wall area open to air, 20% if you’re in humid areas.
- Ridge gap matters: A 2–4 in (5–10 cm) ridge vent across the span dumps warm, moist air fast.
- Ceiling height: Give your plants 18–24 in (45–60 cm) of headroom to the roof so air can pass over and out.
- Orientation: Open the longer face 10–30° off prevailing wind. You’ll catch breezes without turning your shelter into a sail.
Example (2 × 3 m shelter):
- Wall area ≈ (2+2+3+3) × 2 m height = 20 m²
- 10–20% open = 2–4 m² of total vent area spread across sides and gables.
- Ridge vent: continuous 3 m strip × ~0.07 m gap ≈ 0.21 m²—this helps a lot.
Build Checklist (So You Don’t Forget the Good Stuff)

- Pick a design that matches your wind and rain.
- Plan a high vent (ridge, gable peak, or offset roof panels).
- Keep low intakes open (side gaps, roll-ups).
- Choose a breathable side skin (shade cloth).
- Add overhangs, drip edges, and gutters to move water away.
- Anchor your frame (posts, earth augers, guy lines).
- Leave 18–24 in between canopy and roof.
- Size vents for 10–20% open wall area minimum.
- Test the “smoke pencil” (incense stick): Does smoke drift out the top? Good.
- After rain, open it up wide to clear steam.
- Inspect for condensation and eliminate drip points with better pitch or insulation tape on cold beams.
Outdoor Bud Rot Prevention—Your Playbook (Shelter + Plant Care)
A smart cannabis rain shelter is step one. Step two is how you manage the plant.
- Spacing: Don’t cram plants. Give them elbow room.
- Canopy grooming: Remove crowded interior leaves in late veg/early flower so air can move through.
- Top early: Build a flat, even canopy so air (and light) hits all buds.
- Morning venting: Open sides early so dew dries fast.
- Water timing: Water at dawn, not at night. Wet nights = sad buds.
- Shake after storms: Gently flick branches to knock off pooled water.
- Avoid over-feeding nitrogen in late flower: Soft, lush growth holds more moisture.
- Watch the weather: On foggy nights, open the high vent and side gaps to stop steam build-up.
Troubleshooting: If It Smells Stale, Something’s Off

| Symptom | Likely Cause | What To Do |
|---|---|---|
| Roof dripping on buds | Condensation on cold panels | Increase roof pitch, add ridge vent, insulate contact points, add drip edge/gutter |
| Stuffy, warm air | No high vent or blocked gables | Add ridge gap, cut gable vents, raise roof 6–12 in |
| Sides billow like a sail | Crosswind without relief | Add leeward vent panel, install wind baffles, more tie-downs |
| Buds stay wet after rain | Not enough intake/exhaust | Open sides higher, add breathable sidewalls, widen bottom gap |
| Mold creeping inside | Dense canopy + trapped moisture | Defoliate interior, increase spacing, open shelter wider in mornings |
| Leaves look sun-dappled, not bright | Too much roof shade | Switch to clearer roof material or reduce shade cloth density |
Budget vs Premium Paths (Pick Your Poison)
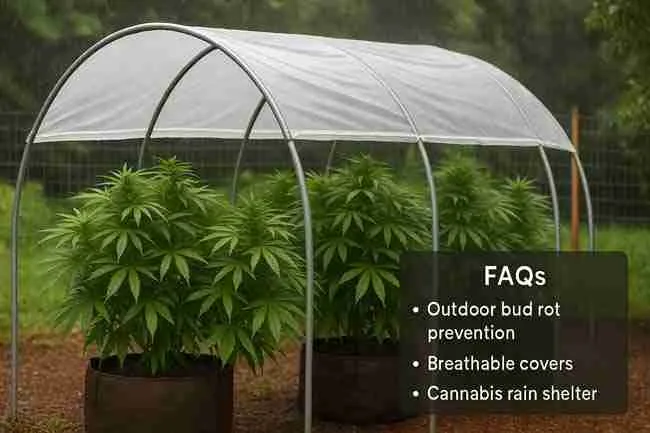
- Budget: A-frame tarp + ridge cap + shade cloth sides. Anchored well, it works and costs little.
- Mid-range: Lean-to or pop-up retrofit with polycarbonate roof, shade cloth sides, real gutters, and a formed ridge vent.
- Premium: Hoop house with roll-up shade cloth sides, clear roof, automated ridge vent, strong anchors, tidy gutters.
Tip: Spend money on the parts that touch the weather first—anchors, roof fasteners, gutters—then upgrade skins later.
Specifications & Dimensions Quick Reference
Here’s a quick sheet you can copy for your build notes.
| Spec | Good Starting Point | Why It Helps |
|---|---|---|
| Roof pitch | 35–45° (A-frame) or 3:12–6:12 (lean-to) | Faster runoff, less condensation |
| Ridge vent | 2–4 in (5–10 cm) continuous | Lets warm, wet air escape |
| Side intake gap | 6–24 in (15–60 cm) above ground | Draws in fresh air |
| Wall openness | 10–20% of wall area | Ensures cross-flow |
| Overhang | 6–16 in (15–40 cm) | Blocks sideways rain |
| Canopy clearance | 18–24 in (45–60 cm) to roof | Prevents steam-cap over buds |
| Side skin | 30–50% shade cloth | Breathable, wind-tunable |
| Roof skin | Polycarbonate or breathable membrane | Rain-proof, long-lasting |
| Anchors | Earth augers or concreted posts | Wind security |
| Gutters | Yes, always | Move water away from roots/buds |
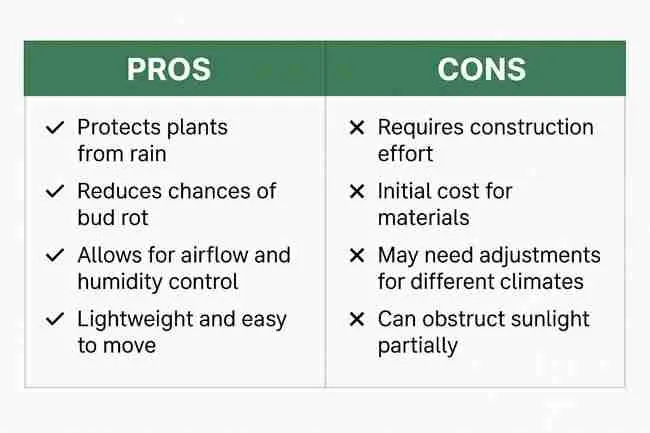
Pros and Cons of Using a Cannabis Rain Shelter
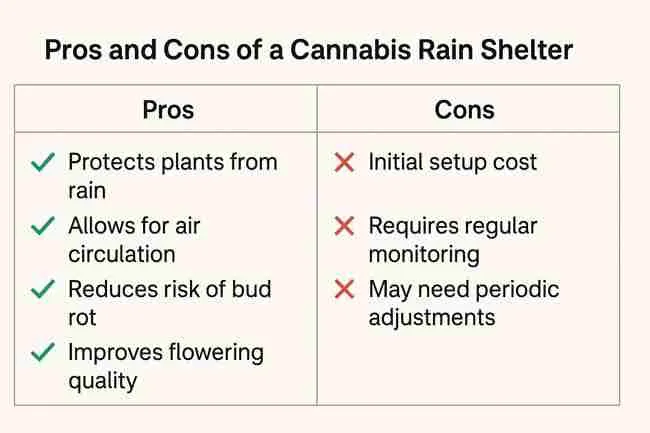
Pros
- Keeps direct rain off buds and lowers outdoor bud rot risk
- Extends your season into wetter weeks
- Reduces storm damage and nutrient leaching from heavy rains
- Lets you control airflow and microclimate
Cons
- Badly designed shelters increase humidity and risk
- Requires setup time and anchoring
- Can shade a bit of light if you choose heavy covers
- Needs vent management during changing weather
Deep Dive: Breathable Covers vs Plastic (What’s the Real Difference?)
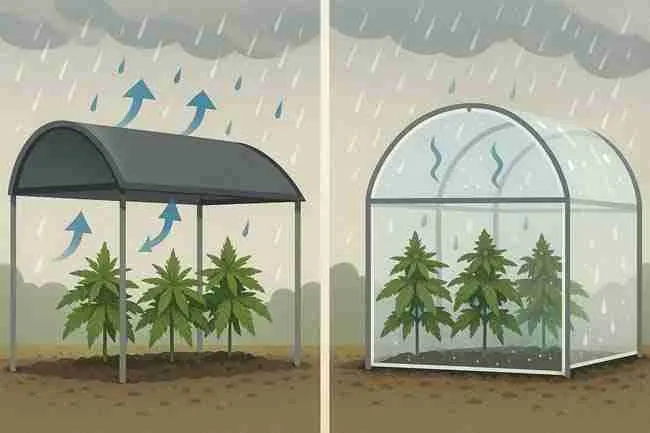
When you pick a skin for your cannabis rain shelter, think of drops vs vapor.
- Plastic films/panels: Block rain very well, but they also block water vapor. If you use them, you must add big vents (roll-ups, ridge vents, gable openings).
- Breathable membranes: They block liquid water but allow vapor to pass (rated by MVTR). You still need intake and exhaust, but moisture exits more easily.
- Shade cloth: Doesn’t block heavy rain; it’s your best friend for sidewalls and gables. It bleeds wind and vapor, so the interior doesn’t stew.
Real-world combo that works: Solid roof (polycarbonate or greenhouse film) + ridge vent + shade cloth sides. Simple. Effective.
Operation Tips for Rainy Weeks (Do This, Not That)

- Before a storm: Close windward gaps to stop sideways rain; leave leeward vents open.
- During a storm: Keep the ridge vent open (protected by its cap). You need that escape path for steam.
- After a storm: Open everything—roll-ups, doors, gables—until the canopy is bone-dry.
- Foggy nights: Open high vent and a small low intake to keep air drifting.
- Heat spikes: Use shade cloth sides and consider a little extra roof shade (30%) but don’t smother the top.
Step-by-Step: Build a No-Drama A-Frame Cannabis Rain Shelter (6 × 10 ft Example)
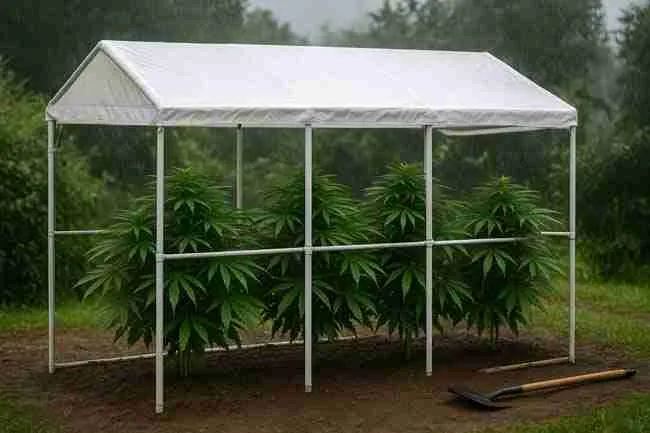
- Layout: Mark a 6 × 10 ft rectangle.
- Posts: Drive eight T-posts (or screw earth anchors) at corners and midpoints.
- Ridge: Lash a ridge pole (EMT or wood) 7–8 ft high.
- Skins: Drape two woven tarps; overlap at the ridge by 6–8 in.
- Ridge cap: Add a 12-in wide strip over the ridge like a hat; secure with battens.
- Intake gap: Keep lower edges 12–18 in above ground.
- Sides: Hang 30–50% shade cloth down to 6–12 in above ground.
- Gutters: Screw a small drip edge or half-pipe gutter along each eave to channel water away.
- Tie-downs: Guy lines at corners to stakes—tight but not tearing.
- Test: Light an incense stick inside. Watch smoke rise and exit the ridge. If it stalls, widen the gap or add gable vents.
Real-Life Example: Coastal Drizzle vs Inland Thunder

- Coastal/Humid (fog, light drizzle): You’ll win with a breathable or vented roof and very open sides. Prioritize continuous ridge vent, shade cloth walls, and morning venting.
- Inland/Thunderstorms (hard rain, quick sun): Use a solid roof with reliable overhangs and gutters. Keep roll-up sides ready. After the storm, open everything wide until dry.
Either way, you’re steering moisture out, not trapping it in.
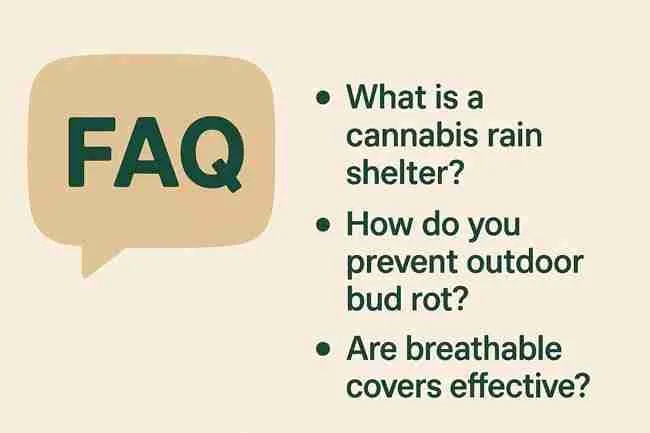
Frequently Asked Questions (FAQs)
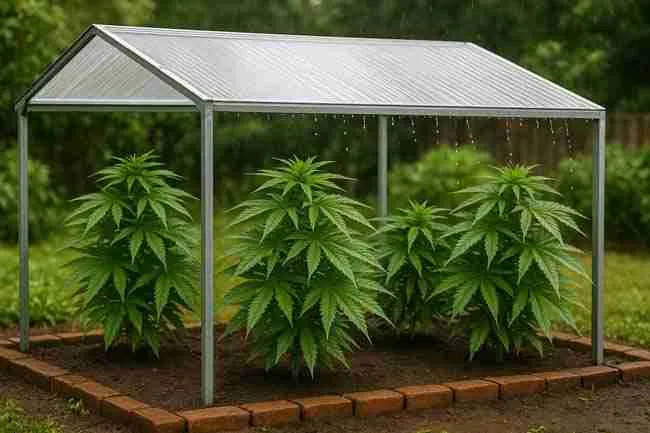
What makes a cannabis rain shelter “breathable”?
Two things: vapor-friendly materials (like breathable membranes or shade cloth sides) and real vents (high ridge or gable vents plus low intake gaps). Breathability means water vapor can leave so buds don’t sit in a wet fog.
Are breathable covers better than plastic for outdoor bud rot prevention?
Often, yes—breathable covers help release moisture. But a plastic roof can work great if you pair it with wide roll-up sides and a ridge vent. The trick is airflow, not just the material.
Can a shelter alone prevent outdoor bud rot?
It reduces risk a lot, but you still need good spacing, gentle defoliation, morning venting, and smart watering. Shake off water after storms and keep the canopy airy. Shelter + plant care = winning combo for outdoor bud rot prevention.
How much ventilation do I actually need?
Aim for 10–20% of wall area open to air, plus a 2–4 in ridge vent. If your climate is super humid, go toward 20% and keep those sides open more often.
Do shelters block too much sunlight?
Clear roofs (polycarbonate or greenhouse film) pass a lot of light. Shade cloth sides barely reduce PAR. If things look dim, use clearer roof skins or reduce shade density.
What roof pitch is best?
35–45° (A-frame) or 3:12–6:12 (lean-to) sheds water and limits condensation. Flatter roofs drip more inside.
Will this hold up to wind?
Anchor it like you mean it: earth augers, guy lines, or concreted posts. Use rounded corners and breathable sides so wind can pass through instead of grabbing your walls.
Can I retrofit my pop-up canopy?
Yes. Add peak vents, swap plastic walls for shade cloth, leave a bottom gap, and anchor it well. Suddenly, it breathes.
The Big Idea (Put It All Together)

A great cannabis rain shelter is not a plastic bubble. It’s a rain hat with lungs. Roofs shed water. Vents let steam escape. Sides breathe. Plants stay dry on the surface and comfy inside, even when the weather acts up. Build for airflow, not just dryness, and you’ll harvest clean, tight flowers without the heartbreak of mushy buds.
Now you’ve got designs, specs, and a plan. Pick the one that fits your space and weather, cut those vents, and—hey presto—no more steamed-bun shelter. Just happy plants.












I appreciate all the information. Could you provide links to canadian suppliers please? 🙏