New Cannabis Growers Checklist


A new cannabis growers checklist is the order you follow, not a cart full of gear. Count the plants the room can finish and the plants your local rule allows. The smaller number wins. Run the tent empty until the light, the fan, and the temperature stop surprising you. Put a sprout in a small cup of soil, then a fabric pot. Buy feminized seed for that count. Lift the pot before you water. Write one line in a notebook every day. That sequence is the whole job. A hydro kit, a CO2 burner, and a shelf of additives do not belong on the first receipt.
People lose a first marijuana crop in the same few places. They soak a seed the afternoon the tent arrives. They set a tiny plant in a huge wet pot. They see droopy leaves and pour again. They mix the bottle at full strength in week one. They harvest because a forum said “week eight,” then jar buds that are still wet. None of those mistakes is a mystery once you have watched one plant all the way through. This page is that watch, in the order you actually do the work.
New Cannabis Growers Checklist
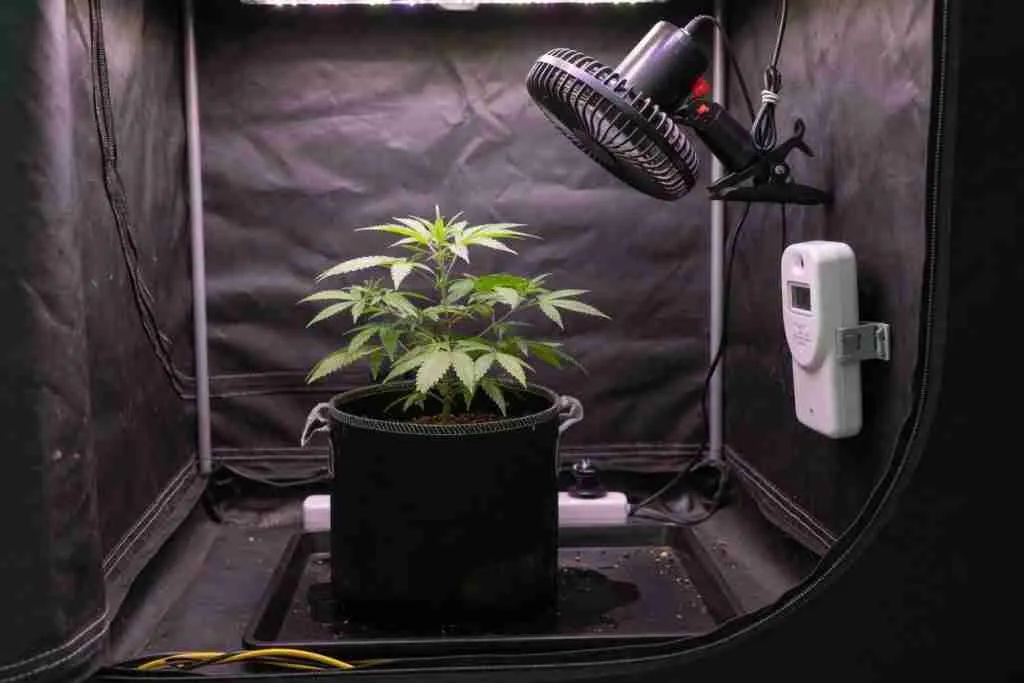
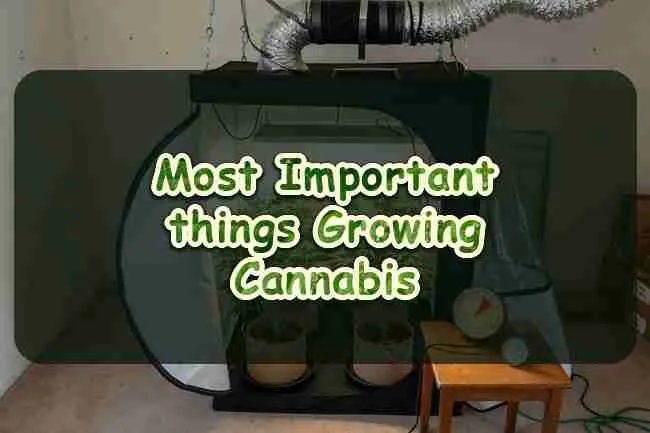
Start two to four weeks before any seed touches water. Measure the space you really have, not the space you wish you had. A closet, a 2×2, or a 2×4 will finish one or two plants if you keep the canopy even. It will not finish a crowd. Buy the tent or clear the closet, hang the light, set the timer, and run the exhaust. Sleep in the house with that fan on. If it howls, or the corner of the room climbs into the low thirties Celsius at noon, you want to learn that with an empty pot.
The useful buy list is short. A light that covers the footprint you measured, on a timer you have already watched for two days. One fan moving air inside the space, and one fan exchanging that air. A meter you can read without opening the door every hour. Fabric pots, a few starter cups, and a potting soil you would trust with a tomato. Feminized seeds, one plant per label. A pH pen. One basic nutrient, still sealed, until the plant has real leaves. Buy a loupe and glass jars before the colas finish, not on day one.
Leave these off the first order. A reservoir and an air stone. A CO2 tank. A second and third bottle “for bloom.” A vitamin pour. Cal-mag you do not yet know you need. A carbon filter is the one maybe: it scrubs smell for the people you live with. It does not feed the plant. If the house can live with the odor of a small crop, run the first round without one and add it when you know you need it. Spend the money on the light and the exhaust instead.
- Match the plant count to the room and the local rule.
- Run the space empty until the light, the air, and the temperature are boring.
- Choose the clock, then buy only the seeds that clock can finish.
- Start in a small cup of soil, then move to a fabric pot.
- Lift the pot before you water, and empty the saucer.
- Feed lightly, and only after the plant is clearly growing.
- In flower, drop the humidity and keep the dark hours dark.
- Harvest with a loupe, dry slow, and write down what you saw.
Where the plants will live
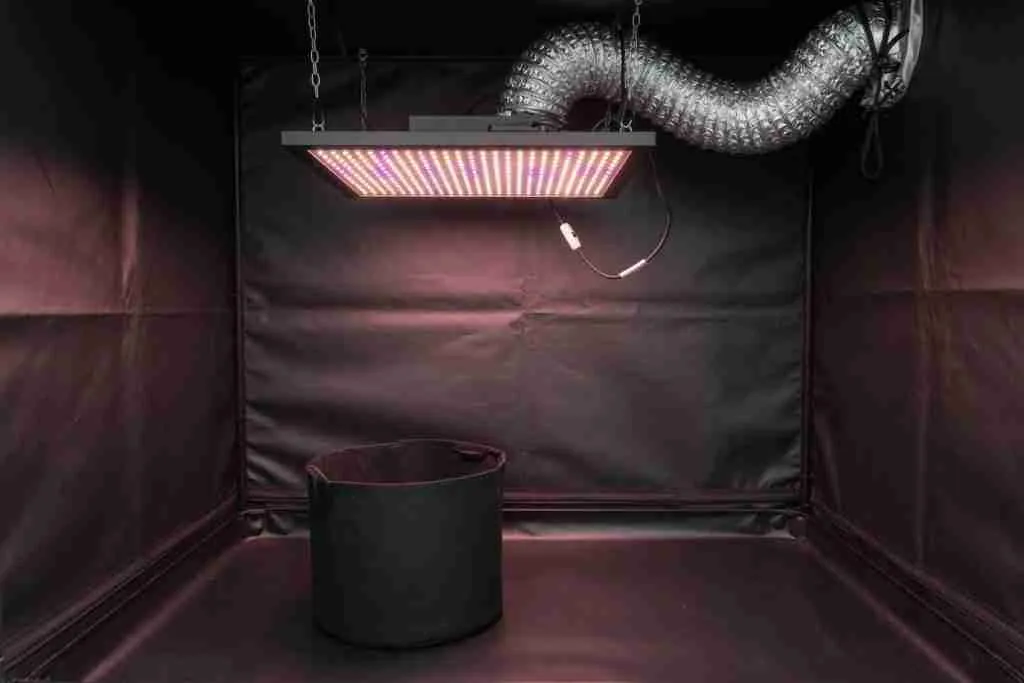
Indoor is the calmer first crop if you can close a door. A tent gives you walls and a place to hang a duct. A closet works if you can vent it and keep the dark hours dark. The grow tent guide and the indoor growers guide go deep on layout. Before any other purchase you need air in, air out, a circuit that is not also running a space heater, and a door kids and pets cannot open.
If the breaker trips when the light and the exhaust come on together, that circuit is the wrong one. Do not “solve” it by skipping the exhaust. Move the setup. A stuffy box with a bright lamp is how buds mold and how a stem stretches into a noodle. The ventilation guide is the fan and duct detail. One oscillating fan inside, aimed across the canopy and not blasted into one cola, plus an exhaust that actually replaces the air, is the whole climate machine for a first run.
Outdoor means you are borrowing the sun, the weather, and the local sight-line rule. Walk the spot morning, noon, and late afternoon before you commit a seed. A puddle that sits all day is not a planting hole. The outdoor place guide owns sun, drainage, wind, and privacy. The outdoor grow guide owns the season. A greenhouse buys frost days, then it has to be vented or it cooks the plants.
In Canada the federal baseline is four cannabis plants per household, not four per adult. Quebec still prohibits recreational home growing. Manitoba, since 1 May 2025, allows adults 19 and older up to four plants, and those plants have to stay indoors. If you live somewhere else, the number is whatever your own city allows. Read that rule before you pop a seed. A legal allowance of four does not mean a 2×2 should hold four. Two plants, finished with air between them, beat four plants stacked into a wet canopy.
Hang the LED so it covers the floor you will actually use, on the chart that came with the fixture. A 2×4 light does not become a bigger light because you want a bigger harvest. The lighting guide owns hang height. Put the lamp on a timer and watch that timer for two empty days. A timer that sticks on, or sticks off, is a problem you can catch while the pot is empty. Do not germinate the day the boxes arrive.
Seed type before the first soak

Three decisions before you buy. First the clock. A photoperiod stays in vegetative growth until you set the light to 12 hours on and 12 off. An autoflower starts flower by age, ready or not. You cannot hold an auto in veg while you fix a hot tent. One timer cannot serve both clocks in the same space. A feminized photoperiod is the calmer first buy if you want days to recover from a mistake. The photoperiod versus autoflower page is the comparison. The autoflower page is how that clock gets into a seed.
Second, feminized or regular. Feminized seed is the beginner path: you want flowers, not a male you have to find and pull before it pollinates the tent. Regular seed is the right pack when you want males for breeding, and the wrong pack when you have two pots and no plan for a male. The feminized and regular page holds that fork. Buy only the count you can finish, and label the cup the day you sow.
Third, seed or clone. A clone is a cutting from a plant somebody has already flowered. You skip the sprout and you also skip the chance to start in a clean tent. A sick mother hands you a sick copy. If you do not already have a healthy plant you trust, start from seed. The seeds versus clones page and the clone guide cover the cut when you are ready for it. For the order on this page, seed comes last on the shopping list and first in the cup, after the room already works.
Do not pop a tray “just in case.” Extra seedlings become extra plants, then a legal problem or a mold problem. The household count is a ceiling, and the tent is often lower. The Canada seed page is the mailbox side of that choice. A strong finish is the seed plus the room, not another bottle. The high-THC page is that argument, and it does not change the order here.
Gear a first marijuana grow actually uses
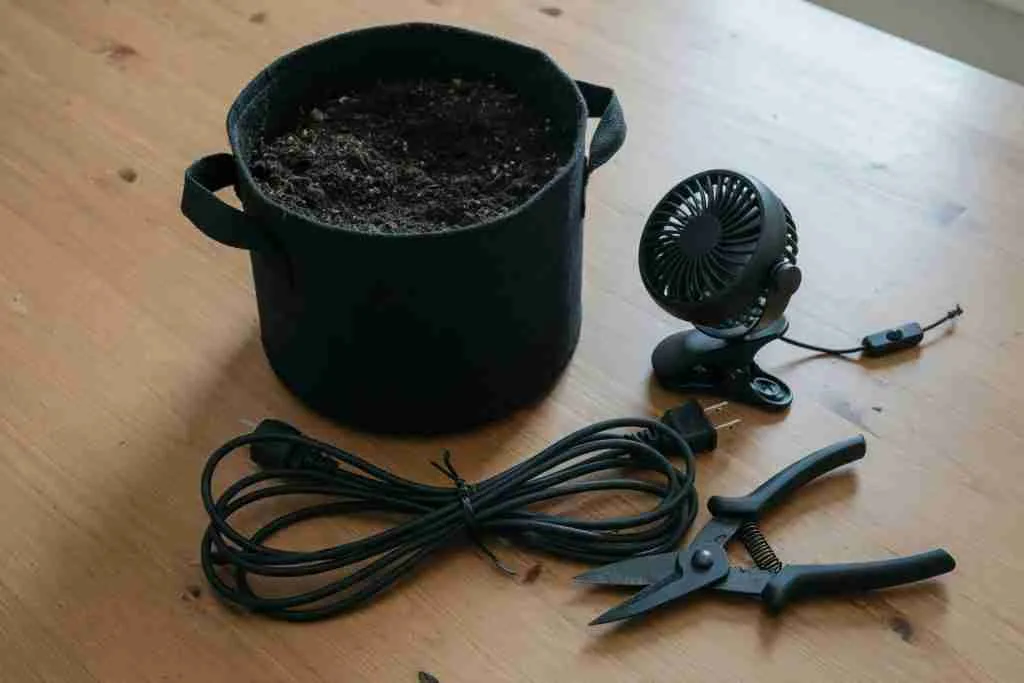
Picture the tent on day ten, not the catalog on day one. There is one plant, or two, in fabric pots. The light is on a schedule. Air is moving. You can read temperature and humidity from the door. The soil surface dries between waterings. A pair of clean snips hangs nearby for later, not for hacking a seedling. That is a working marijuana grow. Anything that does not serve that picture can stay in the shop.
Soil in a fabric pot is the forgiving medium. It holds some food, it drains, and a missed day does not crash a reservoir. Coco asks you to feed at every watering, because the fiber is not a meal. Hydro asks you to watch a reservoir daily. Neither is the first setup if you have not yet learned what a thirsty plant looks like. The soil guide, the soil versus hydro page, the medium page, and the hydro guide are there when you want the other path. For this run, buy a plain potting mix and a fabric pot.

The brown fiber in that photo is coconut coir. It holds water and air, and almost no plant food. The bill for that air is a feeding schedule from early on. A bag of potting soil goes the other way: more food in the bag, less bottle in week two. The organic soil page is that route. Pick one system and stay with it. A heavy amended soil plus a full bottle of salt fertilizer is how a first plant burns.
Skip the vitamin bottle. Cannabis plants make their own B vitamins, and a B1 pour does not replace a careful transplant. That claim lives on the B vitamins page. One basic nutrient is enough, and it stays closed until the seedling has several sets of true leaves. The nutrition guide owns strength by week and the pH windows for soil, coco, and hydro. In a soil pot, aim the water near the middle of the sixes.
Buy a pH pen you will actually calibrate, not a guess and a bottle of “pH down” used by feel. A pen that has lived in a drawer for a year lies. The pH page is the method. If your kettle scales up, read the water hardness page before you trust the feed label. Hard tap water already carries minerals. A full dose on top of that is a common way to hurt a first crop. The watering page is the companion: how much, how often, and why the saucer has to be emptied.
Water by lifting the pot
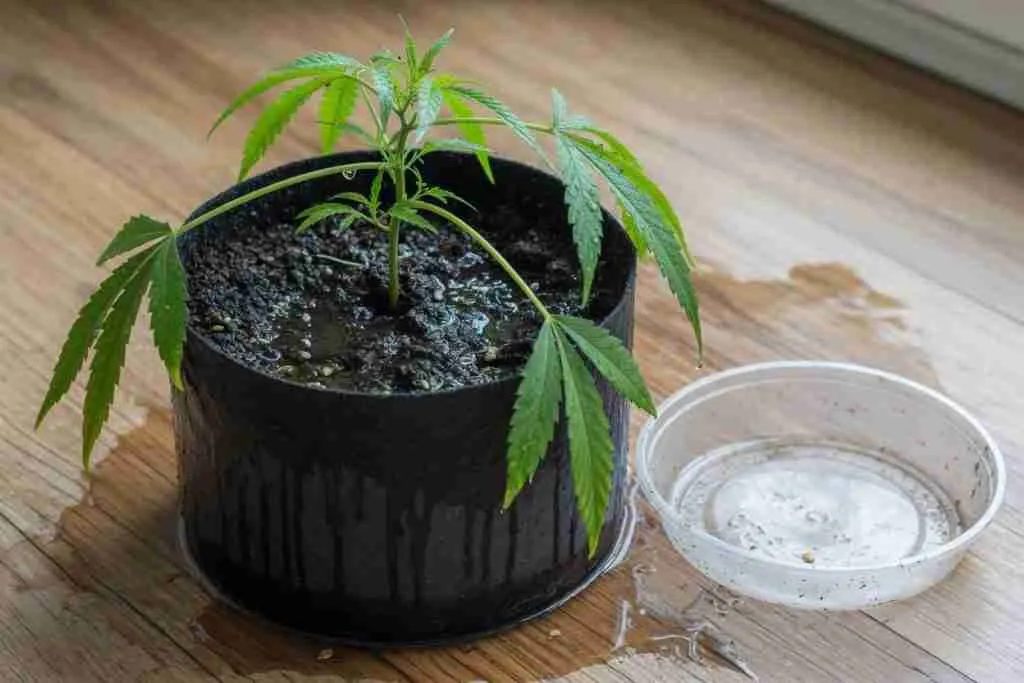
Droop looks like thirst. Often it is the opposite. Lift the pot. If it feels like a brick and the surface is shiny, do not add water. The roots are in airless mud, and another pour makes that worse. Wait until the pot is clearly lighter. Then water until a little drains, and empty the saucer. A pot standing in runoff stays wet at the bottom.
Learn the weight. Pick the pot up on the morning after a watering, and again the day you think it might be ready. The difference is obvious once you have done it twice. A meter in the soil can help later. Your hand is enough for a first fabric pot. Water the soil, not the leaves, and not on a timer that ignores the weather in the tent. A hot day drinks more. A cold, humid day drinks less. The plant does not care what the calendar said.
Start small. A sprout in a huge wet pot stalls because the root zone stays cold and airless for weeks. Use a cup, keep it moist rather than soup, and pot up when roots reach the wall. The pot size guide owns the volumes for later containers. Do not copy a litre chart onto a seedling. The move itself is simple: a slightly larger pot, soil at the same level on the stem, water once so the new soil settles, then go back to lifting.
Seedlings do not get a full-strength bottle in week one. Plain water, or the light mix the nutrition guide describes, until growth is steady. Pale leaves the day after a full-strength mix mean you overfed. Stop. Do not add a second product. The deficiency page separates hunger from burn, and it starts with pH and what you did yesterday. A plain-water finish at the end of flower is a different job. The flush page owns it.
Stages from sprout to jar

Pop the seed only after the tent has already been boring. Use the method on the germination page. The germination-rate page is what actually moves the number of seeds that sprout: warmth, moisture, and patience, not a kitchen soak. Do not dig the seed up to check on it. Label the cup. Keep the medium warm and damp, not drowned. When the sprout breaks the surface, the light goes on and the gentle fan goes on.
The first two weeks are the danger window. A long, pale stem means the light is too far or the room is too warm. Move the fixture closer in small steps and look tomorrow. Leaves that taco and feel hot mean you went too far. Keep the soil surface drying between waterings. A constantly wet cup is where fungus gnats and a collapsed seedling start. The seedling stage page and the day-by-day seedling page are the close watch. Your job here is light, air, and a cup that is not a swamp.
Vegetative growth is the easy stretch if the room is already stable. Eighteen hours of light is the usual indoor day for a photoperiod. Water by weight. Let the plant fill its pot before you train it. A tie that bends a stem can wait until growth is fast. Topping, lollipopping, and a hard bend are for a healthy plant later, not for week one. The vegetative stage page, the low-stress training page, the high-stress training page, and the lollipop page each own one job. None of them replaces a dry-down and a working fan.
Hold veg around 22 to 27 C. Humidity can sit around 50 to 65 percent while the plants are leafy and there are no dense flowers to rot. You are not chasing a perfect number on a cheap meter. You are avoiding a closet that swings from a wet jungle at night to a desert when the light comes on. If the leaves pray gently upward under the light and the pot lightens on a steady rhythm, leave the recipe alone. Write the numbers down anyway. The day something looks wrong, those notes are the only history you have.
Flower, dry, and the jar
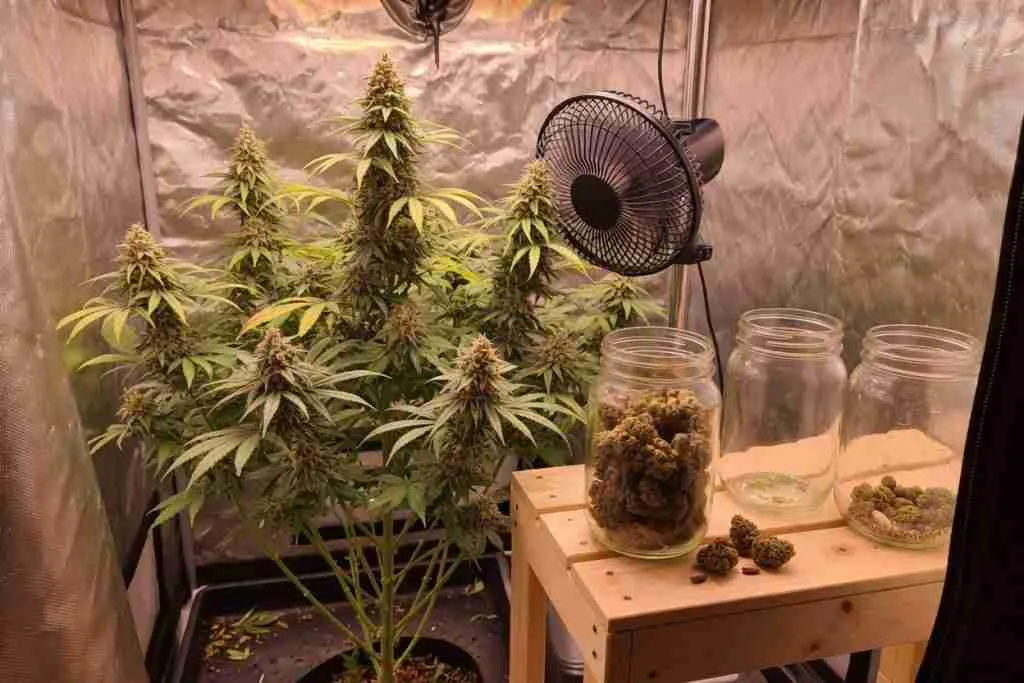
Flower starts when you change the clock, or when an autoflower changes it for you. For a photoperiod, set 12 hours on and 12 off, and make the dark real. A hallway light, a power-strip LED, or a bright humidifier indicator can stall the flowers or push a few male blooms. Close the tent and look for glow. The flowering-control page is that dark period. The flowering stage page is the plant, week by week. An autoflower does not get a flip. Keep the same schedule and stop stressing it. There is no veg time left to recover.
Drop the humidity as flowers stack. Aim toward 40 to 50 percent once the buds are dense, with air moving across the canopy and not blasted into one top. Wet, still air is how rot starts inside a cola. Check the thick sites. If you find rot, that site is done. The bud rot page is the diagnosis. Do not spray oil, soap, or neem on open flowers. The neem page is a veg tool. The IPM page is the weekly scout. A yellow card only tells you something is flying. Gnats on it mean the soil surface stayed wet. Dry it. The fungus gnat page owns the rest.
Harvest by trichomes, not by a week number you saw on a forum. A loupe is the tool. Mostly cloudy heads, with some amber starting, is the usual home window. Clear heads are early. A cola that looks “done” from across the room can still be weeks early under the lens. The quality buds page shows the read. Chopping early because you are impatient is the mistake that makes weed taste green and smell like lawn. Chopping late because you forgot to look is the mistake that makes it sleepy and dull. Look.
Dry slow, in the dark, with air moving and humidity that stays in the same drier band you used late in flower. A bud that is crisp outside and wet at the stem is not ready for a lid. Jar when a small stem snaps, then open the jars on the cure schedule. The dry, cure, and store page owns that routine. Sealing wet weed turns a good crop into hay.
Read the plant before you add anything

If one plant is deep green and the other has gone pale under the same light, do not buy a new product. Ask what changed. Same feed? One pot still heavy? The pale plant closer to a hot spot? Work water, then feed, then light. The deficiency page helps you name the pattern after those three. It is not a menu.
Use this order every time something looks wrong. Lift the pot. If it is heavy and the leaves droop, wait. If it is light and the leaves droop, water, then watch tomorrow before you do anything else. If you fed at the bottle strength and the tips burned or the plant washed out, you overfed. Plain water and time. If the stem stretched and the gaps between leaves got long, the light is too far or the room is too warm. If the buds rot, the air was wet and still. Fix the room. A spray will not dry a cola.
Smell is a house problem. A carbon filter on the exhaust handles it when you need it. Snips, a loupe, and jars that seal are the harvest kit, and they come after the fan and the meter. Empty saucers, a clean floor, and a look under the leaves twice a week catch more than a cabinet of sprays. If you use a labeled product, follow that label and keep it off open flowers.
The weed in the jar is the sequence plus the seed, not the number of bottles you opened. A finished first crop teaches the weight of a pot and the look of a cloudy trichome. Training, a different medium, or a different clock can wait for the next run.
Tape this new cannabis growers checklist where you will see it before you open a bottle.
- Plant count matches the tent and the local rule.
- The space ran empty until the timer, the fan, and the temperature were dull.
- Feminized seed, one label per cup, no extra plants “just in case.”
- Small cup first, fabric pot of soil second.
- Lift before you water. Empty the saucer.
- One nutrient, still light, and only after real growth.
- Flower: drier air, real darkness, a loupe, then a slow dry and a jar.
- A notebook line on the days you did something, and on the days you chose not to.