


Modular Shipping Container Cannabis Growing for Urban Home Enthusiasts

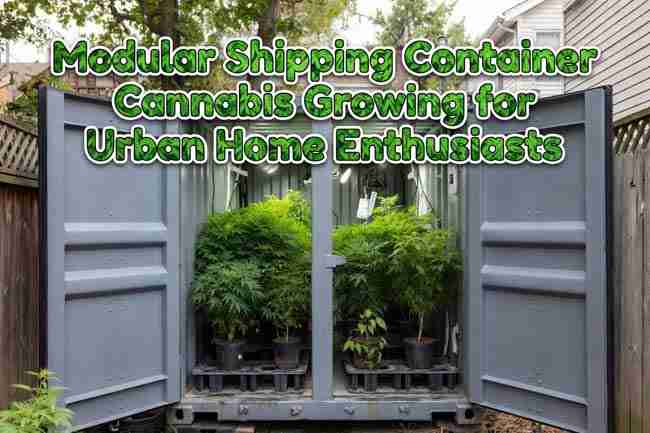
You know that tight feeling when your small city lot, condo balcony, or tiny backyard just refuses to give your cannabis plants the room they deserve? Space limitations frustrate many urban Canadian and United States growers. However, converting shipping containers or modular units offers surprising flexibility and security. Moreover, this approach works well for both hobbyists who want a private, weather-proof space and those planning future expansion without buying a bigger house or renting warehouse space.
Picture this: a sturdy steel box shows up on a flatbed, you park it in the corner of your yard in Vancouver, Toronto, or Denver, and within a few weekends you have a locked, insulated, climate-controlled shipping container cannabis grow that nobody can peek into. You control every variable — light, temperature, humidity, airflow, and smell — while your neighbors see nothing but a tidy container. That is the real magic of modular cannabis growing Canada and modular cannabis growing United States setups.
Furthermore, the post will outline realistic conversion steps, insulation, ventilation, and lighting setups suitable for Canadian and United States climates. In addition, it will share cost comparisons between container builds and traditional tent setups. Consequently, readers will see whether this route fits their goals and budget. One effective strategy involves starting with a single used container and adding sections later. Additionally, the article will include insulation and power recommendations specific to Canada, United States and similar regions. Above all, it encourages beginning with proven cannabis seeds from Green Avenger Seeds for reliable results.
Why a Shipping Container Cannabis Grow Beats Traditional Setups in the City
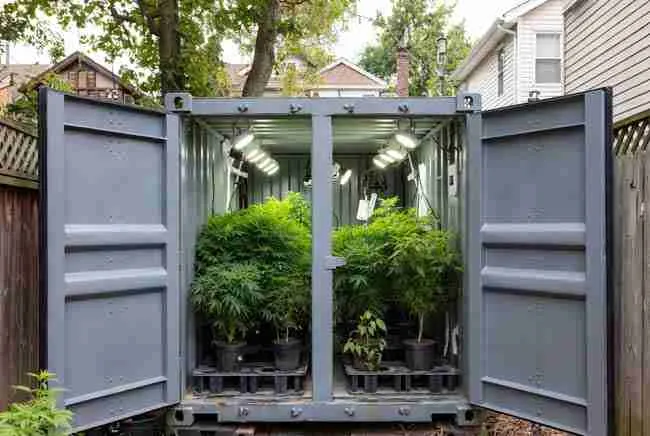
Urban growers face the same headaches everywhere: nosy neighbors, smell complaints, limited square footage, harsh winters that freeze soil or brutal summers that cook plants in tents, and the constant worry about security. A shipping container cannabis grow solves most of these problems in one steel package.
The container gives you four solid walls and a roof that lock with heavy-duty doors. You can paint it to blend with your house or leave it industrial gray — either way it looks like storage, not a grow. Inside you create the perfect micro-climate no matter what the weather throws at you outside. That is why more and more people are choosing container farm home cannabis solutions over flimsy tents that rip, leak light, and scream “plants inside” to anyone walking by.
You also gain vertical real estate. Most 20-foot or 40-foot containers are roughly 7 feet 9 inches wide and 7 feet 10 inches tall inside. That narrow footprint actually works in your favor because you can run two or three long rows or install sturdy shelving and grow vertically without the plants shading each other too badly. Add reflective walls or mylar and every watt of light reaches the canopy.
Security and discretion become almost automatic. Steel doors with good padlocks or hasps keep curious hands out. Carbon-filtered exhaust keeps the neighborhood from smelling your flowering plants. In many Canadian provinces and U.S. states where home growing is legal but must stay out of public view and nuisance-free, a well-built shipping container cannabis grow checks every box.
Choosing the Right Container for Your Shipping Container Cannabis Grow
Not every steel box makes a great grow room. You want something that is already in decent shape so you are not fighting rust holes or warped floors from day one.
New Versus Used Containers — What Smart Growers Pick
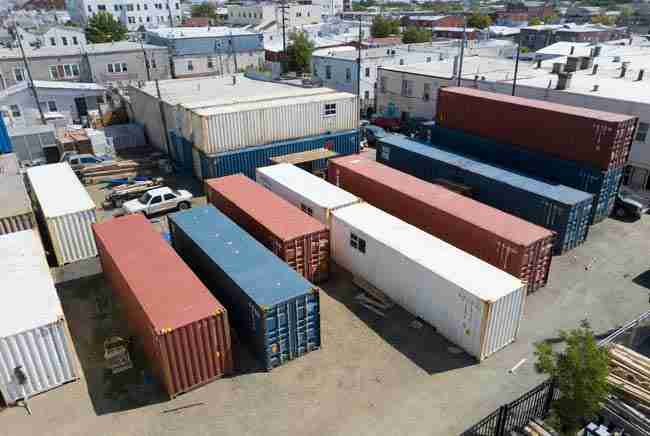
Used “one-trip” or “cargo-worthy” containers cost far less than brand-new ones and still give you decades of service. Look for 20-foot or 40-foot standard dry containers. A 20-foot unit gives you about 150 square feet of floor space — perfect for a first-time urban grower running 8–12 plants in soil or coco. A 40-foot container roughly doubles that and lets you separate vegetative and flowering zones or add a small drying area inside the same box.
Avoid containers that sat on the ground for years with water pooling inside. Check the floor for soft spots and the roof for major dents that could leak later. Many growers buy from local container yards or reputable resellers who let you walk inside before purchase. Spend a little extra for a wind-and-water-tight unit and you save thousands in repairs later.
Size and Layout Decisions That Actually Matter
A 20-foot container works beautifully for beginners or anyone limited on yard space. You can fit a 4×8 or 4×12 grow area plus room for a small veg tent or clone station at one end. Many urban growers start here because the container fits through most residential gates and does not require heavy permits just to park it.
A 40-foot container gives you serious production room. You can run a full perpetual harvest: clones and veg at one end, flowering in the middle, and a small drying/curing section at the far end. You can also connect two containers later with a short hallway or simply place them side by side and run ducting between them. That is the beauty of scalable home cannabis setup thinking — start small, expand when your skills and harvest goals grow.
Insulating Your Container for Real Canadian and US Weather
Steel conducts heat and cold like crazy. Without proper insulation your container will swing 30–40 degrees between day and night or between seasons, and your plants will hate you for it.
Best Insulation Materials and Target R-Values
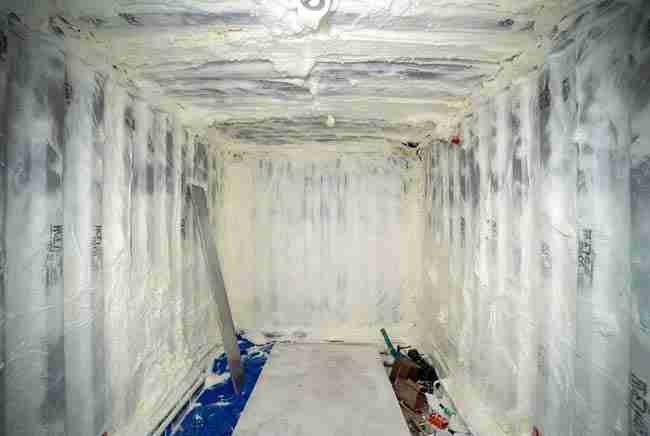
Closed-cell spray foam is the gold standard for shipping container cannabis grow builds. It sticks to every surface, fills every gap, and gives you both insulation and a vapor barrier in one step. Aim for at least 2–3 inches on walls and ceiling (roughly R-13 to R-20) and 2 inches under a raised false floor if you are building one. Rigid foam boards (XPS or polyiso) work well too and are easier for DIYers who want to avoid the mess of spray foam. Just seal every seam with tape or foam.
In cold Canadian winters or northern U.S. states you want every bit of R-value you can get. In hot southern summers the same insulation keeps the air conditioner from running nonstop. Many growers add a layer of reflective radiant barrier under the roof deck before insulation to knock down radiant heat from the sun.
Dealing with Condensation and Mold Before It Starts
Metal sweats when warm moist air hits cold steel. That is why you must seal the interior completely with a vapor barrier and keep humidity controlled. Run a good dehumidifier during flowering and make sure your ventilation brings in fresh air without creating cold spots on the walls. A small drip or two of condensation is normal; streams running down the walls mean you missed a spot or your humidity is too high.
Ventilation, Airflow, and Odor Control That Actually Work
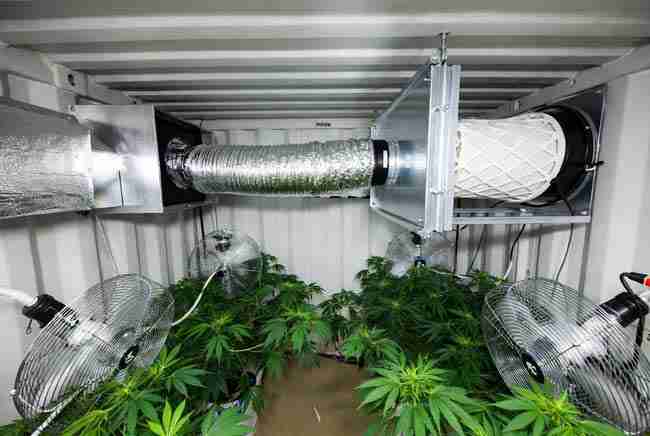
Plants need fresh air exchange every few minutes, and your neighbors do not need to smell flowering cannabis from three houses away.
Calculating CFM and Building a Proper System
A rough rule of thumb for a shipping container cannabis grow is to exchange the entire air volume of the container 1–2 times per minute during lights-on when heat load is highest. Measure your interior volume (length × width × height) and size your exhaust fan accordingly. Most growers end up with a 6-inch or 8-inch inline fan pulling 400–600+ CFM.
Pair the exhaust fan with a properly sized carbon filter. Match the CFM rating of the filter to the fan or slightly higher so the filter does not become a bottleneck. Hang the filter inside or outside depending on space and noise. Add passive intake vents or a second fan bringing fresh air in low and pushing hot air out high. Oscillating fans inside keep air moving across every leaf so you avoid micro-climates and mold pockets.
In urban neighborhoods odor control is non-negotiable. A quality carbon filter plus negative pressure (exhaust stronger than intake) keeps smells inside the container where they belong.
Lighting Your Shipping Container Cannabis Grow for Maximum Yield
Containers are narrow, so light placement and efficiency matter more than in a big room.
LED Recommendations and Wattage Guidelines
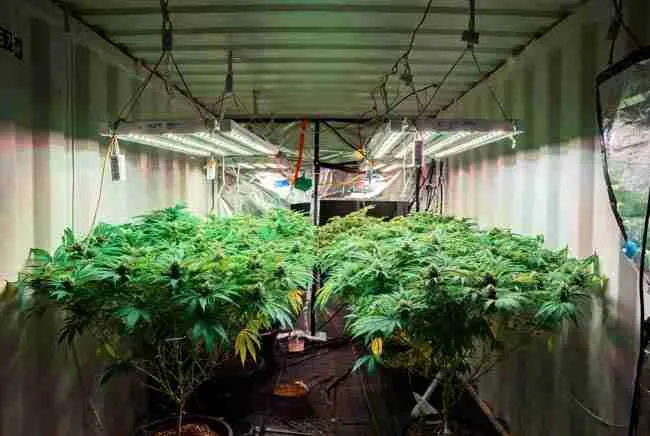
Full-spectrum LED bars or quantum boards are the clear winners for container grows. They run cooler than old HPS lamps, use less electricity, and give you the spectrum plants love from seedling to harvest. For a 20-foot container most growers run 600–1,000 actual watts of good LED during flowering. That translates to roughly 30–50 watts per square foot depending on how densely you pack the canopy.
Hang lights on adjustable ratchet hangers or unistrut so you can raise and lower them as plants stretch. Many container growers run two or three parallel rows of lights the full length of the box. Reflective mylar or white walls bounce every photon back onto the plants. Aim for even coverage — no bright hot spots and no dark corners.
Power, Water, and Smart Controls — The Hidden Details That Make or Break Your Grow
Electrical Load Planning You Cannot Skip
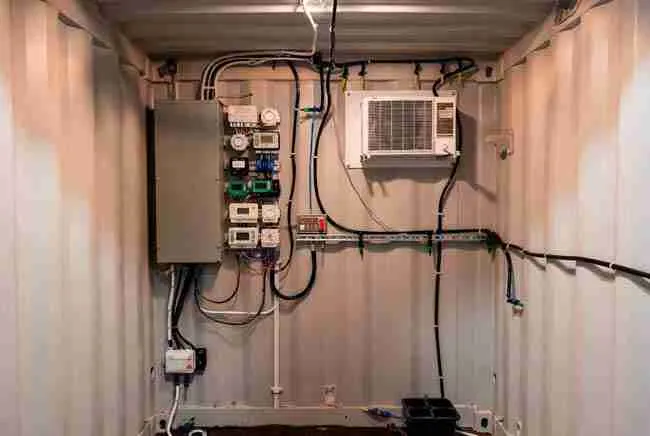
Lights, exhaust fans, intake fans, dehumidifier, heater or AC, pumps — it all adds up fast. A 20-foot container with a full LED setup can easily pull 15–25 amps on one circuit during peak hours. Have a licensed electrician run proper 220V or multiple 120V circuits with the correct wire gauge and breakers. Use smart timers or controllers so lights come on and off smoothly and you can monitor everything from your phone.
Irrigation and Drainage That Keep Roots Happy
Most container growers use fabric pots or raised beds with drip irrigation or hand watering. Make sure the floor slopes slightly to a drain or you build a false floor with a sump. Standing water under the container is a recipe for root rot and pests. A simple timer and drip lines on a manifold let you water consistently even when you are at work.
Automation is your friend here. A basic temp/humidity controller that turns on exhaust or dehumidifier when readings go out of range saves plants and electricity. Many growers add cheap Wi-Fi sensors and a simple dashboard so they can check conditions from the couch.
Complete Step-by-Step Conversion Blueprint Most Growers Follow
Here is a practical order that has worked for hundreds of home growers turning steel boxes into thriving gardens:
- Choose and site your container on level ground or concrete blocks. Make sure you have easy access for delivery and future maintenance.
- Clean the interior thoroughly. Remove any old stickers, grease, or debris. Fix any floor damage.
- Install electrical first — run conduit or surface-mount boxes while walls are still open. Plan outlet locations for lights, fans, and controllers.
- Insulate walls, ceiling, and floor. Spray foam or rigid boards plus vapor barrier. Let everything cure fully.
- Build your ventilation system — mount fan and carbon filter, run ducting, install intake vents.
- Add HVAC if your climate needs it — mini-split heat pump units work great in containers and handle both heating and cooling.
- Install lighting tracks or hangers and reflective material on walls.
- Set up irrigation and drainage. Test for leaks.
- Add shelving, racks, or trellis systems if you are growing vertically.
- Seal every penetration (wires, ducts, pipes) with expanding foam or silicone so light and pests cannot sneak in.
- Run a full systems test for 48 hours before bringing in plants. Fix any hot spots, cold spots, or weird noises now.
- Pop your first seeds or clones from Green Avenger Seeds and enjoy the controlled environment you built.
Cost Comparison: Shipping Container Cannabis Grow vs Traditional Tent Setup
Here is a realistic ballpark breakdown (CAD/USD approximate, 2026 prices, DIY labor) for a basic but functional 20-foot container versus a comparable 4×8 or 5×10 tent setup. Your numbers will vary by region, new-versus-used choices, and how fancy you go with automation.
| Item | Shipping Container (20 ft) | Traditional Tent Setup | Notes |
|---|---|---|---|
| Container / Tent | $2,500 – $4,000 | $300 – $600 | Used container vs quality tent |
| Insulation & Vapor Barrier | $1,200 – $2,500 | $0 (tent walls are thin) | Spray foam or rigid boards |
| Ventilation + Carbon Filter | $600 – $1,200 | $400 – $800 | Larger filter often needed in container |
| LED Lighting (full cycle) | $800 – $1,800 | $600 – $1,400 | Similar wattage, container may need more reflectors |
| Electrical & Timers | $800 – $1,500 | $300 – $600 | Container needs proper circuits & panel work |
| HVAC / Mini-Split or Heater | $1,500 – $3,500 | $200 – $600 (portable) | Container holds temperature far better once insulated |
| Misc (racks, mylar, drains) | $400 – $900 | $200 – $400 | Container often needs false floor or drainage solution |
| Total Ballpark | $7,800 – $15,400 | $2,000 – $5,000 | Container costs more upfront but lasts decades and offers security + climate control |
Many growers find the container pays for itself in 2–4 years through bigger, more consistent harvests, lower electricity waste, and zero tent replacements. Plus you get a structure you can sell or move later.
Pros and Cons of Modular Shipping Container Cannabis Growing
Pros
- Extremely secure and discreet — steel box with lockable doors
- Excellent climate control once insulated — works in Canadian winters or Texas summers
- Scalable — add another container whenever you are ready
- Long lifespan — 20–30+ years with basic maintenance
- Portable — you can move the whole operation if life changes
- Vertical growing potential in a compact footprint
- Lower long-term costs than constantly replacing tents or dealing with outdoor weather damage
Cons
- Higher upfront cost than a simple tent
- Requires real electrical and possibly HVAC work
- Narrow width limits layout creativity (plan rows or vertical racks carefully)
- Condensation and moisture management demand attention
- Delivery and placement can need permits or heavy equipment in some cities
- Power draw is still significant — budget for efficient LEDs and good insulation
Scaling Your Urban Cannabis Cultivation Shipping Container Over Time
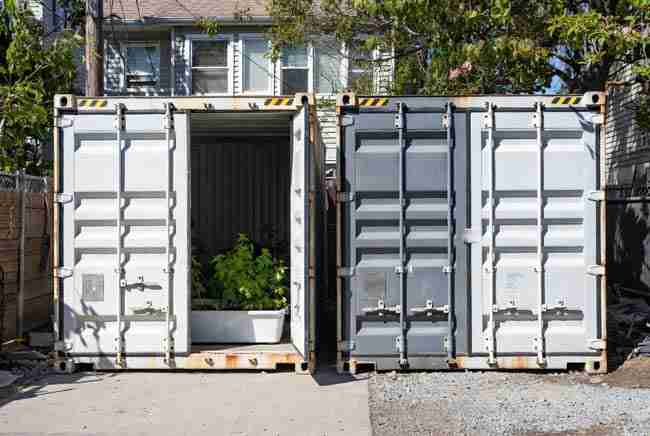
One of the best parts of this method is how naturally it grows with you. Start with one 20-foot container for your first few cycles. Learn your environment, dial in your watering and lighting, and harvest consistently. When you are ready for bigger yields or a perpetual setup, simply add a second container beside or behind the first. Run veg and clones in one, flower in the other, or use the second for drying and curing so your main grow space stays clean.
You can connect them with a short insulated hallway later or just move plants between boxes. Some growers eventually link three or four containers and create dedicated rooms for mother plants, cloning, vegetative growth, flowering, and drying — all still on the same small urban lot. That is true scalable home cannabis setup thinking in action.
Common Shipping Container Cannabis Grow Mistakes and How to Avoid Them
New container growers often under-insulate and then fight temperature swings all year. Others cheap out on the carbon filter and end up with smell complaints. Skipping proper electrical planning leads to tripped breakers or, worse, fire hazards. Always size your ventilation for the heat load of your lights, not just the size of the box. And please — start with vigorous, stable genetics from Green Avenger Seeds so your environment investment actually produces the results you deserve.
Another frequent mistake is ignoring drainage. Build a slight slope or false floor with a drain from the very beginning. Standing water under plants ruins roots fast in any enclosed space.
Your Next Steps Toward a Thriving Shipping Container Cannabis Grow
You now have a complete roadmap: pick the right size container, insulate it properly for your climate, build solid ventilation and odor control, hang efficient LEDs, plan your power and water, follow the step-by-step conversion order, and start with excellent seeds. The result is a secure, private, year-round growing environment that fits even the smallest urban lot and can expand with your ambitions.
Whether you are in Quebec dealing with long winters, British Columbia managing humidity, or somewhere in the United States with hot summers and cold nights, a well-built shipping container cannabis grow gives you control that tents and outdoor plots simply cannot match.
Ready to turn that dream into reality? Grab your first batch of proven cannabis seeds from Green Avenger Seeds, measure your space, and start planning your container. You have got this — and your future harvests are going to be seriously impressive.
