Korean Natural Farming KNF for Cannabis: Indigenous Microorganisms Build Superior Living Soil


You want your cannabis plants to thrive like never before, right? Picture this: lush green leaves, massive sticky buds packed with terpenes that smell like heaven, and zero nasty pests or diseases wrecking your grow. That’s exactly what happens when you dive into knf cannabis. Korean natural farming cannabis turns your soil into a living powerhouse full of indigenous microorganisms imo cannabis. These tiny helpers break down nutrients, fight off bad bugs, and give your plants everything they need without pricey store-bought stuff.
You get bigger yields, stronger flavors, and rock-solid health—all while saving cash and helping the planet. If you’re tired of guessing with synthetic feeds or watching your plants struggle, korean natural farming cannabis is your ticket to success. It works wonders with any setup, from tiny tents to big outdoor plots. And best of all, it pairs perfectly with premium genetics like those from Green Avenger Seeds. Let’s walk you through everything step by step so you can start building superior living soil today.
(Image: knf-cannabis-living-soil.jpg)
What Is Korean Natural Farming KNF for Cannabis?

Korean natural farming, or knf cannabis, started back in the 1960s when Cho Han-kyu in Korea blended old-school Asian methods with a smart eye on nature. You don’t dump chemicals or till the dirt to death. Instead, you team up with local microbes to create fertile soil that feeds your cannabis plants exactly when they need it.
The whole idea follows something called the nutritive cycle theory. You match inputs to each growth stage—seedling, veg, or flower—so your plants stay balanced and happy. No more yellow leaves or weak buds. With knf cannabis, you use stuff you can find or make right at home, like fermented juices from plants in your yard.
However, the real magic comes from indigenous microorganisms imo cannabis. These are the bacteria, fungi, and other tiny life forms already living in your local forest or garden. You capture them, grow them, and add them to your soil. Suddenly, your medium turns into rich, airy living soil that holds water better, releases nutrients faster, and keeps roots healthy.
You save money because you skip expensive fertilizers. Plus, your cannabis ends up tasting better and packing more punch. Growers who switch to korean natural farming cannabis often report fewer problems with mold or bugs because the soil stays alive and balanced. It’s not just growing weed—it’s building an ecosystem that keeps giving back season after season.
Why Indigenous Microorganisms IMO Cannabis Create Superior Living Soil
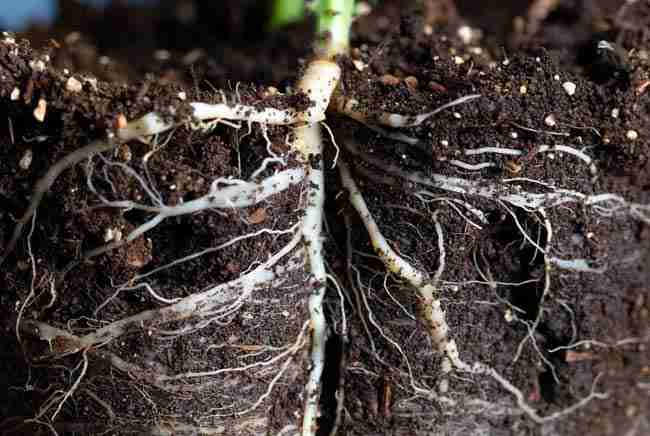
Indigenous microorganisms imo cannabis are your secret weapon. These local microbes know your climate, your water, and your soil type better than any store-bought inoculant. When you add them to your grow, they team up with roots to unlock locked-up nutrients. Phosphorus that used to sit useless? Now your plants grab it easy. Nitrogen gets cycled naturally so you avoid burn.
You see thicker stems, bigger leaves, and buds dripping with resin. The soil structure improves too—no more compaction or runoff. Water soaks in and stays put, which means less watering and happier plants during dry spells.
Moreover, these microbes crowd out bad guys like harmful fungi or bacteria that cause rot. Your cannabis develops natural resistance, so you spray less and stress less. In knf cannabis grows, the soil becomes so alive you can almost feel the energy when you dig in. It’s like your garden turns into a self-sustaining machine that keeps improving year after year.
Step-by-Step Instructions to Collect and Culture Indigenous Microorganisms IMO from Forest Floors
You can collect indigenous microorganisms imo cannabis yourself—it’s easier than you think and totally free. Follow these steps exactly and you’ll have a powerful starter culture in about two weeks.
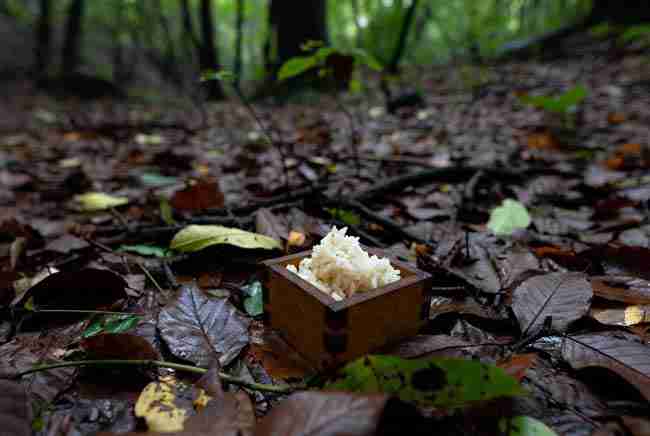
First, pick the right spot. Head to a healthy forest floor, under bamboo, oak trees, or any area with lots of natural plant life and moist, shaded soil. Avoid spots near roads or sprayed fields. Early morning works best because microbes are active.
Next, cook some white rice. Use one part rice to a little less than one part water so it stays fluffy, not mushy. Let it cool completely. Some growers add a splash of fermented plant juice or oriental herbal nutrient to attract even more good microbes, but plain rice works fine too.
Now grab a container. A small wooden box made of cedar is ideal because it breathes and doesn’t harbor bad stuff. You can also use a wicker basket or a bucket with holes drilled in the sides and bottom. Fill it about one-third full with the cooled rice. Leave room at the top.
Cover the rice with a breathable cloth or paper towel, then add a loose lid of wire mesh or more leaves to keep animals out but let air and microbes in. Place the box right on the forest floor after brushing away the top leaves. Cover lightly with leaf litter or a board to protect from rain.
Leave it alone for four to seven days. Check on day five. You want to see white fuzzy mycelium covering the rice—that’s your sign of success! If you see green, blue, red, or gray mold, toss it and try again in a better spot.
Once you have white-covered rice, that’s IMO1. Weigh it and mix in an equal weight of brown sugar. Stir well, pack into a jar, cover loosely with cloth, and let it ferment in a cool dark place for another five to seven days. Now you have IMO2, a sweet-smelling culture ready to multiply.
You can take it further to IMO3 and IMO4 by mixing with bran or wood chips and more inputs, but IMO2 already gives your soil a huge boost. Store it cool and use within months for best results. Add a handful to your soil mix or top-dress around your cannabis plants. Watch how fast the roots explode and the whole garden comes alive.
(Image: knf-cannabis-imo-collection.jpg)
Full Recipes for KNF Inputs Including Fermented Plant Juices, Fish Hydrolysate, and Brown Rice Vinegar
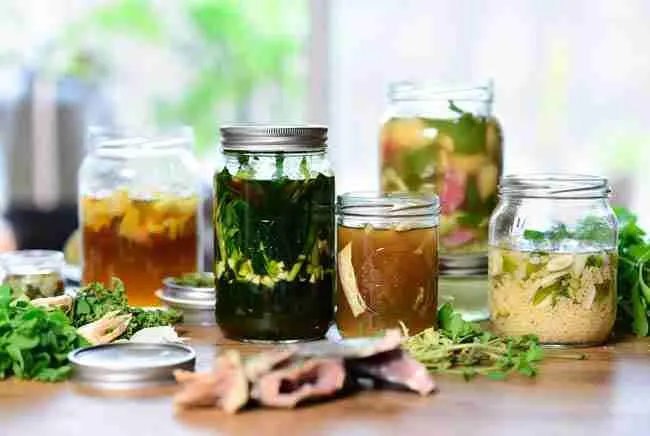
Making your own knf fermented inputs marijuana is simple, cheap, and way more effective than bottled stuff. You use what nature gives you and let fermentation do the work. Here are the full recipes you need for korean natural farming cannabis success.
Fermented Plant Juice (FPJ) Collect fast-growing, healthy plant material like comfrey leaves, stinging nettle, bamboo shoots, or even young cannabis leaves. Do this before sunrise so the plants still hold all their enzymes and hormones. Cut into small pieces—no need to wash. Weigh the material, then add an equal weight of brown sugar. Mix like a salad until everything is coated. Pack tightly into a jar, filling it about two-thirds full. Cover with breathable cloth and store in a dark spot at room temperature for seven to ten days. You’ll see liquid form at the bottom. Strain it out and store in the fridge. This FPJ gives your plants growth hormones and nutrients perfect for the vegetative stage in knf cannabis.
Fish Hydrolysate (FAA – Fish Amino Acid) Use fresh fish waste, heads, or scraps—fatty fish like salmon or tilapia work great. Remove bones if possible. Layer the fish with an equal weight of brown sugar in a bucket. Press down so juices start flowing. Cover loosely and let it ferment for at least six months in a sheltered spot. It might smell strong at first, but it mellows into something sweet. Strain the liquid and dilute heavily before use. This high-nitrogen input powers explosive veg growth in your korean natural farming cannabis setup.
Brown Rice Vinegar (BRV) You can buy good-quality brown rice vinegar or make your own. For homemade, rinse white rice and collect the starchy water. Add a little mother of vinegar or unpasteurized apple cider vinegar. Let it sit covered for a month or two until it turns tangy. BRV helps with vegetative growth and works as a base for other recipes like water-soluble calcium. Use it in mixes to balance pH and feed microbes.
You can also make fermented fruit juice (FFJ) the same way as FPJ but with ripe fruits like banana, papaya, or berries for flowering boosts. Lactobacillus serum (LAB) comes from rice wash fermented with milk—great for cleaning soil and fighting disease. Oriental herbal nutrient (OHN) uses garlic, ginger, and other herbs soaked in alcohol and sugar for pest protection. Water-soluble calcium (WCA) is made by roasting eggshells and dissolving them in BRV. All these knf recipes for cannabis growers keep your inputs local and alive.
Detailed Feeding Calendars Matched to Each Cannabis Growth Stage

You match your knf inputs to the exact needs of your plants so nothing goes to waste. Here is a simple feeding calendar you can follow. Dilute everything in dechlorinated water at about 1 ml per liter unless noted. Spray or water in the evening or early morning.
| Growth Stage | Main Inputs | Dilution (per liter) | How Often | Why It Helps |
|---|---|---|---|---|
| Seedling | IMO2 + LAB + small FPJ | 1 ml each | Once a week as soil drench | Builds roots and prevents damping off |
| Vegetative | FPJ + FAA + OHN + BRV | 2 ml FPJ, 1 ml others | Twice a week | Explosive leaf and stem growth |
| Pre-Flower/Transition | FPJ + FFJ + WCA + OHN | 1 ml each | Twice a week | Smooth shift without stress |
| Early Flowering | FFJ + WCA + OHN + FAA (low) | 2 ml FFJ, 1 ml others | Twice a week | Bud sites swell and resin starts |
| Late Flowering | FFJ + WCA + BRV + seawater (diluted) | 2 ml FFJ, 1 ml others | Once a week, taper off | Boosts terpenes and final swell |
| Flush | Plain water or light BRV | Minimal | Last 10-14 days | Cleans for smooth smoke |
Adjust based on your strain and environment. Always start low and watch your plants. They tell you what they need.
(Image: knf-cannabis-feeding-calendar.jpg)
Real Grower Case Studies Showing Improved Terpene Profiles and Disease Resistance

Growers who switched to knf cannabis saw real magic. In one Oregon outdoor grow, a farmer using indigenous microorganisms imo cannabis reported his Blue Dream plants smelled stronger with pine and berry notes that popped way more than in synthetic soil. Powdery mildew that usually hit in humid summers? Gone. The living soil kept leaves dry and healthy all season.
Another indoor grower in Michigan ran side-by-side tests. Half his tent used standard organic nutes, the other full knf cannabis inputs. The KNF side finished two weeks earlier, yielded 20 percent more, and tested higher in THC and terpenes. Pests like spider mites barely showed up because beneficial microbes crowded them out.
In Montana, a medical cannabis farm using korean natural farming cannabis noticed patients raved about smoother effects and richer flavors. Disease resistance was so good they cut fungicide use to zero. These stories show you what happens when you build superior living soil—your plants reward you with quality you can taste and smell.
Transition Plans from Synthetic or Standard Organic Systems to Full KNF
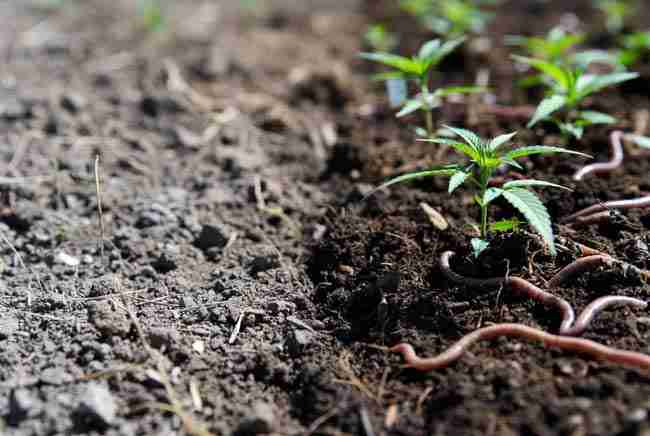
Switching to knf cannabis doesn’t have to shock your plants. Start slow and your garden thanks you.
Week one through four: Keep your current feed but add IMO2 and LAB to the soil every watering. This wakes up the microbes without changing everything at once. Top-dress with a light layer of compost mixed with IMO.
Month two: Cut synthetic nutes by half and replace with FPJ and FAA at half strength. Foliar spray with diluted OHN once a week to build resilience. Watch for any stress and ease back if needed.
Month three and beyond: Go full knf cannabis. Use the feeding calendar above and stop synthetics completely. Your soil will already be teeming with life, so the change feels natural.
However, if you were heavy on salts before, flush well first. Add more mulch to keep moisture even. Within one full cycle, your living soil will be so strong you won’t look back. Many growers say the transition pays for itself in saved costs and better buds.
Best Practices for Combining KNF with Your Premium Green Avenger Seeds Genetics

Your Green Avenger Seeds genetics already carry top-notch traits for potency and vigor. Pair them with knf cannabis and you unlock their full potential. Start seeds or clones in a light soil mix inoculated with IMO2 and LAB. The microbes colonize roots early so plants explode from day one.
During veg, use more FPJ from comfrey or nettle to match the fast growth these strains love. In flower, lean on FFJ from fruits to boost the sweet, fruity, or gassy terpenes bred into many Green Avenger lines.
You also get better phenotype expression because the living soil lets each plant show its best side. No nutrient lockout means you see true colors, smells, and effects. Top-dress with IMO4 around the base every few weeks and your plants stay happy even in containers or beds.
Best practice? Keep records of what inputs you used each week. Your next run gets even better. With Green Avenger Seeds and knf cannabis, you grow like a pro without the guesswork.
Pros and Cons of KNF Cannabis Growing
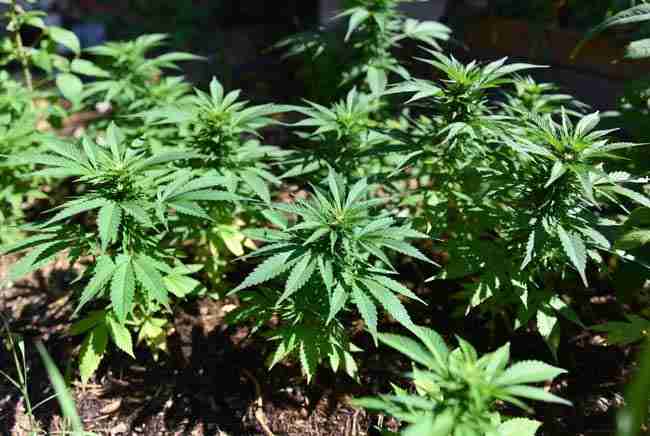
Every method has ups and downs, so let’s keep it real.
Pros
- Super cheap after you make your first batches of inputs
- Builds soil that gets better every year
- Fewer pests and diseases because microbes do the work
- Richer terpene profiles and smoother smoke
- Eco-friendly and sustainable
- Works indoors, outdoors, or in greenhouses
Cons
- Takes time to learn the recipes and schedule
- Some ferments smell strong during making
- Initial collection of IMO needs a nearby forest or healthy wild area
- Results come slower than synthetic nutes in the very first week
- You must stay consistent with dilutions and timing
Overall, the pros win big once you get the hang of it. Most growers say the extra effort is worth every minute.
Additional Tips for Natural Farming Cannabis Soil Success
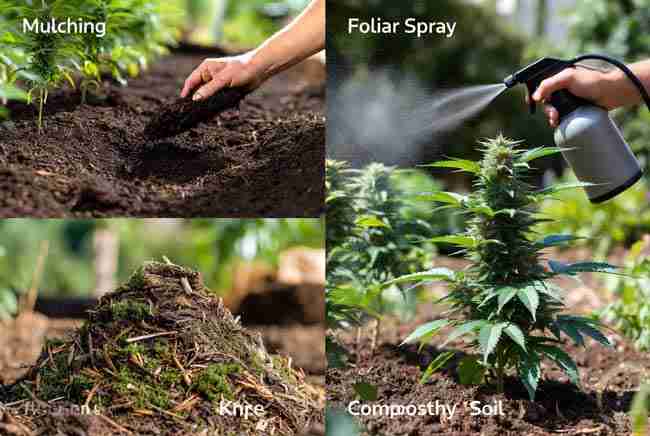
You can layer even more wins into your knf cannabis system. Try no-till methods so you never disturb the microbes. Mulch with chopped cannabis trim or leaf litter to feed the soil life.
Add companion plants like marigolds or basil around your pots—they bring extra good bugs and microbes. Test your soil pH now and then; knf naturally keeps it around 6.0 to 6.5 where cannabis loves it.
During hot spells, diluted seawater (1:30) adds trace minerals and helps plants handle stress. In cold weather, LAB serum warms things up by improving root activity.
Keep a simple journal of what you feed each week and how your plants respond. Soon you’ll tweak the system to fit your exact setup. These small habits turn good grows into legendary ones.
Here is a quick list of ten ways to boost your knf cannabis results right now:
- Always collect plant material before sunrise.
- Use only breathable covers on ferments.
- Dilute everything more than you think at first.
- Spray foliar feeds after lights out or in shade.
- Rotate different FPJ sources for variety.
- Add biochar to hold onto microbes longer.
- Never let ferments freeze or get too hot.
- Top-dress with IMO every three weeks.
- Combine with living mulch like clover in outdoor beds.
- Trust your plants—they show you what works.
FAQ About KNF Cannabis

What exactly is knf cannabis and why should I try it?
Knf cannabis is Korean natural farming adapted for weed. You use local microbes and homemade ferments instead of synthetic feeds so your soil stays alive and your buds taste amazing.
How long does it take to collect indigenous microorganisms imo cannabis?
You can have IMO2 ready in about two weeks if you follow the forest collection steps carefully.
Can I use knf fermented inputs marijuana with hydroponics?
Yes, but start with living soil first. Many growers add small amounts of FPJ and FAA to reservoir water for a hybrid approach.
Will knf cannabis work with autoflowering strains?
Absolutely. The gentle feeding schedule matches the fast life cycle of autos perfectly and helps them pack on resin.
Is korean natural farming cannabis safe for beginners?
It is! Start small with one or two inputs and build from there. Your plants forgive mistakes easier than with harsh chemicals.
How do I store my knf recipes long-term?
Keep them in the fridge or super-saturate with extra sugar for room-temperature storage up to a year.
Does knf cannabis increase terpenes and potency?
Growers report yes—stronger smells, richer flavors, and higher cannabinoid levels because the living soil feeds the plant exactly what it needs.
You now have everything to get started with knf cannabis. Grab some rice, head to the woods, and begin building that superior living soil. Your next harvest will thank you with buds you are proud to share.