Home Tissue Culture for Cannabis: Propagate Unlimited Clones in Jars


You’ve got one killer cannabis strain that’s been your go-to for years, but lately the plants just aren’t as strong as they used to be. Pests keep sneaking in, yields are dropping, and you’re tired of buying fresh seeds or taking endless cuttings that sometimes flop. What if you could snap off one tiny piece of that plant, pop it into a jar, and crank out hundreds – yep, hundreds – of perfect, disease-free clones whenever you want? That’s the magic of tissue culture cannabis, and you can pull it off right at home with nothing fancier than some jars and your pressure cooker.
In this complete guide, you’ll discover exactly how to do cannabis micropropagation home style using sterile cloning cannabis jars. We’re talking unlimited clones, the power to preserve genetics cannabis forever, and even cleaning up old strains that have seen better days. No fancy lab required – just you, a bit of patience, and some simple steps that even a total newbie can nail. Let’s walk through every single detail together so you end up with thriving plantlets ready to explode into massive buds. Ready? Let’s get those jars humming!
Why Tissue Culture Cannabis Changes Everything for Home Growers Like You
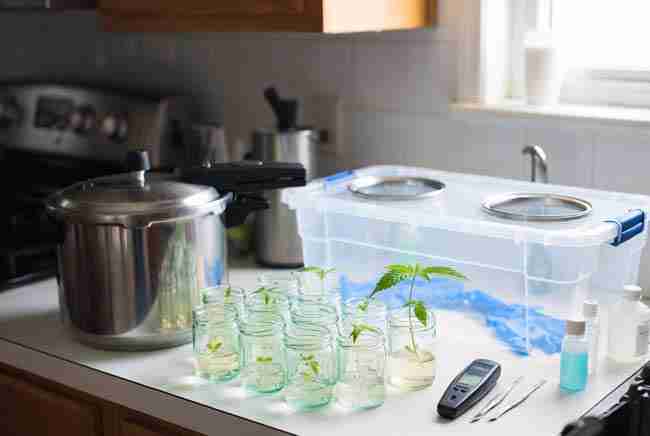
You know how regular cloning works – you cut a branch, dip it in rooting hormone, and cross your fingers. Sometimes it takes, sometimes it doesn’t, and diseases like hop latent viroid can hitch a ride. Tissue culture cannabis flips the script completely. You take a super-small piece called an explant, grow it in a sterile jar on gel media, and watch it multiply like crazy in a controlled environment.
However, the real jackpot comes when you realize one jar can lead to dozens more in just weeks. On the other hand, traditional cuttings take space and risk contamination every time. With home tissue culture cannabis explants, you stay small, clean, and in total control.
First off, you preserve genetics cannabis that might otherwise get lost – think heirloom strains from Green Avenger Seeds that you love but worry about weakening over time. Plus, you create disease-free stock that laughs at pests and viruses. Yet, it does take some practice, so don’t worry if your first batch has a hiccup or two. The payoff? Unlimited clones year-round, no matter the season.
Pros you’ll love:
- Disease-free plants that stay vigorous
- Crazy-fast multiplication – one explant can become 1000 in months
- Tiny space needed compared to mother rooms
- Long-term storage in jars for years
- Perfect uniformity so every plant grows exactly the same
Cons to keep in mind:
- Steep learning curve at first
- Strict sterility rules – one slip and contamination hits
- Initial setup costs around $100-300
- Takes 4-8 weeks per cycle before you see big results
Still, once you nail it, you’ll wonder how you ever grew without tissue culture cannabis.
Gathering Everything You Need for Your Beginner Sterile Lab
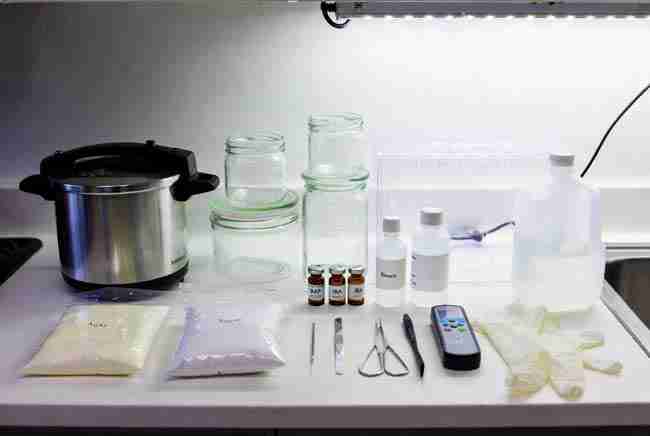
Before you touch a single plant, let’s round up the gear. You won’t need a million-dollar lab – just smart, cheap stuff you can find online or at the grocery store. Here’s the full materials list that works perfectly with a pressure cooker and jars:
- One pressure cooker with gauge (15 psi capability, any size that fits 6-8 jars)
- 20-30 wide-mouth glass jars (baby food jars or 4-oz mason jars work great – autoclavable)
- Distilled water (1 gallon to start)
- Agar-agar powder (food grade, about 200g)
- White table sugar (regular cane sugar)
- MS nutrient salts (pre-mixed powder from garden suppliers – or start simple with a basic fertilizer mix)
- Plant hormones: 6-Benzylaminopurine (BAP) powder for multiplication and Indole-3-butyric acid (IBA) for rooting (small 1g packs last forever)
- 70% isopropyl alcohol
- Household bleach (5-6% sodium hypochlorite)
- A few drops of dish soap or Tween 20 (helps bleach stick)
- pH meter or test strips (aim for 5.7-5.8)
- Sharp scalpel and fine forceps (buy cheap stainless ones)
- Nitrile gloves (box of 100)
- 70% ethanol or alcohol lamp for tool sterilization
- DIY still air box (clear plastic storage bin with two arm holes cut and covered in plastic sheeting)
- LED grow light or fluorescent tubes (cool white, for 16-hour days)
- Thermometer and small fan for your grow shelf
- Hydrogen peroxide (3%) as backup sterilant
- Aluminum foil and parafilm or jar lids
- Small spray bottle for sterile water
Grab all that and you’re set for months of experiments. Total starter cost? Usually under $200 if you shop smart. Meanwhile, organize everything on a clean counter so you feel like a real scientist.
Setting Up Your Sterile Workspace the Easy Way
You don’t need a laminar flow hood right away. Instead, build a simple still air box from a clear storage bin. Cut two holes for your arms, cover edges with tape, and spray everything inside with 70% alcohol before you work. Place it on your cleanest counter, turn off fans and AC to stop air movement, and you’ve got a sterile zone.
However, the pressure cooker does the heavy lifting for sterilizing jars and media. Run it at 15 psi for 15-20 minutes – that kills every nasty bacteria or fungus spore. First off, wash all jars in hot soapy water, rinse well, and load them into the cooker with a little water at the bottom. Let it cool naturally so lids don’t pop off. Boom – sterile jars ready for action.
Choosing the Right Cannabis Explants Every Time
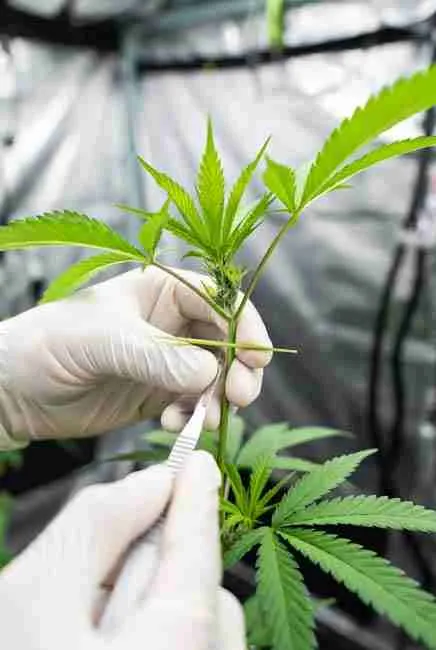
Start with a healthy mother plant – one that’s vigorous, pest-free, and shows the traits you adore. Young nodal sections work best because they have active growing points.
You grab a fresh branch tip, look for nodes where leaves meet the stem, and cut 1-2 cm pieces that include a tiny bud or leaf. However, avoid old woody stems or flowering parts – they fight the process. Meanwhile, take explants in the morning when the plant is perky. Cut under running water first to remove dirt. Keep them moist in a clean bowl until you sterilize. This simple choice decides whether your tissue culture cannabis explodes with growth or struggles.
Exact Step-by-Step Sterilization of Your Explants
Sterility is everything in tissue culture marijuana propagation – mess this up and you’re done.
First, rinse your explants under running tap water for 10 minutes to knock off loose dirt. Then dunk them in a mild soap solution for 5 minutes. Next comes the magic: mix 10% bleach (one part bleach to nine parts water) with a drop of dish soap. Soak the pieces for 10-15 minutes, gently swirling every few minutes.
However, don’t leave them too long or they’ll die. After that, rinse three times in sterile distilled water – use jars you already sterilized in the pressure cooker. Finally, dip in 70% alcohol for 30 seconds and rinse once more. Now you’re holding clean home tissue culture cannabis explants ready for the jar!
Crafting the Perfect Media Recipe for Cannabis Micropropagation Home
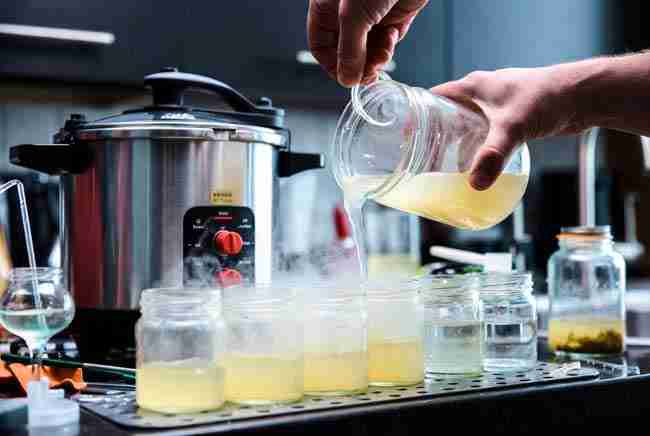
Here’s where the science feels like cooking. You’ll make three types of media: initiation, multiplication, and rooting.
Basic recipe for 1 liter (enough for about 20 jars):
- 4.4 grams MS nutrient salts
- 30 grams table sugar
- 6-8 grams agar powder
- Distilled water to 1 liter
- pH adjusted to 5.7-5.8 with a bit of vinegar or baking soda
Heat everything on the stove until the agar dissolves, then pour into your sterile jars while still hot. Pop the lids on loose and sterilize in the pressure cooker for 20 minutes. Let cool completely.
Now tweak for each stage with hormones (dissolve tiny amounts in alcohol first):
| Stage | Hormone Addition | Purpose | Light Needs | Expected Time |
|---|---|---|---|---|
| Initiation | None or 0.5 mg/L BAP | Get explant to wake up and grow | 16 hours low light | 2-4 weeks |
| Multiplication | 1-2 mg/L BAP | Explode new shoots from every node | 16-18 hours medium | Every 4 weeks |
| Rooting | 0.5-1 mg/L IBA | Grow strong roots before soil | 16 hours low light | 2-3 weeks |
You’ll love how simple this table makes planning. Meanwhile, always sterilize the hormones separately if needed so they don’t break down in heat.
Inoculation: Getting Those Explants into Sterile Cloning Cannabis Jars
Inside your still air box, put on fresh gloves, spray everything with alcohol, and flame your tools. Cut the sterilized explant into smaller 1 cm pieces if needed, then gently push the base into the gel media so it stands upright. Seal the jar tight.
However, label each jar with date and strain – you’ll thank yourself later. Place them on a shelf at 22-26°C with 16 hours of gentle light from your LED (around 1000-2000 lux). In two weeks you’ll see swelling and new growth. That first green shoot? Pure satisfaction!
Multiplication Stage – Watch Your Clones Multiply Like Crazy
Once shoots appear, you subculture. Open the jar in the still air box, cut each new shoot into single-node pieces, and move them to fresh multiplication media with BAP.
However, you can get 4-8 new shoots per explant every four weeks. Keep repeating and soon one jar becomes ten. Lighting stays at 16 hours, temperature steady. This is where cannabis micropropagation home really shines – you can preserve genetics cannabis indefinitely by always keeping a few jars going.
Rooting Your Plantlets the Right Way
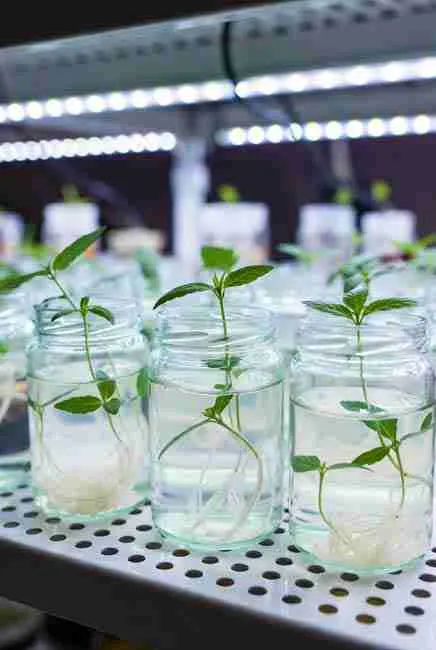
When you have enough shoots, switch to rooting media with IBA. The plantlets grow tiny white roots in 2-3 weeks. Keep the same light and temp.
Meanwhile, roots love oxygen, so don’t pack the jar too full. Once roots fill the bottom, you’re ready for the next big step.
How to Clean Contaminated Genetics and Rejuvenate Old Strains
Sometimes contamination sneaks in – fuzzy white mold or slimy bacteria. Don’t panic! Cut the cleanest tip of the shoot, re-sterilize it quickly in 10% bleach for just 5 minutes, rinse, and move to fresh media.
However, for really stubborn old strains full of viruses, use meristem culture: take the tiniest growing tip (0.2-0.5 mm) under a magnifying glass. These baby cells are usually virus-free. You’ll watch your tired genetics bounce back stronger than ever. Growers swear by this to rejuvenate strains that lost potency after years of cloning.
Transitioning Plantlets to Soil Successfully – Your Plants Will Thank You
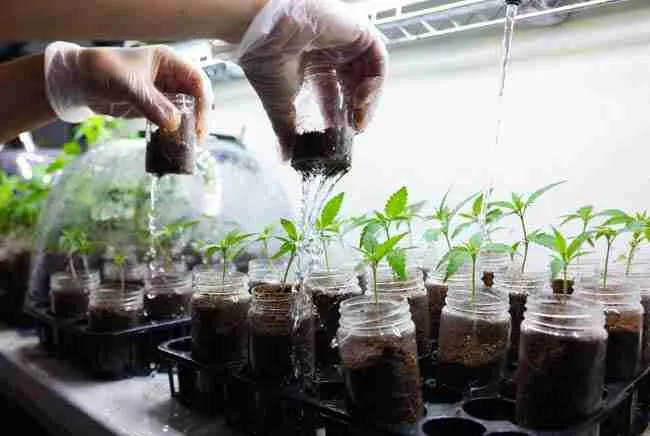
This step feels scary but you’ve got this. Gently wash all gel off the roots with lukewarm water. Plant into light seedling mix or coco coir.
Place under a humidity dome or clear plastic bag for the first week, mist daily, and keep light low at first. Gradually vent the dome over 7-10 days so they toughen up. Water lightly and watch them take off. Most plantlets survive if you go slow. In two weeks they look like normal seedlings and you’re ready to veg them hard.
Lighting, Temperature, and Daily Care Tips That Make the Difference
Keep your jars at 22-26°C – use a small heat mat if your room runs cool. Give 16 hours of cool-white LED light daily; too much intensity burns them.
Meanwhile, check jars every few days for contamination. If a jar looks perfect after eight weeks, celebrate – you just mastered tissue culture cannabis!
Troubleshooting Common Problems So You Never Quit
Yellow leaves? Check pH or light. No growth? Maybe hormone strength is off – start low next time. Contamination everywhere? Clean your workspace better and work faster.
However, most issues fix with practice. Keep notes on what works for your strains and you’ll hit paydirt fast.
Advanced Tips to Preserve Genetics Cannabis for Years
You can store jars in the fridge at 4°C for months between subcultures. Or cryopreserve in liquid nitrogen if you get serious. Either way, your favorite Green Avenger Seeds strains stay forever young.
FAQ About Tissue Culture Cannabis
What exactly is tissue culture cannabis and why should I try it at home?
It’s growing plants from tiny tissue pieces in sterile jars so you get unlimited identical clones. You’ll preserve genetics cannabis and skip diseases forever.
Can I really do cannabis micropropagation home with just a pressure cooker?
Absolutely! Thousands of growers start exactly like that and succeed with the steps above.
How long until I see results in sterile cloning cannabis jars?
Expect shoots in 2-4 weeks and rooted plantlets ready for soil in 6-10 weeks total.
What hormones do I need for multiplication and rooting stages?
Use BAP for shooting and IBA for roots – tiny amounts go a long way.
How do I clean contaminated genetics with home tissue culture cannabis explants?
Cut clean tips and re-sterilize, or use meristem culture for virus-free plants.
Will my transitioned plantlets grow as strong as regular clones?
Even stronger! They start disease-free and often show better vigor.
Can I preserve genetics cannabis long-term in jars?
Yes – subculture every 4-6 weeks or store cool for months.
Is tissue culture marijuana propagation safe and legal where I grow?
It’s just advanced cloning, so check your local laws but the method itself is simple and effective.
What’s the cheapest way to start home tissue culture cannabis?
Pressure cooker, baby food jars, and basic kitchen supplies – under $150 total.
How does tissue culture cannabis help with old or weak strains?
It rejuvenates them by cleaning viruses and restarting from healthy cells.
There you have it – the complete playbook for home tissue culture cannabis that actually works. You now know every material, every step, every hormone trick, and every troubleshooting hack to propagate unlimited clones in jars.
Go grab that pressure cooker, pick your favorite strain, and start today. In a few months you’ll have more healthy plants than you know what to do with, plus the satisfaction of preserving genetics cannabis like a true pro. Happy growing – your future bumper harvests are waiting in those jars!