


Home Cannabis Grafting Techniques: Create Stronger Hybrid Plants and Faster Recovery


Home cannabis grafting remains an unexplored frontier that lets growers combine best traits of different varieties. Therefore, this guide delivers practical value for serious cannabis cultivators.
Hey there, cannabis enthusiast! Have you ever watched one of your favorite plants struggle after a tough move or pest attack, wishing there was a way to give it superhero roots without starting over? That’s exactly where cannabis grafting steps in and changes the game. Instead of tossing a weak plant, you can fuse the top of a flavorful or potent strain onto a tough, vigorous root system. The result? Stronger hybrid plants that bounce back faster, resist disease better, and often deliver bigger harvests.
Whether you’re a home grower tired of losing plants to root rot or someone dreaming of running three different strains on one single rootstock, grafting cannabis plants opens doors regular cloning just can’t touch. In this complete guide, we’ll walk through everything you need to know about cannabis graft techniques home style — no lab coat required. You’ll get step-by-step instructions for the two easiest methods, real aftercare that actually works, troubleshooting when things go sideways, and creative ideas using Green Avenger Seeds strains. By the end, you’ll feel confident trying advanced cannabis propagation grafting yourself and watching your garden level up.
Must-Have Materials and Sterile Tools for Cannabis Grafting Success
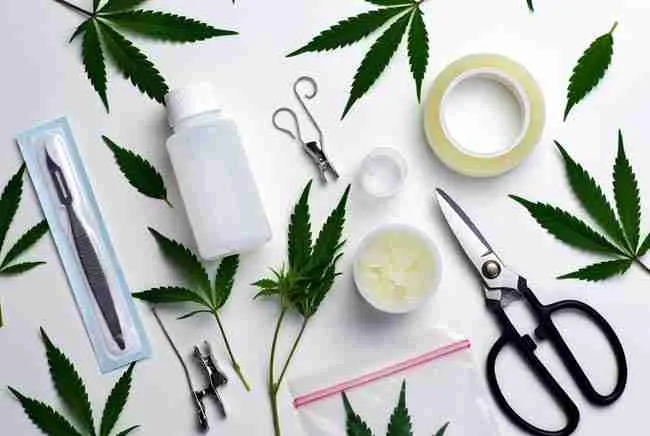
Before you even think about making that first cut, let’s talk tools. Cleanliness is everything in cannabis grafting because bacteria or fungi can sneak in and kill your union before it even starts. Here’s exactly what you need, and why each item matters:
- Sharp scalpel or single-edge razor blade — A clean, precise cut beats a jagged one every time. Dull blades crush cells and make healing harder.
- 70-99% isopropyl alcohol — Spray or wipe everything down. This kills hidden pathogens that love fresh wounds.
- Grafting tape, parafilm, or plumber’s tape — You need something stretchy that holds the pieces tight but lets the stem breathe a little.
- Humidity dome or large clear plastic bag — This keeps moisture sky-high so the scion doesn’t dry out while the graft heals.
- Grafting clips or soft plant wire — Extra security so nothing shifts during the first critical days.
- Cloning gel or rooting hormone (optional but helpful) — A tiny dab on the cut surfaces can speed callus formation.
- Clean cutting board or sterile surface — Never graft on a dirty table.
- Spray bottle with pH 6.0-6.5 water or very weak nutrient solution — For misting if things look dry.
- Healthy rootstock and scion plants — Both should be in veg, pencil-thick stems, no pests, and same diameter for best results.
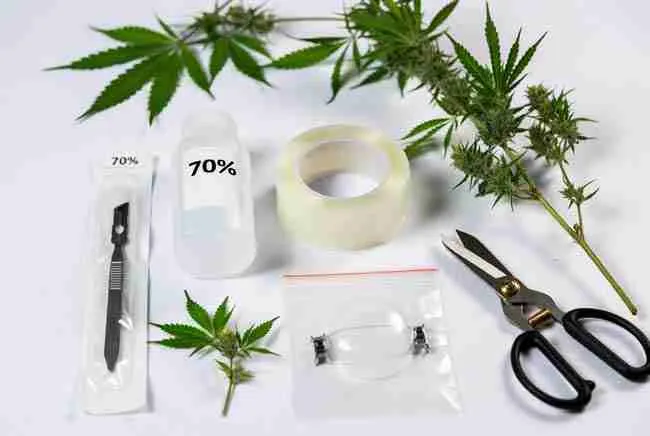
Pro tip: Set up everything on a clean towel in your grow space before you start. Once you begin cutting, you don’t want to hunt for tape with dirty hands. Many growers say the difference between a 40% success rate and an 85% success rate is simply how sterile they stayed.
Cleft Grafting Cannabis Plants Step by Step – The Beginner-Friendly Method

Cleft grafting is forgiving and works great when your rootstock stem is a little thicker than the scion. It’s one of the most popular cannabis graft techniques home growers use because it gives solid physical stability.
Selecting and Preparing Your Rootstock and Scion
Pick a vigorous rootstock plant that’s at least 4-6 weeks old in veg. Look for strong growth and a stem about the width of a pencil or slightly thicker. For the scion, choose a branch from the strain you actually want to flower — maybe that Blueberry from Green Avenger Seeds you’ve been dying to try again. Both pieces should be healthy, turgid (not wilted), and free of any spots or bugs.
Water both plants well the day before so they’re plump. Sterilize your blade by wiping it with alcohol and letting it dry.
Executing the Perfect Cleft Cut and Insertion
On the rootstock, make a horizontal cut straight across the stem about 6-8 inches above the soil. Then, right down the center of that cut, slice vertically about 1 inch deep to create the cleft (like a little V-shaped split).
Now take your scion cutting — it should be 3-5 inches long with 2-4 leaves on top. Cut the bottom into a long, smooth wedge shape on both sides so it looks like a flat chisel. The wedge should be roughly the same length as the cleft you made.
Gently open the cleft with your fingers or a clean tool and slide the wedge in so the green cambium layers (that slippery layer right under the outer skin) line up perfectly on at least one side — ideally both. This alignment is the secret sauce. If the layers don’t touch, the graft fails because nutrients and water can’t flow.
Securing the Graft Union
Wrap the whole area tightly with grafting tape or parafilm, stretching it slightly as you go so it seals everything but doesn’t strangle the stem. Add a clip or loose wire for extra hold if the stems feel wobbly. Mist the scion leaves lightly, pop the whole plant under a humidity dome, and place it in bright indirect light (around 100-150 µmol PAR).
That’s it for the cut. The whole process takes maybe 10 minutes once you’ve done it a couple times.
Whip-and-Tongue Grafting: Precision Technique for Stronger Unions in Grafted Marijuana

If your rootstock and scion stems are almost the same thickness, whip-and-tongue (also called splice grafting) gives an even stronger, faster-healing union. Many experienced growers prefer this advanced cannabis propagation grafting method because the interlocking “tongue” keeps everything rock solid.
Making the Matching Diagonal Cuts
Sterilize your blade again. On both the rootstock and scion, make a long, smooth 45-degree diagonal cut about 1 to 1.5 inches long. The cuts must match in length and angle as closely as possible.
Next, on each cut surface, make a small vertical slit about halfway down the middle — this creates the “tongue.” It sounds fancy, but it’s just a little notch that lets the two pieces lock together like puzzle pieces.
Aligning Cambium and Binding
Slide the tongues together so the green cambium layers overlap as much as possible. Wrap tightly with tape starting from the bottom and working up, then secure with wire or a clip. The better the initial fit, the quicker the graft takes and the faster your faster recovery grafted marijuana will start pushing new growth.
This method often heals in 7-10 days instead of 10-14, which is why so many home growers swear by it once they get the hang of the cuts.
Aftercare Protocols: Humidity Domes, Healing Timelines, and Monitoring for Faster Recovery
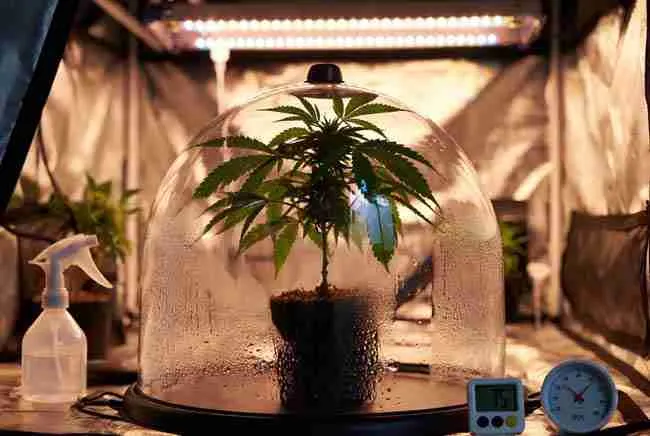
You did the hard part — now don’t blow it with bad aftercare! The first 48-72 hours are make-or-break for faster recovery grafted marijuana.
Setting Up Your Healing Chamber
Keep the plant under a humidity dome or sealed bag at 90-100% humidity for the first 5-7 days. Temperature around 75-78°F (24-26°C) with very low light — think 100-150 µmol, no direct sun or strong LEDs yet. Mist the inside of the dome once a day if it looks dry, but avoid soaking the leaves.
Day-by-Day Healing Timeline
- Days 1-3: Scion may look a little droopy — that’s normal. Don’t panic and rip the tape off.
- Days 4-7: You should see the scion perk up and new tiny growth starting. Humidity can drop to 85-90%.
- Days 8-14: Gradually open the dome vents or cut slits in the bag. By day 10-14 most successful grafts are stable enough to remove the dome completely.
- Week 3+: Treat it like a normal veg plant, but go easy on nutrients for the first feed or two.
Watch for wilting, yellowing, or black spots at the union — those are red flags we’ll cover in troubleshooting.
Boosting Success Rates – Troubleshooting Common Cannabis Graft Failures
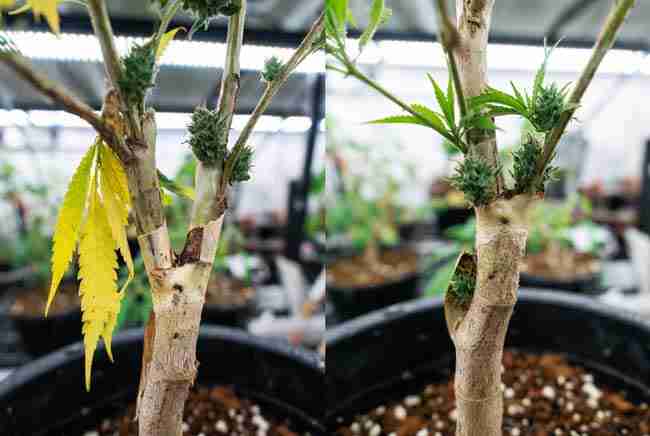
Even the best growers lose a graft now and then. Here’s a handy table to help you diagnose and fix problems fast:
| Problem | Likely Cause | Quick Fix | Prevention Tip |
|---|---|---|---|
| Scion wilts badly in 24-48 hrs | Poor cambium contact or dehydration | Recut and regraft if possible; increase humidity immediately | Practice cuts on spare stems first |
| Mold or slime at union | Too wet + poor airflow + dirty tools | Remove tape, clean gently with alcohol, rewrap loosely | Sterilize everything, don’t over-mist |
| No new growth after 14 days | Misaligned layers or incompatible plants | Start over with better matched stems | Always check cambium alignment visually |
| Graft union breaks open | Tape too loose or plant bumped | Add extra clips and support stake | Use both tape and wire for security |
| Scion grows but rootstock sucks | Rootstock too weak or diseased | Next time choose a proven vigorous mother | Pick rootstock from Green Avenger Seeds’ strongest lines |
Most failures come down to one of three things: dirty tools, bad alignment, or moving the plant too soon. Nail those and your success rate will climb fast.
Creative Combinations Using Green Avenger Seeds Strains for Custom Vigor or Flavor
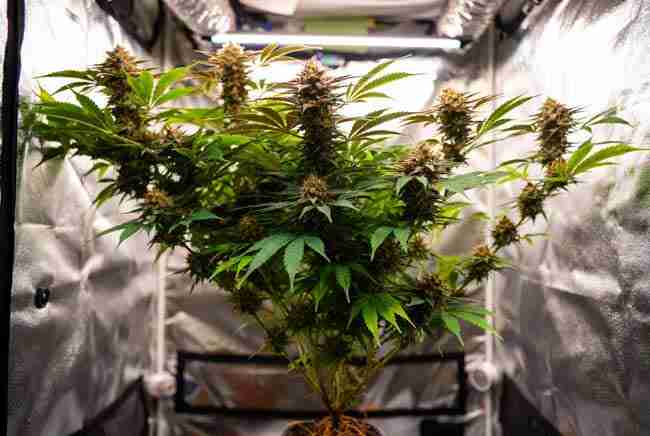
This is where cannabis grafting gets really fun. You’re not just saving a plant — you’re designing your own super-plant.
Try these winning combos with Green Avenger Seeds genetics:
- Vigorous Indica rootstock + Blueberry scion: The strong roots pull extra nutrients so your Blueberry buds get even fatter and more flavorful.
- Landrace or fast autoflower rootstock + high-THC sativa scion: Gives the sativa the stability it often lacks while keeping that soaring high.
- Multiple scions on one rootstock: Graft a Blueberry branch on one side and a different terpene-heavy strain on the other. One plant, two (or three!) different harvests.
Because the rootstock genetics stay in the roots and the scion genetics control the flowers, you get the best of both worlds without any weird cross-pollination worries.
Tomato Rootstock Cannabis Graft Experiments: Unlocking Extra Disease Resistance and Faster Recovery

Some adventurous growers experiment with tomato rootstock cannabis graft setups because certain tomato rootstocks are bred to fight soil diseases like fusarium, pythium, and nematodes that also love cannabis roots. The idea is simple: give your cannabis the iron-clad root system of a disease-resistant tomato while keeping the buds 100% cannabis.
Results are mixed — compatibility isn’t as high as cannabis-to-cannabis, so success rates hover around 50-60% for most home growers. However, when it works, the faster recovery grafted marijuana is impressive. Plants often show bigger root mass, better nutrient uptake, and noticeably less wilting during heat waves or transplant shock.
If you want to try it, use a known resistant tomato variety, match stem sizes carefully, and be extra gentle with aftercare. Many folks report the cannabis scion grows like crazy once the union takes. Just remember this is still experimental territory — always have a backup clone ready.
Long-Term Benefits: Higher Yields, Disease Resistance, and Resilient Grafted Marijuana
Once your graft heals and the plant flowers, the payoffs keep coming. Studies from 2022 onward show grafted cannabis often produces higher biomass and better root health than ungrafted plants. You’ll notice:
- Stronger stems that support heavy colas without staking
- Faster bounce-back after any stress (heat, pests, underwatering)
- Better resistance to soil-borne diseases because the rootstock is usually tougher
- The ability to run multiple strains in the same space with one root system
Many home growers report 15-30% bigger harvests on grafted plants compared to regular clones of the same strain. Plus, you save money on seeds and clones over time because one healthy rootstock can support several scions across multiple grows.
Pros and Cons of Home Cannabis Grafting
Pros:
- Save space and plant counts while growing multiple strains
- Rescue genetics from weak or sick plants
- Potentially bigger yields and faster recovery
- Fun, creative, and educational
- Works amazingly well with Green Avenger Seeds genetics
Cons:
- Takes practice — first few grafts may fail
- More time and attention than simple cloning
- Risk of losing both rootstock and scion if it goes wrong
- Slightly more equipment needed
- Not ideal for complete beginners who haven’t mastered basic cloning yet
Overall, if you already grow successfully and want to level up, the pros far outweigh the cons.
Frequently Asked Questions About Cannabis Grafting Techniques
How long does it take for a cannabis graft to heal? Most unions are stable in 7-14 days with proper humidity and stable temps. You’ll see new growth on the scion as the best sign it worked.
Can I graft any cannabis strain onto any other? Yes, almost all cannabis strains are compatible with each other. The closer the stem thickness and growth rate, the better your chances.
Is tomato rootstock cannabis graft worth trying? It’s a fun advanced experiment for disease resistance and faster recovery grafted marijuana, but success rates are lower than straight cannabis-to-cannabis. Great for experienced growers who like tinkering.
What’s the success rate for beginners? Expect 40-60% on your first tries. With practice and sterile technique, most people hit 80%+ within a few months.
Can I graft during flowering? It’s possible but not recommended. The plant is already stressed and healing is slower. Stick to vegetative stage for best results.
Do I need special lights or tents for grafting? No — just bright indirect light and a humidity dome. Your regular veg space works fine.
Will the rootstock change the flavor or effects of the scion buds? No. The flowers and cannabinoids come from the scion genetics. The rootstock mainly affects vigor, root health, and sometimes overall yield.
How many strains can I put on one rootstock? Home growers commonly run 2-4 different scions on a single strong rootstock. Just make sure each graft has good cambium contact and the plant isn’t overloaded.
There you have it — everything you need to start experimenting with home cannabis grafting today. It might feel a little intimidating at first, but once you see that first successful union and watch your custom hybrid plant explode with growth, you’ll be hooked.
Grab your scalpel, pick a couple Green Avenger Seeds strains, and give it a shot. Your garden (and your future harvests) will thank you. Happy grafting, and may your unions always be strong and your buds always be massive!
