High Yield Cannabis Seeds: Strains That Pack the Most Bud per Square Foot


You want wall-to-wall buds without wasting an inch of space. Perfect. This guide shows you exactly how to choose High Yield Cannabis Seeds, set up your grow for maximum production, and squeeze every last gram from each square foot—without overcomplicating things. We’ll talk tents, light math (the simple kind), training styles, strain picks, feeding, airflow, and all the tiny tweaks that turn “pretty good” into jaw-dropping.
What “High Yield per Square Foot” Really Means (and Why You Should Care)
Yield per square foot is the most practical way to measure success in small grow spaces and home gardens. It tells you how effectively you’re using your limited area—not just how big a single plant got.
- Formula (simple):
Yield per sq ft = Total dried flower (g) ÷ Grow area (sq ft) - Why it’s better than grams per plant: plant size is fake news; canopy area and light exposure are the real engines of yield.
- Targets to aim for (realistic, non-hype):
- Newer grower: 25–40 g/sq ft
- Intermediate: 40–75 g/sq ft
- Dialed-in grower with strong light + training + good environment: 75–120+ g/sq ft
The Two Levers that Move Everything
- Genetics: Start with High Yield Cannabis Seeds that build fat flowers and tolerate training.
- Canopy control: Keep an even, well-lit “table” of tops from wall to wall. That’s where the grams live.
Tent Math That Makes Sense (2×2, 3×3, 4×4 Examples)

You don’t need a spreadsheet; you just need a plan. Use this as a launchpad and adjust with experience.
Tent Size & Strategy Cheatsheet
| Tent | Area (sq ft) | Best Strategy | # Plants (typical) | Light (true watts) | Realistic Yield Target* |
|---|---|---|---|---|---|
| 2×2 | 4.0 | SOG (small plants) or 1–2 plant SCROG | 4–9 (SOG) or 1–2 (SCROG) | 150–250W LED | 150–300g (5–10.5 oz) |
| 3×3 | 9.0 | SCROG (2–4 plants) or SOG | 6–16 (SOG) or 2–4 (SCROG) | 300–450W LED | 350–700g (12–25 oz) |
| 4×4 | 16.0 | SCROG (4–6 plants) or SOG | 9–25 (SOG) or 4–6 (SCROG) | 450–650W LED | 600–1200g (21–42 oz) |
*Assumes good genetics, proper VPD, airflow, training, and basic CO₂ from room air. You can push higher with CO₂ enrichment and a dialed environment.
Takeaway: The bigger your flat, even canopy, the bigger your harvest. You’re not just growing plants—you’re building a level, well-lit bud carpet.
What Makes Seeds “High Yield” in Real Life?

Traits to Look For
- Branchy structure that fills space quickly and supports training (SCROG/SOG).
- Medium internode spacing (tight stacks = more bud sites).
- Moderate stretch (1.5–2×) to help you fill the screen without overshooting.
- Mold resistance (dense buds need airflow insurance).
- Balanced flowering time (7–10 weeks for photoperiods; 9–12 weeks seed-to-harvest for autos).
Photoperiod vs Autoflower for Yield per Sq Ft
Photoperiod (12/12 switch)
- Pros: Highest ceiling for yield; flexible veg time; loves SCROG/mainline/topping.
- Cons: Longer total time; light leaks matter; more training effort.
- Pros: Fast; simple light schedule; multiple quick harvests per year.
- Cons: Lower absolute ceiling; training must be gentler; timing is less flexible.
If your goal is maximum yield per square foot and you’re willing to train, photoperiods usually win. If you want quick cycles and “easy mode,” high-yielding autos still crush it—especially in SOG.
High Yield Cannabis Seeds: Hand-Picked Winners (Photoperiod & Auto)

These are popular, proven high-producers that handle training well. Your exact numbers depend on light, environment, and grower choices.
Fast Photoperiod Workhorses
- Critical Mass – Bulky colas, quick finish, SCROG-friendly.
- Big Bud – Classic yield monster; loves support netting.
- Gorilla Glue #4 – Fat tops, high resin; watch calcium and training timing.
- Blue Dream – Vigorous, stretch helps fill a screen; great for 3×3 and up.
- Super Skunk – Easy, forgiving, chunky; ideal for newer growers pushing yield.
- Amnesia Haze – Longer flower but huge tops in capable hands.
- Northern Lights – Compact, low odor, surprisingly dense production.
High-Yield Autoflowers
- Critical Auto – Fast, stocky, big center cola with side spears.
- Gorilla Auto – Heavy for an auto; keep EC steady and light intense.
- Super Skunk Auto – Beginner-proof, efficient SOG choice.
- Blue Dream Auto – Vigorous, benefits from early LST; fills gaps nicely.
At-a-Glance Specs (Guide Values)
| Strain | Type | Flowering (photo) | Seed-to-Harvest (auto) | Stretch | Training Fit | Yield Potential |
|---|---|---|---|---|---|---|
| Critical Mass | Photo | 7–8 wks | — | Med | SCROG, topping, lollipopping | Very high |
| Big Bud | Photo | 7–9 wks | — | Med | SCROG, stakes/trellis | Very high |
| Gorilla Glue #4 | Photo | 8–10 wks | — | Med-High | SCROG, light defol | Very high |
| Blue Dream | Photo | 9–10 wks | — | High | SCROG, supercrop | High-very high |
| Super Skunk | Photo | 7–8 wks | — | Med | Any method | High |
| Critical Auto | Auto | — | 9–11 wks | Low-Med | LST only | High (for auto) |
| Gorilla Auto | Auto | — | 10–12 wks | Med | LST only | High (for auto) |
The Canopy Systems That Actually Pack On Weight

SOG (Sea of Green) – Many Small Plants, Minimal Veg
- How it works: Start many clones/seedlings, flip early, harvest a forest of single colas.
- Why it yields: Maxes out canopy surface quickly, tight spacing increases tops per sq ft.
- Pros: Fast cycles; easy to scale; great for autos or compact photos.
- Cons: More plants to manage; legal plant counts may limit you.
SOG Specs to Try
- Spacing: 8–10″ centers (autos a bit wider).
- Flip: 10–21 days from sprout (photoperiods).
- Training: Minimal—just gentle LST or a single topping if needed.
- Lollipop: Clean the bottom 1/3 for airflow and cola focus.
SCROG (Screen of Green) – Fewer Plants, Big Screen
- How it works: Weave tops into a screen to build a flat, even canopy.
- Why it yields: Every top gets premium light; no wasted vertical space.
- Pros: Huge cola count per plant; perfect for 2×2 to 4×4 tents.
- Cons: Longer veg; plants are “tied” to the net; harder to move.
SCROG Specs to Try
- Screen height: 8–12″ above pot top.
- Mesh size: 2–3.5″ squares.
- Fill rate: Fill 80–100% of screen before 12/12.
- Defoliation: Light leaf removal at day 21 and day 42 of flower.
Mainline/Manifold – Symmetry = Predictable Tops
- How it works: Top to create 8–16 equal colas that sit at the same height.
- Why it yields: Uniform tops = uniform ripening and weight.
- Pros: Sculpted structure, easy to maintain; beautiful in a 3×3.
- Cons: More veg time; autos don’t love it.
Light, PPFD, and “Don’t Cook the Leaves”

You can’t out-genetics bad lighting. Here’s a plain-English target list:
- DLI (veg): 20–30 mol/m²/day
- DLI (flower): 35–55 mol/m²/day
- PPFD (flower canopy): 800–1000 µmol/m²/s (CO₂ room can push 1000–1200)
- Photoperiod schedule: 18/6 veg → 12/12 flower
- Autoflower schedule: 18/6 or 20/4 from start to finish
Tip: Use your hand—if the back of your hand feels hot at canopy level, raise or dim the light. Leaf edges canoeing? You’re probably too hot or too dry.
Feeding for Weight Without the Drama

Heavy feeders can be drama queens if you rush. Keep it steady.
Target Ranges (Coco/Soilless; dial down ~10–20% for soil)
- Veg EC: 1.2–1.8 mS/cm
- Early flower EC: 1.6–2.0
- Peak swell EC: 1.8–2.2 (watch tips closely)
- pH: Coco 5.7–6.2; Soil 6.3–6.8
- Cal-Mag: Keep Ca steady (GG#4 and similar strains crave it).
Add-Ons (Only if Basics Are Dialed)
- Silica: Stronger stems for heavy colas.
- Carbohydrates: Optional; environment matters more.
- Microbes: Root health = nutrient uptake = weight.
- PK Booster (moderate): Weeks 3–6 of flower; don’t chase numbers—watch leaves and runoff.
Airflow, RH, and VPD (The Bud-Density Trifecta)

- Veg: 60–70% RH, temps 22–26°C (72–79°F)
- Flower weeks 1–4: 50–60% RH, temps 22–26°C (72–79°F)
- Late flower: 42–50% RH, temps 21–25°C (70–77°F)
- Air exchange: 1–2× tent volume per minute; add oscillating fans below and above canopy.
- VPD goal: Keep leaves transpiring without crispy edges; chart it once, feel it forever.
Dense buds from High Yield Cannabis Seeds need moving air, proper humidity, and leaf temps that match your light intensity. That’s how you avoid fluff and achieve glass-marble nugs.
Defoliation, Lollipopping, and “When to Stop Touching Things”

- Defoliate purposefully: Open shadowed bud sites; don’t strip your plant naked.
- Timing: Light defol in late veg, day 21 of flower (post-stretch), and optionally day 42.
- Lollipop: Remove lower growth that will never see light—redirect energy to top sites.
- Hands off: After mid-flower, keep your scissors holstered unless leaves are choking airflow.
Mistakes That Kill Yield per Square Foot (and How You Dodge Them)

- Uneven canopy → Fix with SCROG, supercropping, and early topping.
- Under- or over-lighting → Use a PPFD meter app (calibrated) and follow target ranges.
- Overcrowding → Buds need space for air; respect plant count and spacing.
- RH too high late flower → Invite botrytis and lose weight to mold.
- Swingy feeding → Keep EC consistent; rapid jumps cause lockout and slow growth.
- Ignoring stretch → Flip too late and you’ll overshoot; flip too early and leave holes.
- Poor dry & cure → You can lose 10–20% perceived weight and value with a bad dry. Aim for 10–14 days at 60°F/60% RH, then cure in jars.
Quick Planner: How Many Plants Should You Run?

| Tent | SOG Plants | SCROG Plants | Veg Time (Photo) | Flip Height (Photo) | Notes |
|---|---|---|---|---|---|
| 2×2 | 4–9 | 1–2 | 2–4 wks (SCROG) | 6–10″ | SOG = fastest turns |
| 3×3 | 6–16 | 2–4 | 3–6 wks | 8–12″ | Sweet spot for most homes |
| 4×4 | 9–25 | 4–6 | 4–8 wks | 10–14″ | Add 2nd fan for airflow |
Flip height depends on stretch; plan 1.5–2× growth after 12/12. If a strain is a rocket (like some hazes), flip earlier.
Realistic Yield Examples (So You Can Forecast Like a Pro)
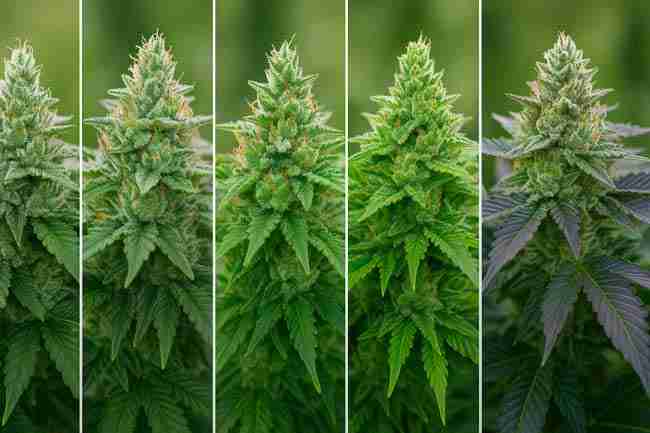
Example A – 3×3 SCROG, Photoperiod
- Plants: 3 photoperiods (Critical Mass, Blue Dream, Super Skunk)
- Light: 400W high-efficiency LED
- Canopy PPFD: 850–950 µmol/m²/s
- Flower time: 8–10 weeks
- Expected: 450–700g (50–78 g/sq ft)
Example B – 2×2 SOG, Autoflowers
- Plants: 6 autos (Critical Auto, Gorilla Auto mix)
- Light: 200W LED
- Seed-to-harvest: 10–11 weeks
- Expected: 150–250g (37–62 g/sq ft)
Example C – 4×4 SCROG, Photoperiod with CO₂ (Optional Advanced)
- Plants: 4 photos (GG#4, Big Bud)
- Light: 600W LED, PPFD 1000–1100
- CO₂: 1000–1200 ppm, leaf temp controlled
- Expected: 800–1200g (50–75 g/sq ft), sometimes more with perfect dialing
Pros & Cons: Your Path to Maximum Bud Density

Photoperiods (for maximum control)
Pros
- Highest potential per sq ft
- Flexible veg = perfect canopy fill
- Take harder training well
Cons
- Longer cycle time
- Sensitive to light leaks
- More hands-on
Autoflowers (for speed and simplicity)
Pros
- Fast harvests, great for perpetual grows
- Simple light schedule
- Beginner-friendly SOG
Cons
- Lower ceiling at the extreme high end
- Limited training window
- Timing is pre-wired
SCROG
Pros
- Best light use; mega tops
- Fewer plants, legal-friendly
- Predictable canopy
Cons
- Longer veg
- Hard to move plants
- Needs planning
SOG
Pros
- Speed; fast flips
- Simple training
- Great with autos or clones
Cons
- More pots to water
- Plant-count limits
- Smaller individual buds
Specifications You Can Copy Right Now

Environment
- Temps (lights on): 22–26°C (72–79°F)
- Temps (lights off): 19–22°C (66–72°F)
- RH: Veg 60–70%, Flower 50–60%, Late 42–50%
- Air exchange: 1–2× tent volume per minute
Lighting
- PPFD: 800–1000 in flower (non-CO₂); 1000–1200 with CO₂ and leaf temps dialed
- Photoperiod: 18/6 → 12/12; Auto: 18/6 or 20/4
- Keep even spread; avoid hotspots
Nutrition
- Coco/soilless EC: Veg 1.2–1.8, Flower 1.6–2.2
- pH: Coco 5.7–6.2, Soil 6.3–6.8
- Cal-Mag steady, especially under LEDs
Training
- Topping: once or twice by node 4–6 (photos)
- LST: early and often; bend tops to fill space
- Defoliation: light, targeted, timed
How to Pick the Right High Yield Cannabis Seeds for Your Space

- Tent size first: 2×2 likes compact, fast strains; 3×3 and 4×4 can run stretchier genetics.
- Training style: If you love SCROG, choose branchy, medium-stretch photos (Critical Mass, Blue Dream, GG#4).
- Time budget: Need speed? Go with Critical Auto, Gorilla Auto, or Super Skunk Auto in SOG.
- Smell tolerance: Super Skunk and Big Bud can reek; Northern Lights is stealthier.
- Climate: In humid basements, lean toward mold-resistant lines (NL, Super Skunk, Critical).
- Experience level: If you’re newer, choose strains labeled “easy” and don’t stack five new techniques at once.
Frequently Asked Questions (FAQ)

What are High Yield Cannabis Seeds?
They’re genetics known to produce lots of dense buds with the right light and training. Think Critical Mass, Big Bud, GG#4, Blue Dream, and their auto counterparts.
Do autos or photos make more per square foot?
Photoperiods usually win for maximum yield per sq ft because you can veg longer and shape the canopy. High-yield autos are great for fast, steady runs.
How much can I harvest from a 3×3 tent?
With dialed High Yield Cannabis Seeds, a proper SCROG, and a 300–450W LED, 350–700g per run is a realistic, solid range.
What PPFD should I aim for in flower?
800–1000 µmol/m²/s without added CO₂. With CO₂ and proper temps, 1000–1200 can add more density.
Which training gives the best yield per square foot?
SCROG is king for fewer plants and maximum top exposure. SOG wins for speed and plant counts (if legal).
How do I avoid airy buds with high-yield strains?
Hold VPD steady, keep RH lower late flower, push enough light (without burning), and maintain strong airflow through the canopy. Don’t overfeed.
Can I hit 1 gram per watt?
Yes—when light coverage, canopy evenness, environment, and genetics all line up. Use efficient LEDs, keep PPFD on target, and don’t starve calcium.
Are longer-flowering strains always bigger yielders?
Not always. Many High Yield Cannabis Seeds finish in 7–9 weeks and still pack massive weight if the canopy is flat and well-lit.
Action Blueprint: Your Next Run, Step by Step

- Pick genetics: Choose two High Yield Cannabis Seeds that match your tent and training style.
- Plan the canopy: Decide SOG vs SCROG now; set plant count and screen height.
- Light map: Hang light, measure PPFD at corners, raise/lower for even coverage.
- Dial the air: One exhaust, two oscillating fans minimum; set RH/temps by stage.
- Gentle veg: Top once, LST early; keep internodes tight with good light and airflow.
- Flip timing: Fill 80–100% of the screen (SCROG) or hit your chosen flip height.
- Defol schedule: Light cleanup in veg, then day 21 and day 42 flower touch-ups.
- Feed steady: EC increases gradually into mid-flower; watch runoff and leaf tips.
- Late-flower discipline: Lower RH, stop heavy defol, support heavy colas.
- Dry/cure like a pro: 60/60 for 10–14 days, then cure. That’s where quality (and perceived weight) gets locked in.
Stick to this, and your square footage will feel bigger than it is. That’s the power of smart planning plus High Yield Cannabis Seeds.
Final Thoughts: Build the Bud Carpet

You don’t need luck—you need structure. Pick genetics that love to stack, spread your tops into a flat plane, feed steadily, and keep the air moving. When you do that, your tent becomes a factory floor, not a jungle. The result? Serious weight, consistent runs, and the kind of jars that make friends say, “No way you pulled that from a closet.”