Growing Quality Cannabis Buds

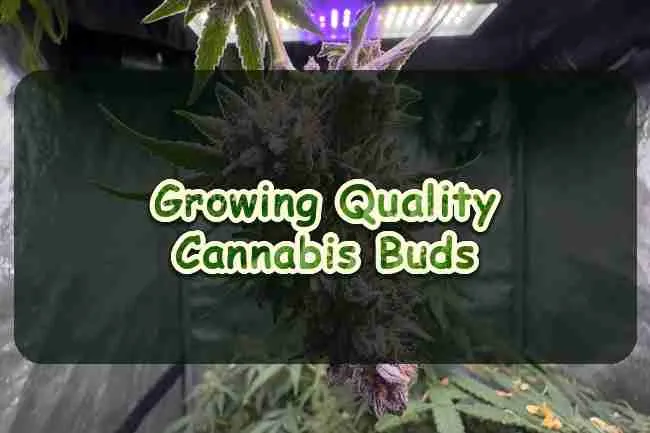
Growing quality cannabis buds is a stack, not a secret bottle. Ranking pages in 2026 keep landing on the same order: genetics first, enough light on an even canopy, a climate that does not cook or rot the flowers, harvest by trichomes on the calyxes, then a slow dry and a jar cure. Size is the last thing to trust. A golf-ball cola that is dense, sticky, and loud beats a long airy spear that only looks big in a photo.
This is still the original quick-start walkthrough. You start in cups. You run a tent with exhaust and a clip fan. You veg until the plant has real tops. You flip photoperiods to 12/12 and you keep that night dark. You wait until a jeweler’s loupe shows milky heads with a little amber. Then you hang the plant and you jar it. Marijuana and weed both finish in those resin heads. If the heads are still clear, you are early. If you jar wet, you can lose the whole run to mold.
Named feminized packs in the shop run about four dollars CAD a seed, mixed feminized closer to a dollar. That buys you a ceiling. It does not buy extra PPFD, a dry room, or patience. Shop the current list in the cannabis seeds store if you still need a pack, then come back here with a thermometer and a loupe.
What Quality Cannabis Buds Actually Means
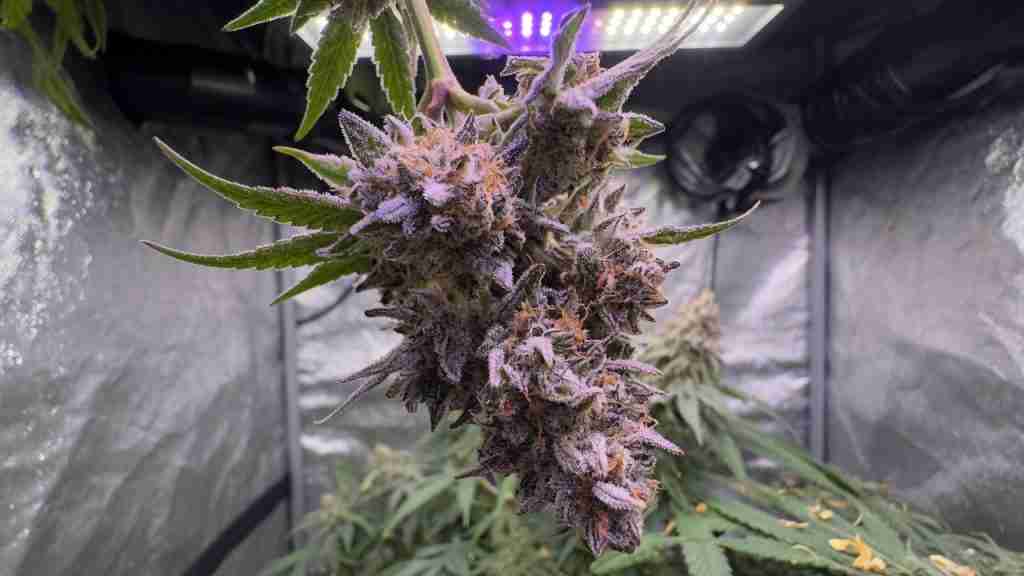
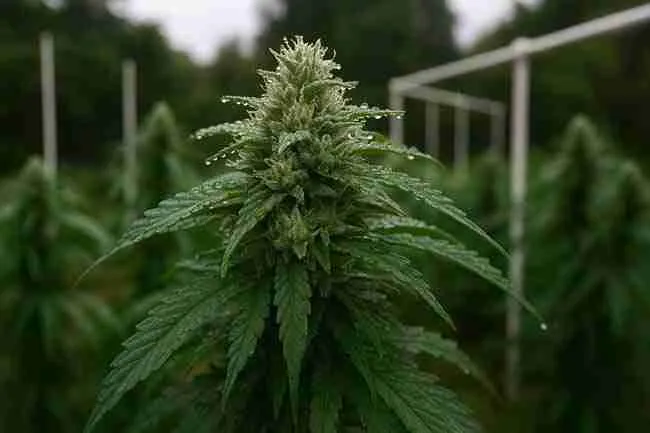
Quality is density, resin, and a smell that survives the dry. You are looking at calyxes stacked tight, trichome heads covering those calyxes, and a cure that takes the hay note out of the smoke. A bag of leafy, fox-tailed, or hollow buds can weigh the same as a smaller jar of tight flower. The jar is the better crop.
THC percentage follows the plant you started, the light it got, and when you cut it. An 18 percent line will not become a 28 percent line because you doubled the bloom bottle. Feed keeps the plant from stalling. Light builds the heads. Harvest timing decides whether those heads are still empty or already turning over. The dry and cure keep what you grew. That is the whole quality job, from first true leaf to the first week in glass.
Pistils (the white hairs) are a hint, not the harvest. Sugar leaves frost earlier than the flower. If you judge by a sugar leaf, you will chop early and the weed will taste like a stem. Look at the heads on the actual bud. The rest of this page is how you get that bud there without wasting three months on air and chlorophyll.
Genetics Set the Ceiling
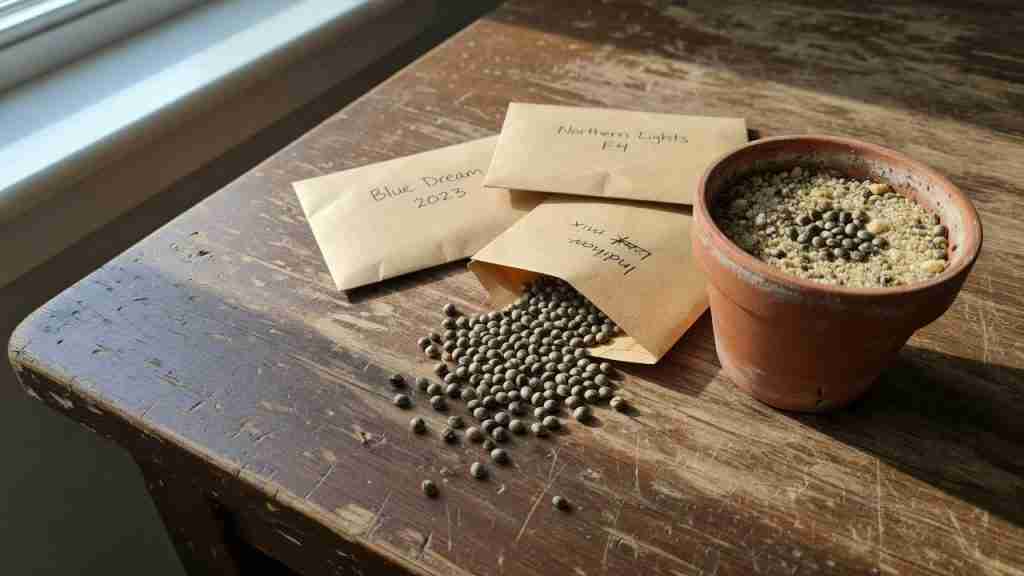
Start with seed that already makes dense flower when other people grow it. You cannot train a lanky, airy line into a golf ball. You can only hit the ceiling that pack already has. If your last run was loud and tight, run that line again before you chase a new name.
Photoperiod plants wait for night length. You veg them until they fill the tent, then you flip. Autos flower on age. They do not wait for your canopy to even out, so you start them in the pot they will finish in and you keep the light honest from week one. The clock for autos lives on grow autoflowering cannabis plants. Photoperiods, and why 12/12 is the switch, live on photoperiod cannabis seeds explained.
Feminized seed is the easy first crop because almost every plant is a girl. Regular seed is half pollen. Either way you still check nodes. A boy in a quality run is wasted floor, wasted power, and a pollen risk. Sex at the nodes, not by height: cannabis plant male or female. Fem versus regular packing is feminized and regular cannabis seeds.
Get the Room Ready Before You Plant

Do not germinate into a corner with a desk lamp and hope. Quality buds need a box you can control: walls that hold light, air that leaves, air that moves across leaves, and numbers you can read. A grow tent for cannabis seeds is the fastest box. Zippers, vent holes, and a window beat a closet you cannot seal. Pick a tent you can reach from more than one side. You will be in there topping, tying, and checking colas. The longer indoor walkthrough is the indoor cannabis growers guide.
Set the tent up so it cannot collapse at 2 a.m. Poles fully seated. Crossbars tight. Then hang the exhaust before you hang the light. You want the room ready the day the taproot shows, not three days later when the cups are already stretching.
Start Seeds in Cups, Not the Final Pot
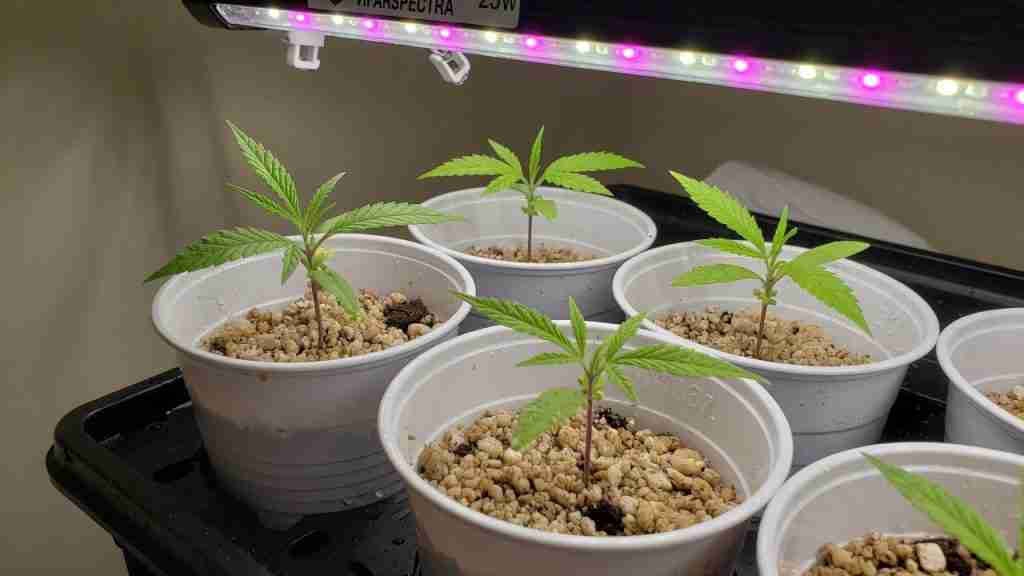
Solo cups or small square pots are still the cheapest start. Drain holes in the bottom. A light, fluffy seed-starting mix, not a heavy garden bag that stays wet for a week. You want oxygen around a new root. A dense wet cup is how seedlings damp off. The day-by-day clock is cannabis seedlings day by day. Light distance and first-week water live on healthy cannabis seedlings first week.
Use clean water. If your tap is heavy or you do not know it, start with a jug you trust. Do not drown the cup. The mix should be damp, then you wait until the top dries a little before you water again. Paper towel germ is optional. Direct sow into that starter mix works if the seed is viable. The full germ walkthrough is cannabis seed germination. This shop does not invent a germ percentage. You start extras if the run matters.
Tent, Exhaust, and Moving Air
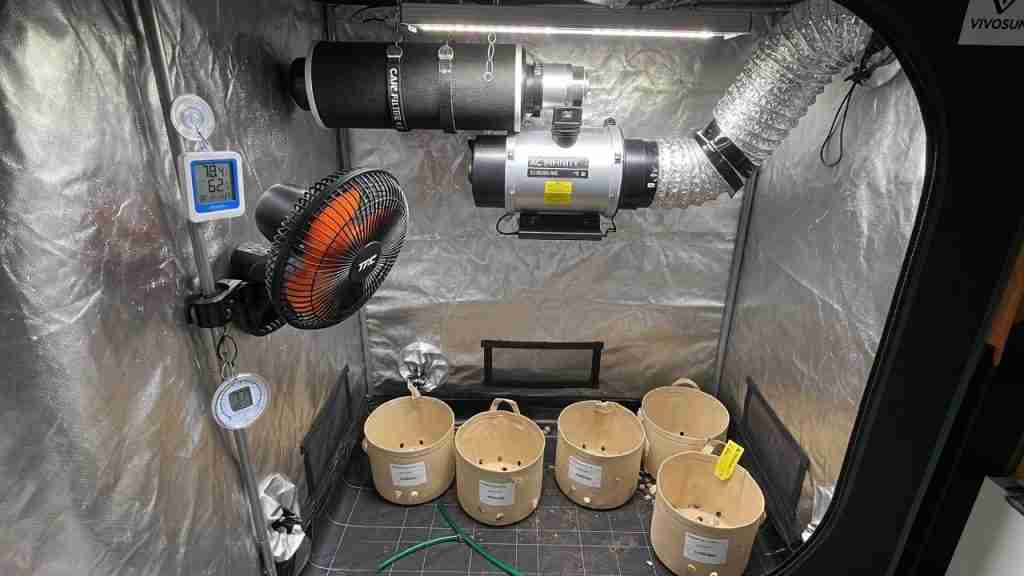
Ventilation is not optional. Leaves breathe. Stale wet air in late flower is how you grow bud rot instead of quality cannabis buds. Hang a carbon filter and an inline fan inside the tent and push air out. That pulls fresh air in through the passive vents and keeps smell from filling the house. Sizing is simple: four-inch fan and filter on a small tent, six-inch on a 4×4, bigger if the box is bigger or the light runs hot. The fan walkthrough is ventilation for a cannabis grow.
Add a clip fan that moves leaves a little, not a gale that wind-burns the edge. You want a gentle sway. That thickens stems and keeps a wet pocket from sitting in the middle of a cola. A cheap thermometer-hygrometer hangs at canopy height, not on the floor and not against the light. If you cannot read the room, you cannot keep it in range.
Light Density Matters More Than Fixture Brand
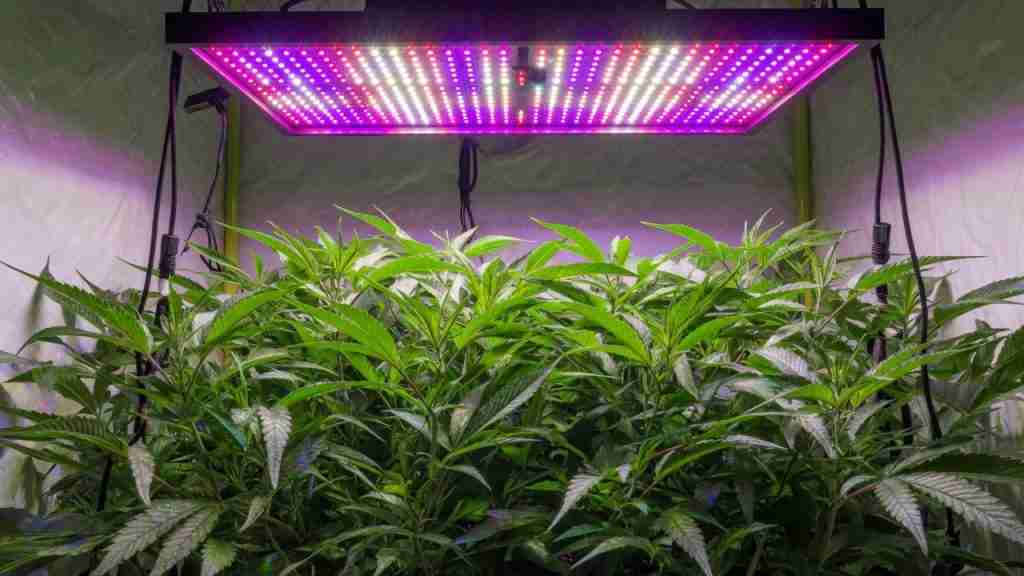
Any real grow light will start a plant. Quality flower needs enough photons at the canopy, not a pretty fixture photo. Ranking growers talk in PPFD, not watts on the sticker. Rough indoor targets that actually show up in current charts: seedlings around 200 to 300 µmol/m²/s, veg 400 to 600, flower 700 to 1,000 if the plant can take the heat and you keep water and air honest. A cheap bar that only lights a dinner-plate in the middle of a 4×4 will make one decent cola and a skirt of fluff.
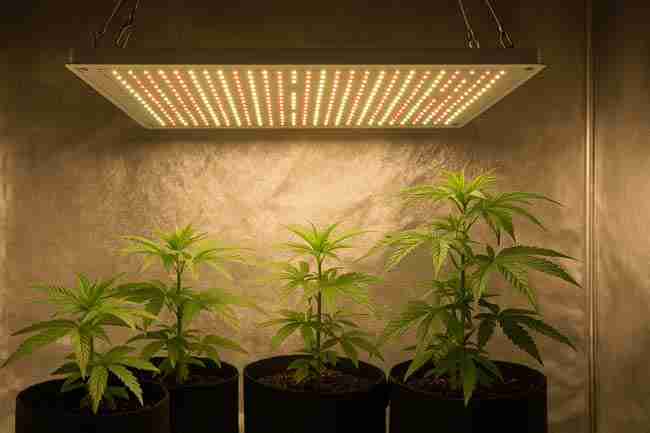
LED is the easy first buy because it runs cooler and you can dim it. Hang it so the canopy is even, then raise or dim if the tops taco or bleach. Two weak lights can cost the same as one that actually covers the floor. Measure with a phone app if that is all you have, then trust the plant: tight internodes and fat tops mean the light is working. Stretch and airy buds mean it is not. Fixture types and hanging live on grow lighting for cannabis. Extra side light is a later trick: maximizing trichome density through light manipulation.
Soil, Pots, and the First Transplant
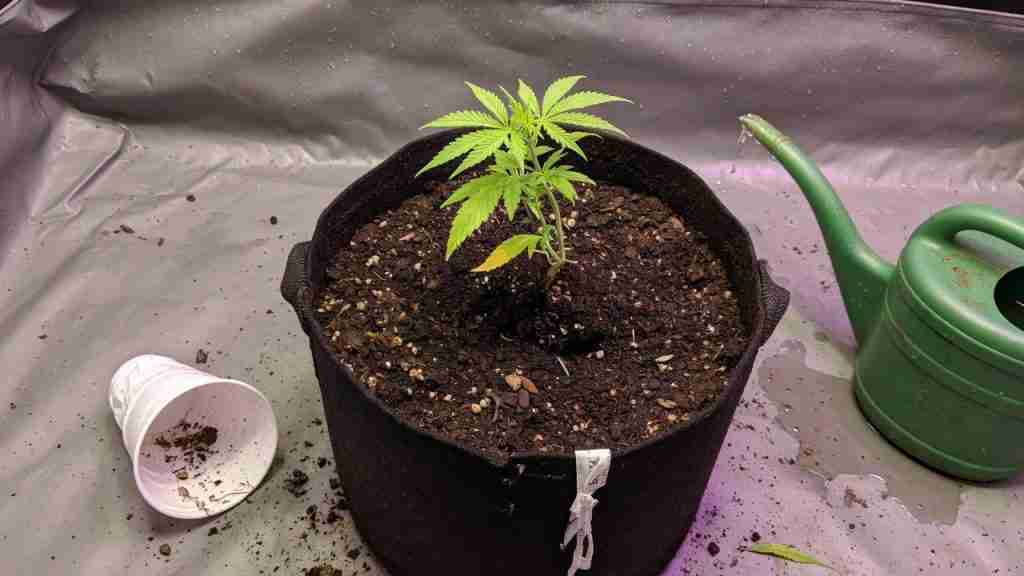
Keep two mixes. Seed starter is light and low-food. The finish mix is a real growing soil, preferably one already built for cannabis so you are not guessing lime and charge. That pot is the plant’s home until harvest. A hungry, salty, or soggy mix makes airy buds no matter how good the seed was. Soil choice in more detail: the best soil for growing cannabis seeds.
When the seedling has about four true sets of leaves and the cup is full of white roots, move it. If this pot is also the flower pot, five gallons is a practical indoor floor for one plant. Bigger is fine if the tent has the height. Slip the root ball out. If it is a white spiral, tease the bottom a little. Drop it in a hole in the new mix, fill, and water around the stem until the whole pot is evenly damp, not a swamp. Then leave it alone until the plant drinks.
Water the plant, not a schedule. Lift the pot. Heavy means wait. Light means water. Runoff is useful in coco and bottled soil. Living soil does not want a flood every time. The water page is water cannabis plants. Overfeeding does not raise quality. Tip burn and clawed leaves are the plant telling you to back off, not to add a booster.
Veg Is Where Quality Starts Looking Even
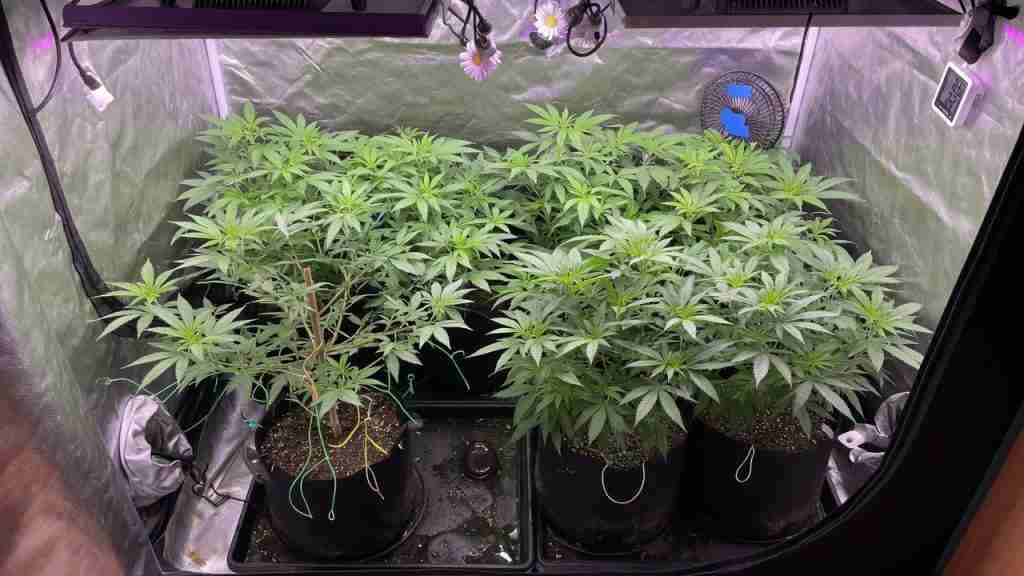
Vegetative growth is the cheap weeks. You are building stems and an even table of tops that will all sit in the strong light later. A Christmas-tree plant with one main cola and a skirt of shade is a yield plant, not a quality plant. Those lower sites never see enough PPFD. They finish airy, leafy, and late. The stage guide is cannabis vegetative stage.
Top the plant once it has a few nodes you can work with. Each top becomes two. Two to four toppings over a few weeks is plenty for a first tent. Four main tops is a good beginner target. After that, strip the bottom. Take the weak shoots and the big fans that sit in the dark, about the lower half of the plant. That is lollipopping. Those sites will not make quality cannabis buds. They steal water and they rot first in week 7. More leaf work: defoliate cannabis.
Put support in before flower weight shows. A net, stakes, or ties to the tent bars. You will not want to shove a stake through a ripe cola in week 8. Branches that flop fold the flowers into each other and trap moisture.
Temperature and Humidity in Veg
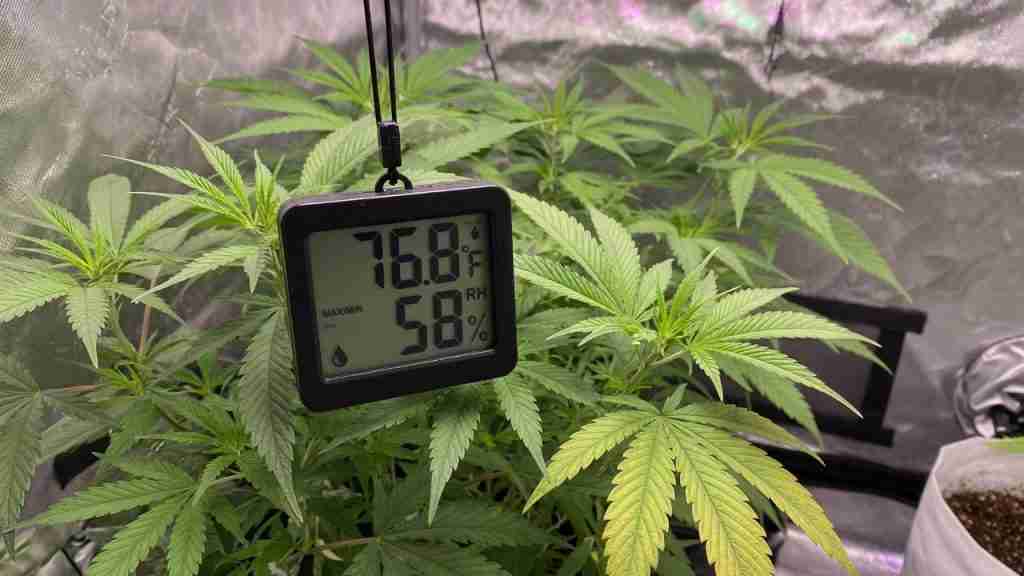
Keep days around 70 to 77 °F (21 to 25 °C). Nights can drop about five degrees. Veg humidity 55 to 65 percent is a working range. Seedlings like the higher end. A hot dry tent stretches. A cold wet tent stalls and invites fungus gnats. Read the meter at the tops, not on the floor next to a humidifier.
Consistency beats a perfect number for one hour. Lights on should not spike 15 degrees above lights off if you can help it. If the LED is the heater, exhaust harder during the day and ease off at night so you do not pull the room too dry. These numbers are the veg half of the quality stack. Flower will ask you to drop humidity on purpose.
Train an Even Canopy
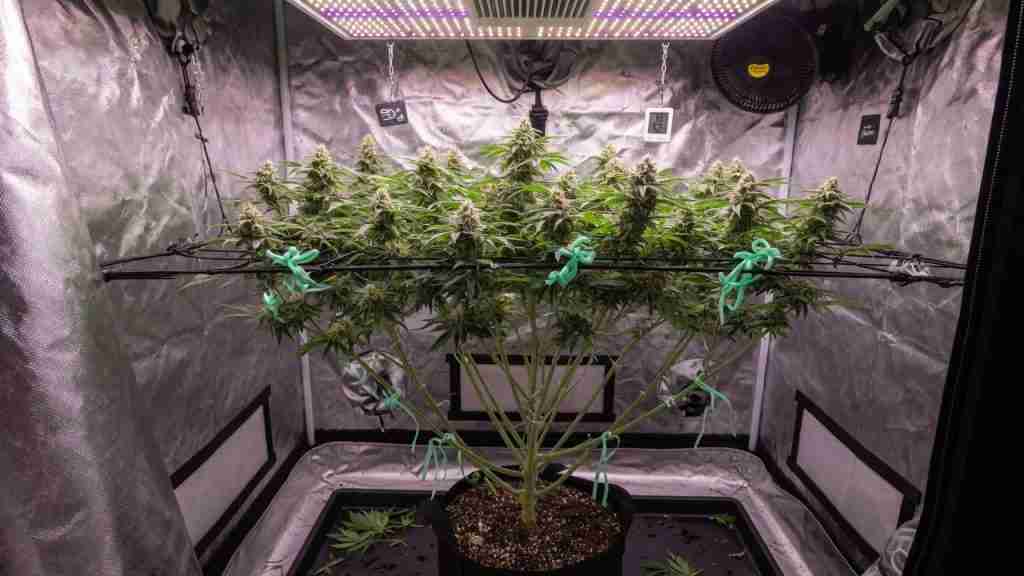
Low stress training is tying branches out so every top sits in the same plane. Soft ties, not wire that bites. Bend while the wood is still green. An even canopy means the PPFD you paid for actually hits four colas instead of one scorched tip and three shady arms. The how-to is low stress training cannabis.
Do the tying in veg. A hard bend on a flowering cola can snap it, and a snap in week 6 is a rot pocket. If one top still races the others, tie it out or pinch it. You want a table, not a spear. That table is what later looks like quality instead of one trophy cola and a pile of smalls.
Flip to Flower Without Wrecking the Room
Flip when the plant has the tops you want and the pot is big enough to finish 8 to 12 weeks. A month of veg is a common indoor floor, not a law. If the tent is already full, flip sooner. Photoperiods stretch after 12/12. Give yourself headroom under the light. The week-by-week flower map is growing cannabis flowering stage of growth.
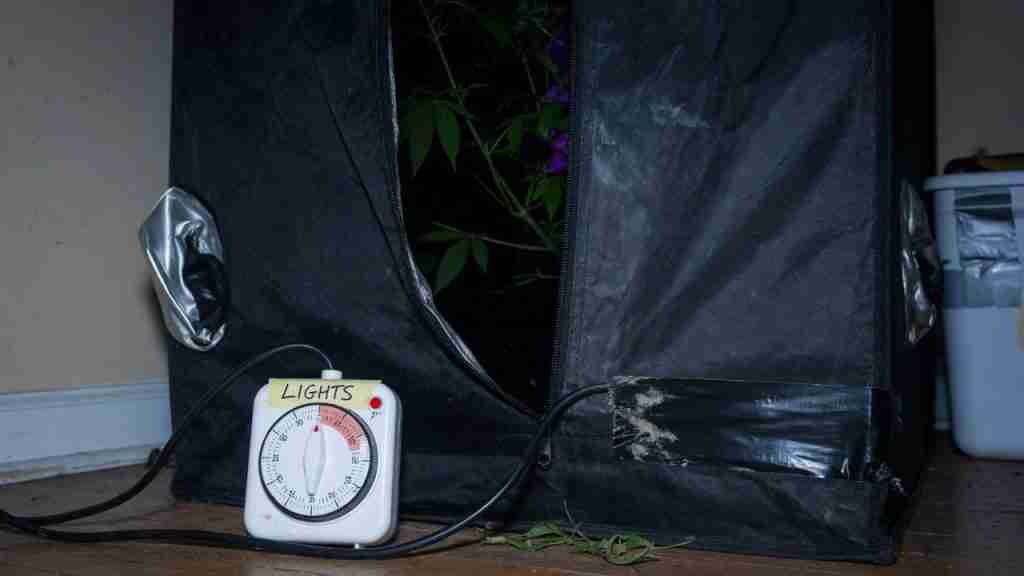
Set the timer to 12 hours on, 12 off, and then make the off actually dark. Sit in the tent with the lights out for a few minutes. Tape pinholes. A glowing charger, a door crack, or a neighbor’s porch light through a window can confuse the plant. Bad leaks stall flower or push nanners. You wanted quality buds. You did not want seeds. Autos skip this switch. Do not 12/12 an auto unless you are managing heat, and even then you are cutting DLI.
Flower food is phosphorus and potassium, with nitrogen lower than veg. A top-dress of a bloom amendment at flip is the old soil way and it still works if the mix was not already hot. Bat guano got named in the original version of this page for a reason: it is a slow P-K bump, not a miracle. More feed is not a quality secret. If the leaf tips are burnt, you are already past useful. Plain water before harvest is a salt rinse in bottled programs. It does not raise THC. The honest version of that job is flushing cannabis.
The First Four Weeks of Flower

Week 1 to 3 is stretch. Internodes lengthen. Pistils show at every top you left. If you stripped the bottom in veg, you are not wasting that stretch on popcorn in the dark. Keep the canopy even. Tuck or tie anything that wants to kiss the diodes. Raise PPFD as the plant hardens, as long as the tops stay green and the room stays in temperature.
By week 4 you should see real sites stacking and the first trichome balls on the calyxes and sugar leaves. Smell usually shows up here. That is terpenes filling the heads, not a bottle you sprayed. If the room still smells like a greenhouse, give it time. The smell stack is increasing the smell of cannabis. A second round of bloom food around week 4 is common in bottled soil. Watch the leaf. Dark, clawed, shiny leaves mean you already overdid nitrogen.
Do not strip the plant bald in early flower. You still need fans to run the plant. Take leaves that shade a bud site or block airflow. Leave the rest. A stressed photoperiod can throw nanners. Quality is a calm finish, not a scalped Christmas tree in week 3.
Late Flower Climate and Air Through the Colas

Most of the weight lands in the last three to five weeks. Calyxes swell. The supports you put in earlier earn their keep. Flower days around 68 to 80 °F (20 to 27 °C) are a working band. Cooler in the last two weeks helps terpenes hang on. Hot tents foxtail, bleach tops, and smell like hay even before you cut.
Drop humidity as the buds pack. Early flower can sit near 50 to 55 percent. Late flower wants closer to 40 to 50 percent, lower if the colas are dense. Wet, still air in a fat cola is cannabis bud rot. Night is the danger window because temperature drops and relative humidity climbs. Dew point math for that night swing is dew point vs bud rot. Keep a fan moving air through the canopy, not blasting the flowers dry on one side.
Stop foliar sprays. Stop heavy defoliation that opens wounds you cannot dry. Check inside the biggest colas with your fingers. If it feels swampy, thin a leaf and add air. One rotten core ruins a jar of otherwise quality weed.
Harvest by Trichomes on the Calyxes

The breeder week count is a window, not a date. Some plants finish on time. Some want another ten days. You harvest quality cannabis buds when the resin is ready, which is why this page still ends with a loupe. Cannabinoids and terpenes live in the trichome heads. Clear heads are still filling. Milky heads are the potency window. Amber heads mean some of that THC is already moving toward a heavier, sleepier effect as it degrades.
A working target for most indoor marijuana is mostly milky with about 10 percent amber on the calyxes. More amber if you want a heavier stone. Almost no amber if you want a brighter head. Look at the flower, not the fan leaf. Sugar leaves turn amber first and they will lie to you. Pistils turning orange is only a backup clue. Plenty of ripe plants still show some white hairs. Plenty of early plants have brown hairs because the room was dry.
Chop near the end of the dark period if you can. The plant has been sitting cool and the volatile smell is still on the flower. Get it into a dark dry space the same day. Light on a cut cola is wasted terpenes. The longer harvest-and-cure walkthrough is how to harvest and cure cannabis plants.
Use a Loupe, Not the Calendar
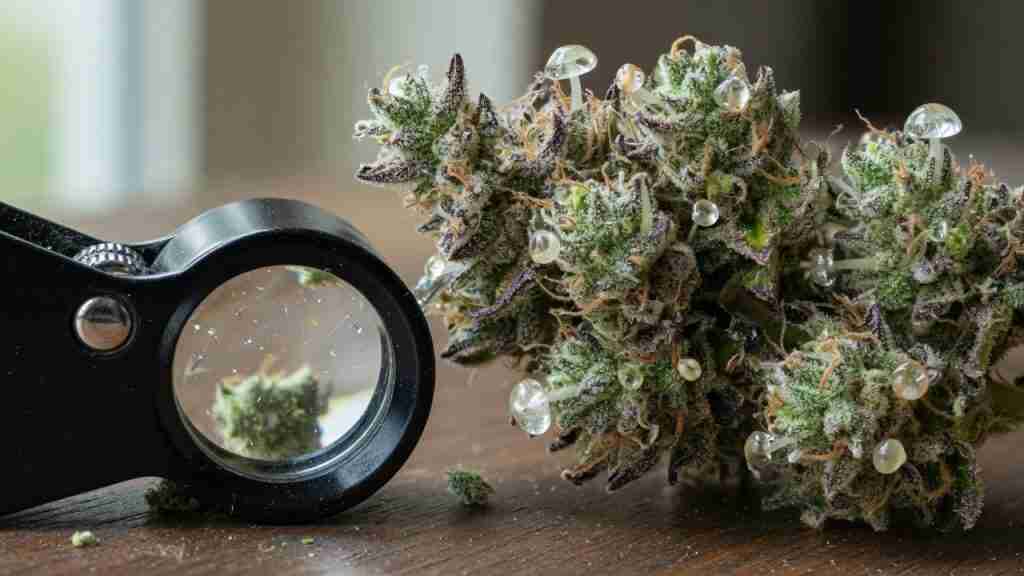
A jeweler’s loupe in the 60× to 100× range costs a few dollars and does the job. A USB microscope is nicer if you like photos. You are looking for mushroom-shaped heads, not the stalks. Scan a few buds, top and mid, because the top can finish first. If the tops are ready and the lowers are still clear, you can take the tops and leave the rest a few days under the light.
Start checking daily about a week before the seed pack’s week number. Write the flip date on tape on the tent. Guessing “it has been about eight weeks” is how you either cut grassy flower or sit on amber until the smell drops. If the nose already faded from last week and the heads are going amber, you are late. Cut.
Dry Slow, Then Cure in Jars
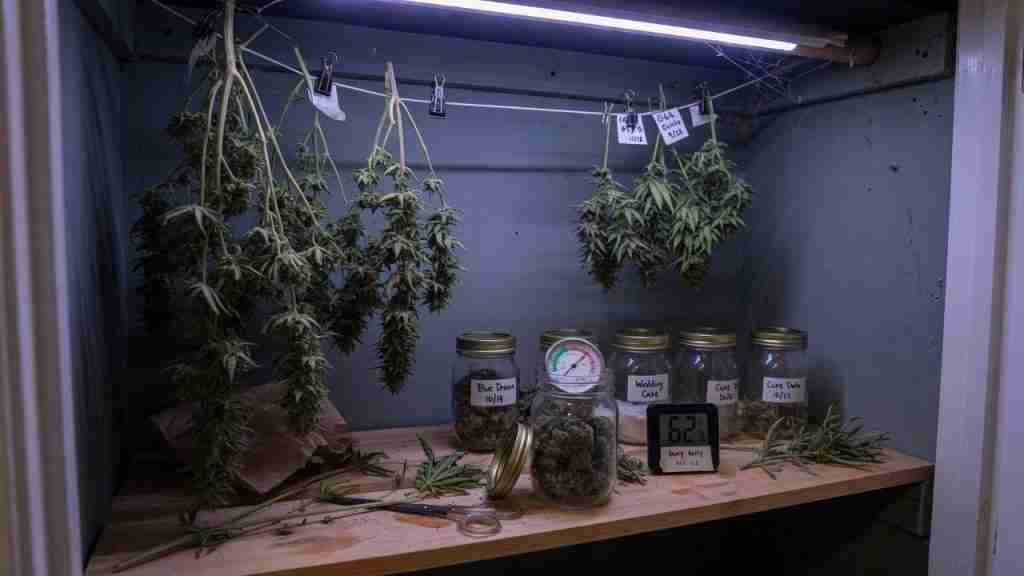
This is where first crops die. A four-day dry in a hot room locks chlorophyll in and blows the terpenes off. You cannot cure that back. Target a slow dry: about 60 °F and 60 percent RH, dark, gentle air that moves the room not the flowers, 7 to 14 days. Stems on the small branches should snap, not fold. Whole plant hang versus branch hang is a separate choice: whole plant hang vs branch hang vs rack drying. The full dry-and-store page is dry, cure, and store cannabis buds.
Trim, then jar in glass about three-quarters full. You want 58 to 62 percent inside the jar. Burp daily the first week, 10 to 15 minutes, then every few days. Two weeks is the floor. A month is where most flower starts tasting like itself. Hay means you dried too fast. Ammonia means you jarred wet: dump the buds out and dry them before they compost. Over-dried buds that already went to dust can sometimes be brought back a little: rehydrating over-dried buds safely.
Cure does not raise THC. It finishes the dry, breaks down the grass note, and keeps the heads from sitting in a plastic bag. Store cool, dark, lid on. Light and heat are how a good jar turns into cardboard by spring.
Size Is Not Quality
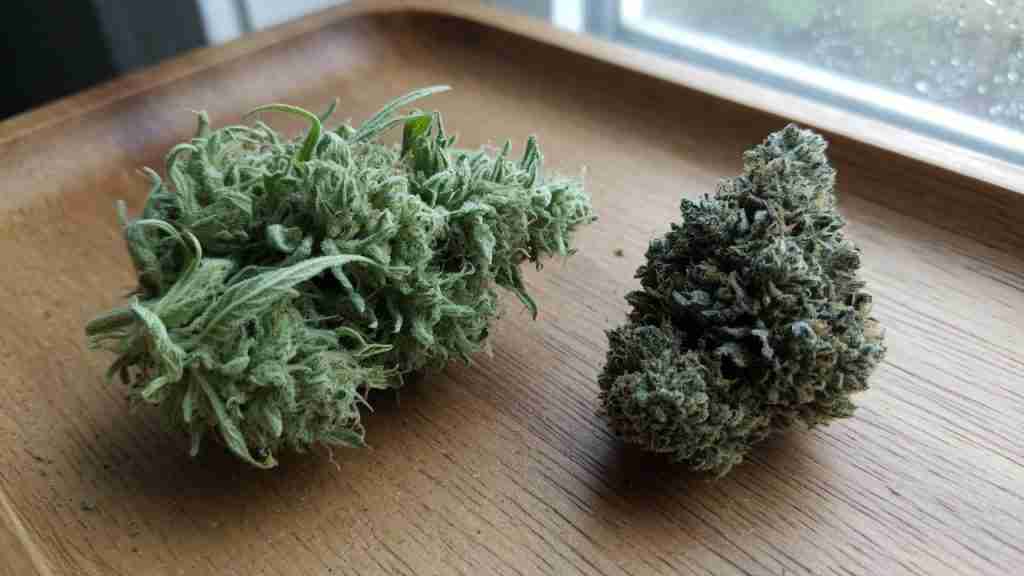
A fluffy bud is usually a light, heat, humidity, or harvest problem, sometimes genetics. Too little PPFD in flower makes air. Too much heat makes fox-tails. Too much humidity late makes you harvest scared and early, which also makes air. Stretch after a weak veg canopy puts sites too far from the diodes. None of those get fixed by a bigger bottle of bloom.
Weigh a dense small cola against a long hollow spear if you need the lesson. The dense one is the quality cannabis buds you were trying to grow. Keep the line that stacked. Keep the even canopy. Keep late-flower RH down. Cut on milky heads. Dry at 60/60. That is the repeatable run. The shop is there when the next pack should match the last one that actually finished tight.