Does Water Hardness Affect Cannabis Crops?


Does water hardness affect cannabis crops? Yes. It is not a death sentence and it is not a reason to buy a household softener for the tent. Hardness is dissolved calcium and magnesium. Those two ions are plant food. They also take up space in the electrical-conductivity budget you were saving for nitrogen, potassium, and the rest of the bottle. Get the number, name the ions, then decide if the tap is a helper, a crowding problem, or a pH fight wearing a hardness costume.
The last version of this page mashed four different water facts into one. It treated a TDS pen as a hardness kit. It listed 400 to 800 ppm as the “water” target, which is feed strength, not source water. It said a sodium water softener was beneficial for marijuana. It told you to pour Cal-Mag because hard water “binds” calcium. That last one is often backwards. Extra calcium on an already-hard tap crowds potassium and magnesium and the weed yellows anyway.
Read your kettle, your glassware, and a cheap test before you rewrite the feed chart. Municipal tap under about 150 ppm as calcium carbonate, with a pH you can hold, grows cannabis after you deal with chlorine. A well over about 300 ppm will eat the room you needed for nutrients. Rain, distilled, and reverse-osmosis water are empty. Empty water needs calcium and magnesium added on purpose. Sodium-softened water is a poor irrigation source. Start from named cannabis seeds, then match the water to the medium. The how-to for actually pouring it sits on watering cannabis plants. The bicarbonate chemistry that fights pH down lives on the sibling page, water hardness and bicarbonates.
What Water Hardness Actually Is
Water hardness is the load of calcium and magnesium dissolved in the water. Labs report it as milligrams per litre of calcium carbonate, which is the same number people call ppm as CaCO3. Soft water sits at 0 to 60. Moderately hard is 61 to 120. Hard is 121 to 180. Very hard is anything above 180. Those are the USGS bands. Your city report, if you have one, uses the same language.
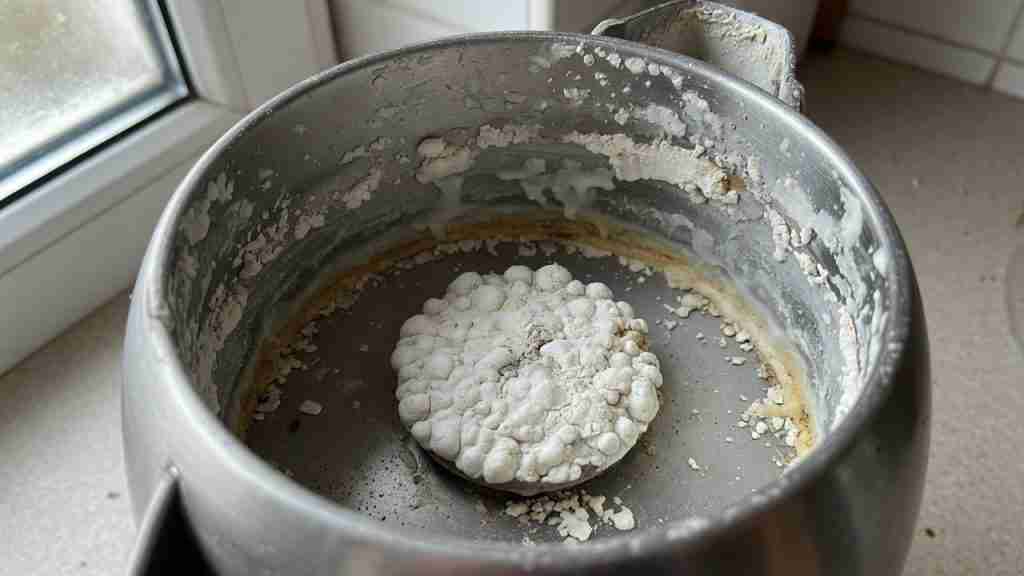
Groundwater usually runs harder than lake or river water because it sat against limestone, dolomite, or gypsum. A prairie well, a limestone-belt municipal plant, and a granite-country spring are not the same tap. The kettle already votes. White scale on the heating element, spots that will not wipe off a glass, soap that will not lather: that is hardness leaving the water as carbonate when you heat it or evaporate it.
For a cannabis plant those same ions are useful until they take the whole seat. Calcium builds cell walls. Magnesium sits in the middle of the chlorophyll molecule. A moderately hard tap is a free Cal-Mag dose. That is why bottled “hard water” nutrient lines exist. They leave calcium and magnesium out of the formula on purpose, because the tap was supposed to bring them. A “soft water” or RO line assumes you will add them. Mixing the two stories is how people burn a coco run with a full Cal-Mag rate on a 250 ppm tap.
Hardness is not a moral category. It is a number. Soft water is not automatically better for weed. It is empty of Ca and Mg, and empty water in coco or hydro shows magnesium yellow fast. Very hard water is not automatically poison. It is crowded. You have less room left for the rest of the feed before the roots see a salt load they cannot drink.
Hardness, Alkalinity, and the TDS Pen
Four numbers get sold as one on grow forums. Hardness is calcium plus magnesium. Alkalinity is the bicarbonate buffer that fights every drop of pH-down you add. TDS, or EC, is everything dissolved: hardness, bicarbonate, sodium, chloride, sulfate, leftover fertilizer, whatever the pipe contributed. Sodium is the ion a household softener puts in when it takes calcium out. Those are four different stories. Treating them as one is how a grower “fixes hardness” and then waters with salt.
Alkalinity is the one that makes a reservoir climb overnight. Hard tap often lands at pH 7.5 to 8.2 because bicarbonate is holding it there. You can have moderate hardness with high alkalinity, or high hardness with a pH that still moves. The plant cares about both. This page owns hardness and the grower actions that follow. The bicarbonate tables and the calcium-uptake chemistry sit on the bicarbonates guide. Do not copy a pH-down rate from a forum until you know which of those two numbers you actually have.
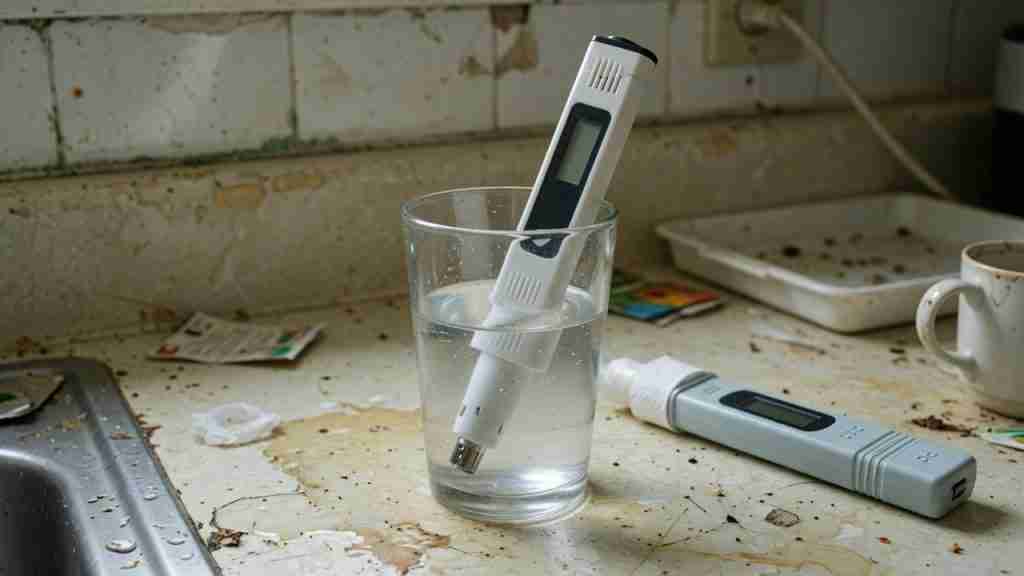
TDS is a conductivity reading converted to ppm. The pen does not know calcium from sodium from leftover bloom formula. A 220 ppm tap made of Ca and Mg is a different liquid from a 220 ppm tap made of sodium after a softener. Same screen, different crop. EC in millisiemens is the cleaner number because it skips the 500-scale versus 700-scale argument. If you use ppm, write down which scale the pen is on and stay there. The feed chart on dialing EC by phase is about the solution you mix, not the raw tap.
A TDS Pen Cannot Name the Ions

The original photo on this URL is a three-in-one TDS, EC, and temperature stick. Keep it. Calibrate it. Use it on the tap, then on the mixed feed, then on the runoff. What it will not do is split hardness from bicarbonate from sodium. For hardness you want a titration kit with drops that change color, a lab report, or the municipal analysis that lists calcium, magnesium, and alkalinity as separate lines. Some combo meters add a “hardness” mode. That mode is still a guess from conductivity unless the manufacturer is doing an actual titration.
The old “optimal water parameters” line on this page said TDS 400 to 800 ppm. That range is a mid-veg to early-flower feed for a lot of bottled lines, not a source-water target. A tap already at 450 ppm of mixed ions has spent most of the budget before you open a bottle. Seedlings and early veg want a much lighter solution. Notes for that window sit on the seedling stage and seedlings day by day. If the tap is already loud, you dilute it or you strip it. You do not stack a full feed on top and call the pen reading “healthy.”
How Hard Water Shows Up on a Marijuana Plant
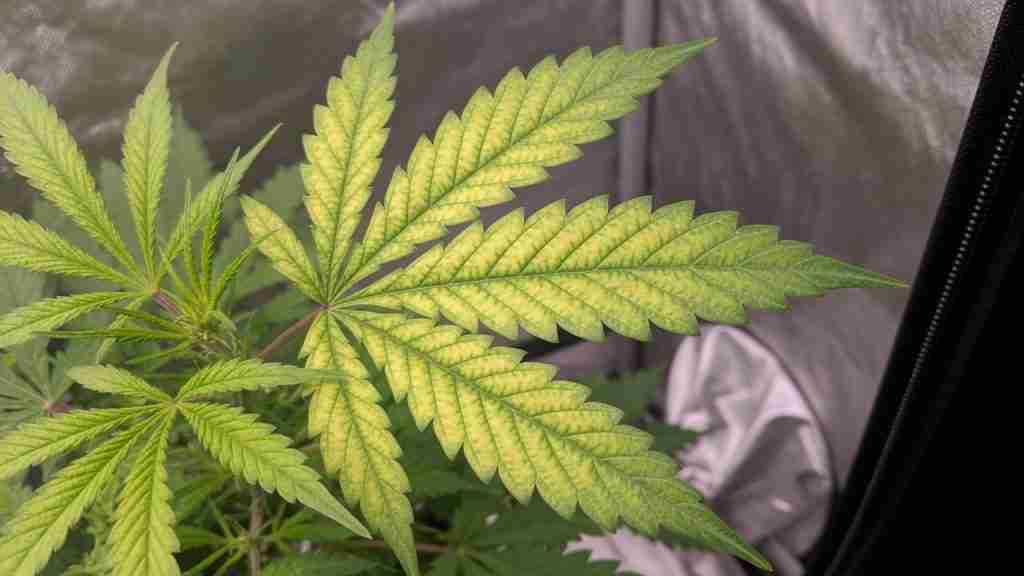
Hard water shows up as a plant problem in three ways, and they get blamed on three different bottles. First, the leftover salts pile up in the pot. Tips burn. The rim crusts. Runoff EC climbs even when you thought you fed light. Second, pH drifts high and stays there, so iron, manganese, phosphorus, and magnesium stop moving even though they are in the mix. That is lockout. The page for that pattern is cannabis nutrient lockout. Third, the ion balance goes sideways. Extra calcium from the tap crowds magnesium and potassium. The fan yellows between the veins. You add more Cal-Mag. The yellow spreads.
True calcium shortage hits new growth: twisted tips, rusty spots on young leaves, weak stems. True magnesium shortage hits older fans first: interveinal chlorosis, the veins stay green longer, the yellow walks up the plant. Both patterns also appear when pH is wrong. In coco, yellow new growth is often lockout from a high-pH, high-EC root zone, not a missing pint of Cal-Mag. Walk the symptoms against cannabis nutrient deficiency and the yield notes on identifying common issues before you double a bottle.
Phosphorus can look locked when the root zone sits alkaline. The old copy blamed hardness for tying up phosphorus. The practical version is pH and bicarbonate, with salt load on top. You do not fix that with more bloom formula. You fix the water, then you feed at the strength the medium can actually drink. pH for growing cannabis is the matching page. Magnesium detail, including how calcium and magnesium fight each other, is on magnesium for growing cannabis.
Scale, Salt Crust, and a Climbing pH
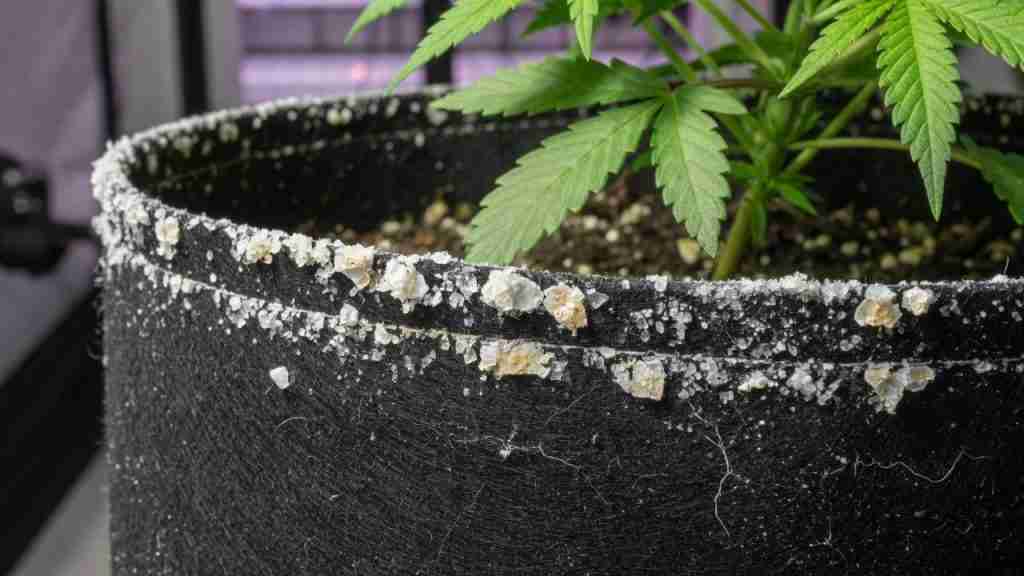
Evaporation leaves the ions behind. A fabric pot rim, a saucer ring, white dust on a dripper, scale on a reservoir heater: that is the same chemistry as the kettle. In a soil pot it builds over weeks. In coco it builds faster because you water more often. In hydro you see it on the lid, the pump, and the stone. If the crust is already there, you have been leaving more in the pot than the plant took. A measured flush resets the medium. Changing the tap without changing the feed just rebuilds the ring.
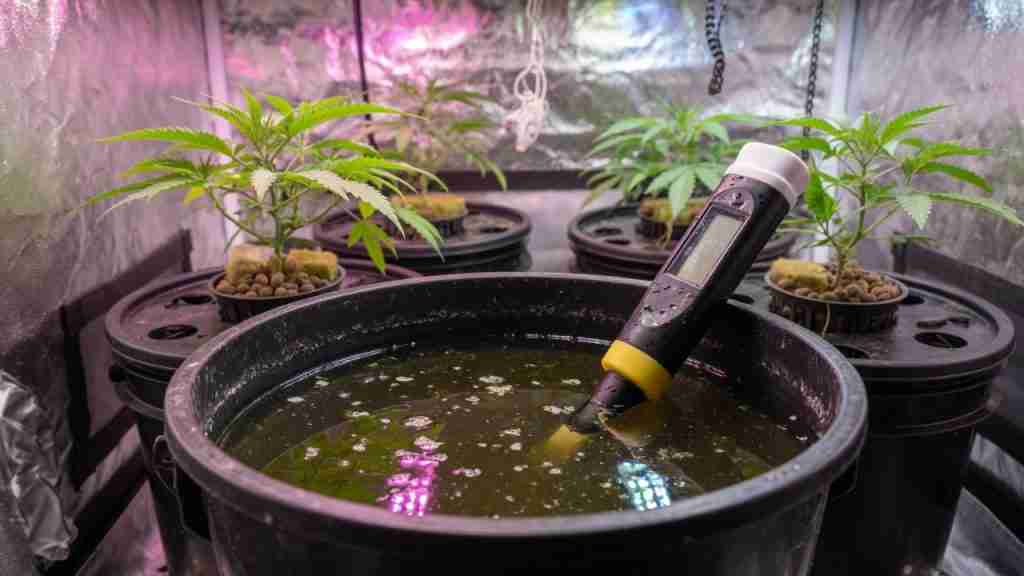
Hydro and coco tell on you overnight. You set the reservoir to 5.8. In the morning it is 6.4, then 6.8, and the new growth goes pale. That climb is alkalinity, usually bicarbonate, riding along with a hard tap. You can chase it with pH-down every few hours, or you can lower the bicarbonate load so the number stays put. Working pH bands on this site: soil about 6.2 to 6.8, coco 5.8 to 6.2, hydro 5.5 to 6.0. A wider soil window of 6.0 to 6.8 still works if the rest of the room is honest. The hydro walkthrough is the hydroponic growers guide.
What Kind of Water to Use for Cannabis

Use the cleanest water you can hold at a stable pH, with enough calcium and magnesium for the medium, and without a sodium load from a softener. That sentence rules out most magic lists. City tap is fine for a lot of soil grows once chlorine is gone. Let chlorinated water sit in an open bucket about a day. Chloramine does not off-gas that way. Chloramine needs a carbon block. A cheap sediment-plus-carbon pair handles rust, grit, chlorine, and a lot of chloramine. It does not take hardness out. That is still the right first filter for most houses.
Rain collected off a clean surface is close to empty. It can also pick up roof grit, bird film, and dissolved metals from old flashing. Distilled water is empty on purpose. Reverse-osmosis water is empty on purpose. All three need calcium and magnesium added before they are a complete irrigation source, especially in coco and hydro. Well water is a lab job. Hardness, iron, sulfur, sodium, and heavy metals can all ride in the same hose. Taste and kettle crust are not a metals test.
A practical split: tap under about 150 ppm as CaCO3, sodium low, pH you can hold after dechlorination, is a working source for soil and a usable source for coco if you pick a hard-water nutrient line or you skip extra Cal-Mag. Tap in the 150 to 300 band is a judgment call. Measure runoff. Watch pH drift. Blend with RO if the reservoir will not sit still. Above about 300 ppm, stop arguing with the water. Strip it or dilute it, then build the feed on a known base. Medium choice still matters; the overview is best medium to grow cannabis and the longer soil write-up is the soil guide.
Soil, Coco, and Hydro Read the Same Tap Differently
Soil buffers. Compost, peat, and the living fraction swallow a moderate hardness load and still feed. You can run a decent tap in a living mix for a whole cycle if you do not also pour a full synthetic rate on top. Overdoing bottled feed in soil is still one of the most common growing mistakes. Organic amendments and a patient water-in, water-out rhythm hide a lot of tap sins. They will not hide a sodium softener. Sodium stays in the cation exchange and the leaves burn from the edge in.
Coco is a cation-exchange medium with almost no native calcium. It will strip Ca and Mg from a soft tap and hold sodium if you send sodium. That is why coco plus RO without Cal-Mag yellows, and why coco plus a hard tap plus Cal-Mag plus a full A/B line salts up. Pick one calcium story and stay on it. Feed earlier in coco than in soil. Hold pH 5.8 to 6.2. The soil-versus-hydro comparison, including coco in the middle, is soil vs hydroponic cannabis.
Hydro has no soil to lie for you. Every ion in the reservoir is either useful or in the way. Hard tap in DWC is a daily pH fight and a cloudy tank. RO plus a complete hydro formula is the boring method that works. Blend RO and tap if you want some native Ca/Mg and a lower waste volume, then mix to a known EC. Pot size, dry-back, and how often you irrigate change how fast salts stack; that side of the room is on environment, media, and pot size.
Test the Tap Once, Then Stop Guessing

You do not need a ritual. You need a baseline. Municipal customers: download the water-quality report and find hardness as CaCO3, alkalinity, sodium, chloride, and pH. Then stick a calibrated TDS/EC pen in the kitchen tap and write that number on the nutrient clipboard. Well users: pay a lab once, or use a drop-titration hardness kit plus a separate alkalinity kit. A cloudy pour from a tote, rust flakes, a sulfur smell, or a stain that looks like tea is a reason to test metals and iron, not a reason to guess from a forum chart.
Retest when the source changes. A new well pump. A city switch from one plant to another in summer. A move to a different house. A switch from hose to RO. You do not retest every watering. You do measure the mixed feed and the runoff on a regular cadence, because that is how you catch salt pile-up before the rim turns white. Keep the same pen, the same scale, and the same units so the notebook means something in week six.
A hardness kit is drops and a color change. It is slow and it is the right tool for the question this article is named after. A TDS pen is fast and it is the right tool for “how loaded is this liquid right now.” Use both. If the report says 90 ppm hardness and the pen says 410, the extra 320 is other ions. That gap is the story. Fill it in before you buy a filter that only claims to “fix hard water.”
Is Water from a Softener Good for Cannabis?

No. Household ion-exchange softeners are a poor default for irrigation. They swap calcium and magnesium for sodium. The kettle stops scaling. The plant loses two nutrients and gains an ion that burns leaf edges and wrecks coco exchange sites. The last version of this URL called softened water beneficial. That sentence was wrong. Bypass the softener for the grow room. Take an unsoftened line, or plumb a tee before the resin tank, and water from that.
Potassium-chloride salt instead of sodium-chloride salt is less ugly. You are then swapping Ca/Mg for potassium, which cannabis can use. It is still a blunt tool. You have no idea how much K you just added, and you still stripped the calcium. Do not build a feed chart on a water-softener setting. If the house already has one, treat the softened tap as contaminated for the tent and get raw water some other way.
The blue dual canister in the original photos is an OptiPure ScaleX-style scale inhibitor. Gear like that is sold to restaurants so espresso boilers last. Template-assisted crystallization and similar cartridges change how scale forms in pipes. They do not give you a known hydroponic water. Do not hang one under the sink and call the runoff “RO.” If you needed the calcium gone, you needed a membrane, not a scale template.

The white two-stage unit is sediment polypropylene plus a carbon block. That is the filter most cannabis rooms actually need on city water. Chlorine off a leaf is ugly. Chloramine is worse because it does not sit out. Carbon handles both when the cartridge is rated for it and you replace it on schedule. Sediment stops rust and sand from chewing a pump. After that pair, test hardness again. It will barely move. That is expected. Filtration for chlorine is not mitigation for hardness. If the report also shows metals you do not want in flower, that is a different cartridge and a different lab, not a bigger carbon block.
Reverse Osmosis and Blending
Reverse osmosis pushes water through a membrane. Almost everything dissolved stays on the waste side, including Ca, Mg, bicarbonate, sodium, and a lot of metals. What comes out is a clean slate, often 10 to 30 ppm on a working residential unit, higher if the membrane is tired or the tap is brutal. You then add calcium and magnesium, then the rest of the feed, then you set pH. That is the method when the well is a mess or the city water will not hold a hydro pH.
RO wastes water. A typical under-sink ratio dumps two to four litres of reject for every litre of product. A booster pump and a better membrane improve that. Catching reject for toilets or the garden is a household choice. For the tent, product water is the point. Replace prefilters so chlorine does not kill the membrane. Replace the membrane when product TDS creeps up. A pen on the product line is the maintenance schedule.
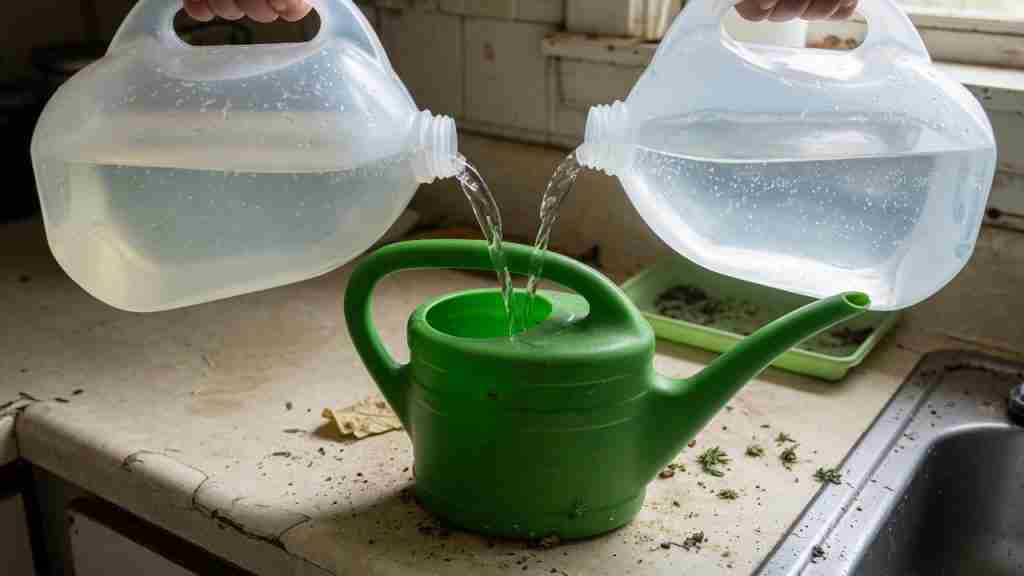
Blending is the grown-up move when tap is only moderately hard. Mix RO and unsoftened tap until the pen sits where you want the base water, often 40 to 100 ppm before nutrients if you still plan to add Cal-Mag, or higher if you are using a hard-water nutrient line and adding none. Stir, measure, then mix feed. Write the blend ratio on the jug. Veg and flower can keep the same base water; you change the nutrient strength, not the tap recipe, unless pH starts wandering in late flower. Full-room context is in the indoor growers guide. Feed building beyond water is on advanced nutrient management and the bottle chemistry on synthetic cannabis fertilizers.
Should You Use Cal-Mag in Hard Water?

Default answer: no extra Cal-Mag on an already-hard tap. The tap brought calcium and magnesium. A hard-water A/B line assumes that. Adding a pint on top raises EC, pushes calcium even higher, and magnesium and potassium lose the fight at the root. The plant then shows magnesium yellow, which is the exact picture that sold you the pint. Stop the extra bottle. Lower the feed. Check pH. The yellow often walks back without a third calcium source.
Use Cal-Mag when the water is empty. RO, distilled, rain, and a truly soft tap in coco or hydro need calcium and magnesium added, usually before the rest of the feed so those ions are in the water when the medium sees them. Coco in particular will show interveinal yellow in veg if you skip it on RO. Soil with compost and a tap at 120 ppm often needs none. Read the nutrient line: “hard water” on the label means leave Cal-Mag on the shelf unless a tissue test or a clear calcium symptom says otherwise.
The FoxFarm Bush Doctor pint in the original photo is 1-0-0 Cal-Mag. Plenty of rooms run it. Plenty of rooms also run it on city water that already tested hard, then wonder why tips burn in week three of flower. Follow the water, not the bottle’s marketing paragraph. Silica is a separate add with its own mixing order; that write-up is using silica for marijuana. Do not dump silica, Cal-Mag, and pH-down into the same cup and call it a method.
If you already crusted the pot, do not “fix” it with more calcium. Reset the medium, then rebuild the feed on a known water. Vegetative plants bounce. A plant deep in flower with a salted coco bag is a patience job; you can still read the stage notes on veg and flower so you stop treating week seven like week two. Gypsum in soil can add calcium without raising pH the way lime does. It is a soil tool, not a hydro trick, and more is not a hardness filter.
Hardness will not set the potency of a finished flower by itself. It will set whether the plant could eat during the weeks you were trying to bulk it. A locked root zone in mid flower is a smaller, harsher harvest, which is why people swear the tap “ruined the weed.” The tap wrote the EC and the pH. You still choose the seeds, the medium, and the bottle. Canadian buyers who want that pack at the door start at buy cannabis seeds in Canada. Then test the hose before the first feeding, not after the fans bleach.