


DIY Cannabis Grow Room Automation: A Comprehensive Guide to Tools, Technologies, and Techniques


Growing cannabis at home can be a rewarding hobby, but it also comes with its challenges. We think one of the biggest is managing all the different elements that go into creating the perfect environment for your plants. From lighting to humidity, and temperature to nutrient delivery, there’s a lot to keep track of, start slow learn the tech for your automation and start there. However, with the right tools and technologies, you can automate much of this process, making your grow room more efficient and less stressful for you and your prize cannabis plants. This guide will walk you through everything you need to know about DIY cannabis grow room automation, from basic setups to more advanced systems.
How Do I Automate My Grow Room?

DIY cannabis grow room automation involves using technology to control various aspects of the environment, ensuring that your cannabis plants get exactly what they need to thrive. Automation can save you time, reduce human error, and help you achieve more consistent results.
Tools and Technologies You’ll Need
- Smart Controllers: These are the brains of your grow room automation. They can manage everything from lighting schedules to temperature and humidity levels. Some popular options include the Titan Controls Spartan Series and the Inkbird ITC-308 temperature controller.

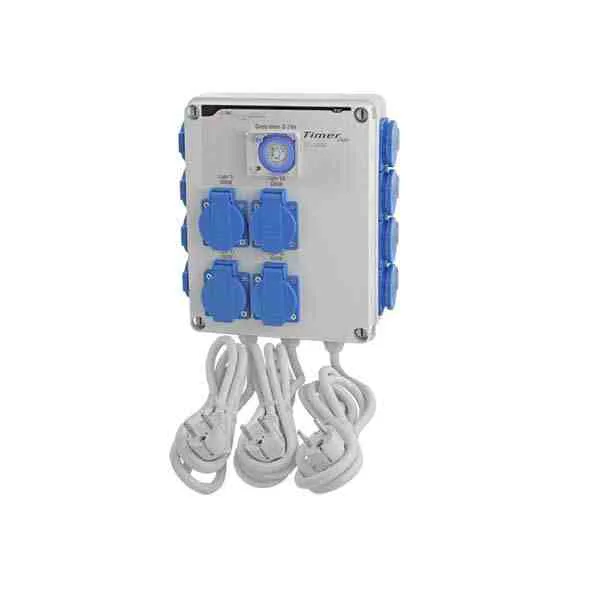
- Timers: Timers are essential for controlling your grow lights, fans, and other equipment. You can use basic plug-in timers, or more advanced digital timers that can be programmed with different schedules.
- Environmental Sensors: These sensors monitor conditions in your grow room and feed data back to your smart controller. Common sensors include temperature, humidity, and CO2 sensors. We have seen many people that relied very heavily on tech only to have it fail, and their beautiful plants burn up in their grow tents.

- Automated Lighting Systems: LED grow lights with built-in timers and dimmers allow you to set light schedules and intensity levels automatically. Brands like Viparspectra and HLG offer great options for automated lighting.
- Hydroponic Controllers: If you’re growing hydroponically, a hydroponic controller can automate nutrient delivery, pH balance, and water levels. Systems like the AutoPot or Blumat are popular among growers.

- Smart Plugs: These devices let you control any equipment plugged into them via a smartphone app. You can use them to turn fans, pumps, or heaters on and off remotely.
Step-by-Step Guide to Automating Your Grow Room

- Start with a Plan: Determine what aspects of your grow room you want to automate. This could include lighting, temperature, humidity, CO2 levels, and nutrient delivery. Sometimes it’s good just to start with a couple automating devices, make sure those work well, before moving into other more complex devices.
- Choose Your Equipment: Based on your plan, select the tools and technologies you’ll need. Consider factors like your budget, the size of your grow room, and the complexity of your grow setup. Ask other growers what they have used in the passed or are using now, they may be able to give you more useful recommendations.
- Install Your Controllers and Sensors: Place your controllers and sensors in strategic locations around your grow room. For example, put temperature and humidity sensors near your plants, and position CO2 sensors at canopy level. With all the new technologies in the world today, finding smart devices to run your lights and fans is much easier today then many years ago.
- Program Your System: Set up your smart controllers, timers, and other equipment according to your grow schedule. This might include setting light schedules, adjusting temperature and humidity levels, and programming nutrient delivery times.
- Monitor and Adjust: Even with automation, you’ll still need to keep an eye on your grow room. Check your sensors regularly and make adjustments as needed to ensure your plants are getting the best possible care. When first starting with your automation setup it is a good idea to check your lighting and other smart tech to make sure it is working the way that you had indented, like the lighting turning off for 12 hours each day for the flowering cycle.
What Is the Most Widely Used Method for Cannabis Cultivation?

Cannabis cultivation methods can vary widely depending on the grower’s goals, the available space, and the desired final product. However, there are a few methods that are more popular than others, particularly among home growers.
Soil-Based Growing

Soil is the most traditional and widely used medium for growing cannabis. It’s simple, inexpensive, and readily available, making it a popular choice for beginners. Very low tech.
Pros:
- Ease of Use: Soil is forgiving and easy to work with, making it ideal for beginners.
- Nutrient Retention: Soil naturally retains nutrients, reducing the need for constant feeding.
- Natural Taste: Many growers believe that soil-grown cannabis has a richer, more natural flavor.
Cons:
- Slower Growth: Plants grown in soil tend to grow more slowly than those in hydroponic systems.
- Pests: Soil can harbor pests and pathogens, which can be difficult to control.
Hydroponic Growing (Fastest growing cannabis recommended)

Hydroponics is a method of growing plants without soil, using a nutrient-rich water solution instead. This method allows for faster growth and higher yields, but it can be more complex and expensive to set up. Much more hightech then growing with soil setups.
Pros:
- Faster Growth: Plants grown in hydroponic systems typically grow faster than those in soil.
- Higher Yields: Hydroponics can produce larger yields compared to soil-based growing.
- Cleaner: Without soil, there’s less mess and fewer pests to deal with.
Cons:
- Complexity: Hydroponic systems require more knowledge and experience to set up and maintain.
- Cost: The initial cost of setting up a hydroponic system can be high.
Organic Growing

Organic growing is a method that focuses on using natural inputs, like compost and organic fertilizers, to grow cannabis. This method is popular among those who prefer a more sustainable approach to cultivation.
Pros:
- Sustainability: Organic growing is better for the environment and often produces healthier plants.
- Flavor: Many growers believe that organic cannabis has a superior flavor and aroma.
- Health Benefits: Organic methods avoid synthetic chemicals, making the final product potentially healthier.
Cons:
- Time-Consuming: Organic growing can be more labor-intensive and time-consuming than other methods.
- Lower Yields: Organic methods may produce lower yields compared to hydroponics or synthetic fertilizers.
What Is the Fastest Method of Growing Cannabis?

If speed is your top priority, there are several methods and techniques you can use to accelerate the growth of your cannabis plants.
Hydroponics: The Fastest Growing Medium
Hydroponics, as mentioned earlier, is a method that allows plants to grow faster by delivering nutrients directly to the roots in a water-based solution. This bypasses the need for the plant to search for nutrients in the soil, allowing for quicker growth.
Autoflowering Strains
Autoflowering cannabis strains are bred to flower based on age rather than light cycles. This means they can go from seed to harvest in as little as 8-10 weeks, making them one of the fastest-growing options available.
Optimizing Light Schedules
Providing your plants with the optimal light schedule can also speed up growth. Most growers use an 18/6 light schedule (18 hours of light, 6 hours of darkness) during the vegetative stage. However, some growers use a 24/0 light schedule to maximize growth.
Quick Tips for Faster Growth:
- Use High-Intensity Lighting: LED or HPS lights with high output can promote faster growth.
- Maintain Ideal Environmental Conditions: Keep temperature, humidity, and CO2 levels in the optimal range.
- Proper Nutrient Management: Use high-quality nutrients and monitor pH levels closely.
How to Build a Grow Shed?

Building a grow shed is a great way to create a dedicated space for your cannabis plants, away from the rest of your home. A well-designed grow shed can provide the perfect environment for your plants, with plenty of space for all your equipment.
Step-by-Step Guide to Building a Grow Shed

- Choose Your Location: Pick a spot on your property that’s out of the way and has easy access to electricity and water.
- Plan Your Space: Decide how big your shed needs to be. Consider how many plants you want to grow, and make sure you have enough space for all your equipment, including lights, fans, and hydroponic systems.
- Insulate Your Shed: Proper insulation is key to maintaining a stable environment inside your grow shed. Use foam board or fiberglass insulation to keep the heat in and the cold out.
- Install Electrical Wiring: You’ll need electricity to power your lights, fans, and other equipment. If you’re not comfortable doing this yourself, hire a professional electrician.
- Set Up Ventilation: Good airflow is crucial for preventing mold and keeping your plants healthy. Install intake and exhaust fans to keep the air moving, and consider using a carbon filter to remove odors.
- Install Lighting: Choose the right type of grow lights for your setup. LED lights are a popular choice for grow sheds because they’re energy-efficient and produce less heat.
- Set Up Your Growing System: Whether you’re using soil or hydroponics, set up your growing system and make sure everything is working properly before you bring in your plants.
How Do You Make Room Automation?

Creating a fully automated grow room requires integrating various systems to work together seamlessly. Here’s how to get started:
Key Components of Room Automation
- Smart Controllers: As mentioned earlier, these devices manage all aspects of your grow room environment. They can be programmed to control lighting, temperature, humidity, and CO2 levels.
- Automated Watering Systems: These systems ensure that your plants get the right amount of water at the right time. Drip irrigation systems and hydroponic controllers are popular choices.
- Environmental Sensors: These sensors feed real-time data to your smart controllers, allowing for automatic adjustments to maintain ideal growing conditions.
- Climate Control Systems: Automated climate control systems can adjust the temperature and humidity levels in your grow room. These might include HVAC systems, dehumidifiers, and humidifiers.
Step-by-Step Automation Process
- Install Your Equipment: Set up your smart controllers, sensors, and other automation equipment according to the manufacturer’s instructions.
- Program Your System: Use the software provided with your smart controllers to program your system. This might include setting up schedules for lighting, temperature, humidity, and watering.
- Monitor and Adjust: Keep an eye on your system’s performance and make adjustments as needed. Even with automation, it’s important to stay involved in the process to ensure everything runs smoothly.
How Do You Make an Automated Hydroponic System?

An automated hydroponic system can make growing cannabis more efficient and less labor-intensive. Here’s how you can build one:
Components of an Automated Hydroponic System
- Reservoir: This is where your nutrient solution is stored. It needs to be large enough to hold enough solution for your entire system.
- Pump: The pump moves the nutrient solution from the reservoir to your plants. Choose a pump that’s powerful enough to move the solution efficiently.
- Drip Irrigation System: This system delivers the nutrient solution directly to the roots of your plants. Drip emitters should be placed near the base of each plant.
- pH and EC Meters: These tools monitor the pH and electrical conductivity (EC) of your nutrient solution, ensuring that it’s properly balanced.
- Timers: Timers control when your pump turns on and off, ensuring that your plants get the right amount of nutrients at the right time.
Building Your Automated Hydroponic System

- Set Up Your Reservoir: Place your reservoir in a central location where it’s easy to access. Fill it with your nutrient solution. These can be DWC as these seems to be the easiest for most growers.
- Install the Pump and Drip System: Connect your pump to the reservoir and the drip irrigation system. Make sure that the drip emitters are positioned correctly to deliver nutrients directly to your plants. Never let your pump run dry as this will break your pump. Make sure you look for any issues before hand like lines that can clog, buckets that can overflow, or anything else that may end up with your water on the flood instead of your system.
- Set Up pH and EC Monitoring: Place your pH and EC meters in the reservoir to continuously monitor the nutrient solution. Adjust the solution as needed to keep it within the optimal range. You can also buy nutrients that control the PH for you.
- Program the Timers: Set your timers to control when the pump turns on and off. This will depend on the size of your system and the needs of your plants. Try to pick proven produces as this will help you in the long run with maintenance of your hydroponic system.
- Test the System: Before adding plants, run your system for a few days to make sure everything is working properly. Check for leaks, make sure the nutrient solution is flowing evenly, and adjust the timers as needed.
How Do You Automate Humidity in a Grow Tent?

Maintaining the right humidity levels in your grow tent is crucial for healthy cannabis plants. Too much humidity can lead to mold, while too little can cause your plants to dry out. Here’s how to automate the process:
Tools for Automating Humidity
- Humidifier: A humidifier adds moisture to the air, raising the humidity level in your grow tent. Choose one with a built-in hygrometer for automatic control.
- Dehumidifier: A dehumidifier removes excess moisture from the air, lowering the humidity level. Look for a model that can be programmed to maintain a specific humidity range.
- Environmental Controller: This device monitors the humidity levels in your grow tent and controls the humidifier and dehumidifier to maintain the ideal range.
Step-by-Step Guide to Automating Humidity
- Set Up Your Equipment: Place the humidifier and dehumidifier in your grow tent. Make sure they’re positioned so that air can circulate freely.
- Connect to an Environmental Controller: Connect your humidifier and dehumidifier to the environmental controller. Set the desired humidity range based on the stage of growth your plants are in.
- Monitor and Adjust: Regularly check the humidity levels in your grow tent to ensure they’re staying within the desired range. Adjust the settings on your controller as needed.
How Do You Program a Grow Light Timer?

Programming a grow light timer is a simple yet crucial step in automating your grow room. Proper lighting schedules are essential for healthy cannabis plants.
Types of Grow Light Timers
- Mechanical Timers: These are basic timers with a dial that you set manually. They’re simple to use but lack precision.
- Digital Timers: Digital timers allow you to program multiple on/off cycles per day with greater accuracy. They’re ideal for more complex lighting schedules.
- Smart Timers: These timers can be controlled via a smartphone app, allowing you to adjust the lighting schedule remotely. (Recommended)
Step-by-Step Guide to Programming a Grow Light Timer
- Choose Your Light Schedule: Decide on the light schedule you want to use. For the vegetative stage, an 18/6 schedule is common, while the flowering stage usually requires a 12/12 schedule.
- Set the On/Off Times: Use the timer’s interface to set the times when you want your lights to turn on and off. For example, for an 18/6 schedule, you might set the lights to turn on at 6 AM and off at midnight.
- Test the Timer: Once you’ve programmed your timer, test it to make sure it’s working correctly. Check that the lights turn on and off at the correct times.
- Adjust as Needed: As your plants progress through their growth stages, you may need to adjust the light schedule. Reprogram the timer as needed to match the new schedule.
How Do You Make an Indoor Grow System?

Creating an indoor grow system involves setting up an environment that mimics the natural conditions your cannabis plants would experience outdoors. This includes providing the right amount of light, water, and nutrients, as well as controlling the temperature and humidity.
Components of an Indoor Grow System
- Grow Tent: A grow tent is a portable, controlled environment for your plants. It helps contain light, control temperature and humidity, and keep pests out.
- Grow Lights: Choose high-quality grow lights that provide the right spectrum of light for your plants. LED lights are a popular choice for indoor growing.
- Ventilation System: Proper ventilation is crucial for maintaining the right temperature and humidity levels. Use an inline fan and ducting to move air in and out of the grow tent.
- Hydroponic or Soil System: Depending on your preference, set up a hydroponic system or use high-quality soil to grow your plants.
- Automation Tools: Use timers, smart plugs, and environmental controllers to automate the lighting, watering, and climate control in your grow system.
Setting Up Your Indoor Grow System
- Choose Your Location: Find a space in your home that’s out of the way and has easy access to electricity.
- Set Up the Grow Tent: Assemble your grow tent according to the manufacturer’s instructions. Make sure it’s positioned in a way that allows for easy access to your plants.
- Install the Grow Lights: Hang your grow lights at the appropriate height above your plants. Adjust the height as your plants grow to ensure they’re getting the right amount of light.
- Set Up the Ventilation System: Install the inline fan and ducting to ensure proper airflow in and out of the grow tent. Consider using a carbon filter to remove odors.
- Set Up Your Growing System: Whether you’re using soil or hydroponics, set up your growing system inside the grow tent. Make sure everything is in place and working correctly before adding your plants.
- Automate Your System: Use timers and controllers to automate the lighting, watering, and climate control in your grow system. Monitor the conditions regularly and make adjustments as needed.
FAQs
Q: Can I automate a small grow tent? A: Yes, even small grow tents can benefit from automation. You can use timers, smart plugs, and environmental controllers to manage lighting, temperature, and humidity.
Q: What is the best lighting schedule for cannabis plants? A: During the vegetative stage, an 18/6 light schedule is recommended. For the flowering stage, switch to a 12/12 schedule.
Q: How do I prevent mold in my grow tent? A: Maintaining proper humidity levels and ensuring good airflow are key to preventing mold. Use a dehumidifier and ventilation system to keep the environment dry.
Q: What are the advantages of hydroponic growing? A: Hydroponics allows for faster growth, higher yields, and more control over nutrient delivery compared to soil-based growing.
Q: How often should I water my cannabis plants? A: The frequency of watering depends on the growing medium, stage of growth, and environmental conditions. In general, water when the top inch of soil feels dry.
