Cannabis Canopies: Designing the Perfect Plant Canopy for Light Penetration

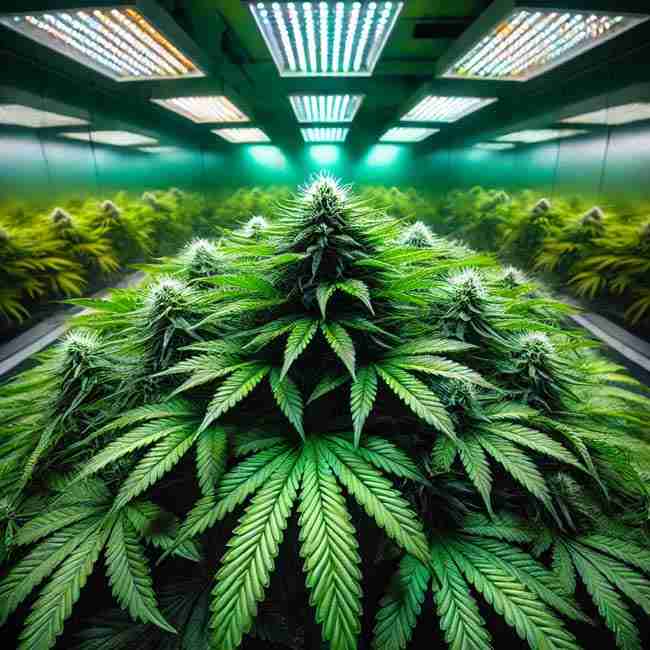
Imagine walking into your grow room and seeing a lush, level field of green. Every bud site basks in light, and no branch is left lurking in the shadows. Sounds like a dream, right? This dream can be your reality if you master the art of cannabis canopies. In simple terms, a cannabis canopy is the top layer of your plant (or plants) where most leaves and buds collect light. Managing this canopy well is the name of the game for successful cannabis growing. In this article, we’ll walk you through everything you need to know—speaking directly to you, the grower—to help you design the perfect plant canopy for optimal light penetration, healthy growth, and bigger yields.
What Does Canopy Mean in Cannabis?
When growers talk about a cannabis canopy, they’re talking about the umbrella of leaves and buds that forms at the top of your cannabis plants. Think of it like the treetops in a forest—the canopy is the layer that gets the most sunshine. In your grow, the canopy is where most of the action happens: it’s where your plant absorbs light for photosynthesis and grows those precious buds.
In plain English, the canopy is just the top of your plant. If you have several plants close together, their tops can form one big combined canopy covering your grow space. Why does this matter? Because this canopy determines how well light is distributed to your plants. A thick, well-spread canopy means your plants are maximizing their light intake. On the flip side, an uneven or overgrown canopy can cause parts of your plant to live in the shadows, missing out on light. And as you know, light is life for a cannabis plant!
Understanding the Cannabis Garden Canopy

To really get a grip on canopy management, you need to understand how a canopy forms. Cannabis plants naturally want to grow like a Christmas tree – one big main stem (called the apical stem) that dominates and grows tallest, with smaller branches below. This means if you let your plant grow freely, you’ll end up with one tall top and many lower branches that might get shaded out. In a garden with multiple plants, one plant might shoot up taller than the rest, creating an uneven canopy. It’s like having one tall kid in a group photo blocking the others!
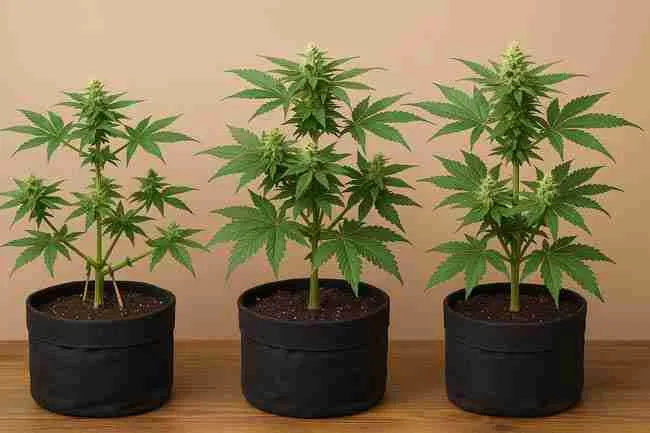
By paying close attention to your canopy, you can take control of this natural growth. The goal is usually to have an even, flat canopy so that all parts of the plant get equal light. Imagine your grow lights shining down like the sun—if the canopy is even, every bud gets a fair share of rays. If it’s uneven, some buds get too much attention (light) while others are left in the dark. So as a grower, you should watch your plants’ height and shape. When you notice one branch making a run for it and growing taller than the others, you can train or trim it (we’ll get to how in a bit) to keep everything level. Over time, you’ll learn to read your canopy like a book, spotting what it needs at a glance.
Remember, your cannabis canopy isn’t just about looks—it’s a living, changing part of your garden that reflects the overall health of your grow. A well-managed canopy means your plants are likely getting what they need. If something’s off (like light, nutrients, or space), it often shows in the canopy first. So keep an eye on that green blanket at the top of your garden; it’s telling you a story about your plants’ growth.
What Are the Main Benefits of Growing a Cannabis Canopy?

Why put so much effort into managing your canopy? The benefits are worth their weight in gold (or in this case, bud). Here are the big advantages of maintaining a nice, even cannabis canopy:
- Better Light Penetration: When your canopy is flat and spread out, light can reach deeper into the plant. This means even the lower buds (often called “popcorn buds”) get some love from the light. With more light hitting more leaves and bud sites, your plant can photosynthesize efficiently and develop fatter buds from top to bottom.
- Improved Airflow: A well-spaced canopy allows a breeze to flow through your garden. Good airflow is a breath of fresh air for your plants—it helps regulate temperature and humidity and prevents stale pockets of damp air where mold or mildew could form. Plus, a gentle wind makes your stems stronger, as if your plants are doing a little workout in the breeze.
- Healthier Plants: Managing your canopy often goes hand-in-hand with pruning and training (like trimming excess leaves or bending branches). These practices help remove dead weight (like yellowing leaves or tiny branches that won’t produce much) so the plant can focus on healthy growth. The result? A canopy full of vigorous, green leaves and healthy bud sites. Think of it as giving your plant a nice haircut—it looks better and grows better afterwards!
- Maximized Grow Space: If you’re growing indoors or in a limited area, you want to use every inch of space wisely. Training your plants to form a canopy means you’re creating a carpet of buds across your grow area. You’re not wasting space with one tall plant in the corner and others crouching low. Instead, you have an even field of green that makes the most of your lights and space. More canopy coverage = more area for buds to develop.
- Easier Maintenance: When your canopy is even, it’s easier to work with. You can adjust lights to one uniform height, prune evenly, and spot issues like pest infestations or nutrient deficiencies quickly (since uneven coloring or wilting stands out on a flat canopy). It’s like tending a well-trimmed hedge versus a wild bush—you can see what you’re doing and access all parts easily.
In short, a well-tended canopy leads to happier plants and a more productive garden. Just like a well-maintained lawn or a pruned fruit tree yields better results, your cannabis plants will reward you when you give their canopy some TLC (tender loving care).
Does Growing a Cannabis Canopy Increase Yields?

Many growers swear that better canopy management equals better yields. And generally, they’re right. If you think about it, an optimized canopy means more of your plant is getting optimal light and air. More light to more bud sites usually means more bud, period. By training and pruning to create a broad, even canopy, you’re helping the plant direct its energy into producing flowers (buds) rather than just growing taller or bushier with no plan.
Real-life example: Imagine two growers each have one cannabis plant. Grower A lets the plant grow naturally. It becomes tall with one big cola (main bud) at the top and lots of smaller buds below. Many of the lower buds stay small because they’re shaded. Grower B, however, tops the plant (cuts off the top growth) and trains the branches outwards. Now the plant of Grower B has, say, 4 main colas and a wider canopy so light hits many bud sites evenly. At harvest, Grower B’s plant is loaded with medium to large buds all over, while Grower A has one giant bud and a bunch of airy popcorn nuggets. Who do you think comes out ahead?
Of course, yields depend on lots of factors—strain genetics, nutrients, light intensity, etc. Canopy management isn’t a magic wand that will fix a poor environment or genetics. But it can significantly boost your yields when combined with good overall care. Some growers report yield increases of 10-20% or more just by techniques like topping and ScrOG (Screen of Green). Even if your increase is smaller, every extra gram counts, right?
One thing to note: developing a great canopy might require a little extra vegging time (time before flowering). When you top or train a plant, you often give it a bit more time to recover and fill out the canopy before switching to the flowering stage. This can delay harvest by a week or two, but the payoff is a heavier harvest. So it’s a trade-off: a little more time growing can lead to a lot more bud in the end.
In summary, a good canopy is like a big net that catches all the light and turns it into bud. A patchy or uneven canopy lets light spill onto the floor (wasted light) or into a few tops while other parts miss out. For most growers, taking the time to train plants and shape the canopy is well worth it when it comes to harvest weights.
The Importance of Light Distribution on the Cannabis Canopy
Light is to plants what food is to us. But just like you wouldn’t eat your entire day’s meals in one go, plants don’t benefit from all the light in one spot and none elsewhere. It’s not just about how much light you provide, but how evenly that light is spread across your cannabis canopy.

Imagine your canopy is a big solar panel. Every leaf is like a solar cell that converts light into energy for the plant. If some parts of the panel are always shaded, you’re not getting the full power. Similarly, if one part of the canopy is too close to the light, it might get “burned out” while the edges remain under-lit. The goal is to have balanced light distribution so that each leaf in the canopy can do its job.
How do you achieve that? First, consider your grow light setup:
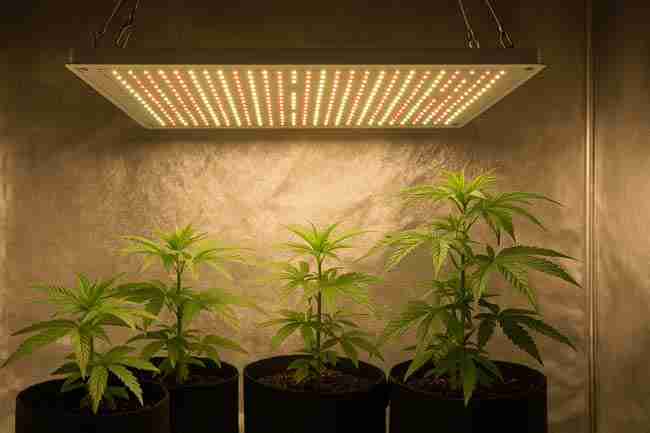
- Light Positioning: Center your lights over the canopy and consider using multiple smaller lights instead of one big one if you have a wide area. Multiple lights can reduce shadows because they hit the canopy from different angles. If you’re using a single light, you might notice the plants directly under it grow taller (reaching for that intensity) while ones on the side stretch sideways toward the light. Adjust your lights or plant positions to fix these shady deals and ensure even coverage.
- Reflective Surfaces: Indoors, having reflective walls (like mylar or white paint) around your canopy helps bounce light to lower and side parts of the plants. This way, even if a bud site isn’t directly under the light, it still catches some indirect glow. It’s like setting up mirrors to light up a dark corner of a room.
- Avoiding Light Burn: More light isn’t always better if it causes stress. If the top of your canopy is too close to a high-intensity light, you might see symptoms of light burn or bleaching (the leaves turn yellow-white and look sun-bleached). This is a sign to give them some space (literally, by raising the lights or lowering the plants). A well-managed canopy will be just the right distance from the light to soak up rays without getting scorched.
- Even Canopy = Even Light: This circles back to training your plants. Techniques like topping and LST (low-stress training) ensure no single branch is towering over others. If one cola is much taller, it will hog the light, and the plant’s energy will go mostly to that cola. By keeping your canopy level, you let each bud site get equal opportunity to bask in the light. Uniform light = uniform growth, which means you won’t have a mix of overripe buds at the top and underdeveloped buds at the bottom when harvest time comes.
In essence, light distribution is all about fairness—giving every inch of your canopy a fair share of light. If you notice any part of your canopy looking pale or stretching, it’s a clue that the light isn’t distributed well there. You might need to reposition a branch, add a small supplemental light, or adjust your main lamp. When you get the light distribution dialed in, your plants will thank you with vigorous, even growth across the canopy.
How Far Should the Light Be From the Cannabis Canopy?
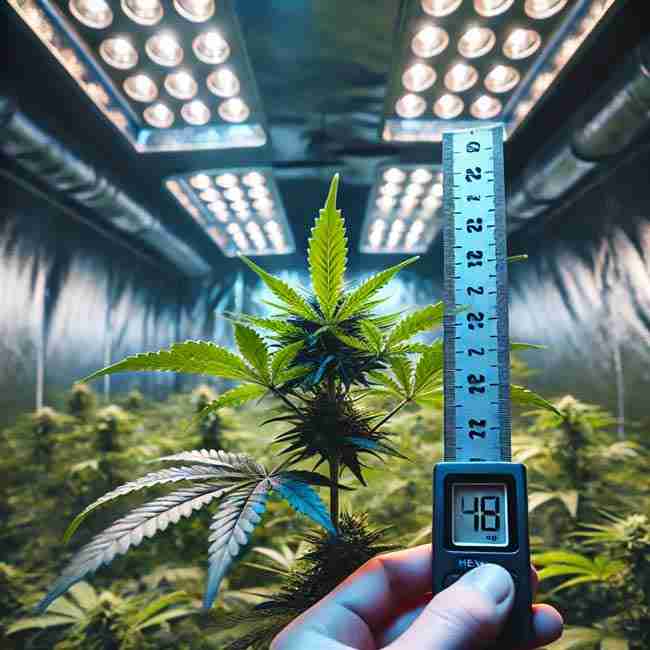
Finding the perfect distance between your grow light and the canopy can feel like a balancing act. Too close, and you risk fried leaves; too far, and your plants might stretch and scrounge for light. The optimal distance actually depends on the type of light and the growth stage of your plants, but let’s break down some general guidelines to keep you on the right track.
Seedlings and Clones: Young cannabis plants are tender, just like babies. They don’t need intense light right away. If you’re using powerful LED or HID (HPS/MH) lights, start them high—around 24 to 36 inches (60-90 cm) above the seedlings. This gives a gentle light that won’t overwhelm them. If you’re using CFLs or fluorescent tubes (weaker lights), you can go closer, like 2 to 4 inches, since those lights don’t emit much heat. Watch your baby plants: if they start to stretch (get tall and lanky), it means they’re not getting enough light and you might need to lower the light a bit.
Vegetative Stage: Once your plants are in veg and growing steadily with a good root system, they can handle more light. For most LEDs or HPS lights, keeping them about 18 to 24 inches (45-60 cm) above the canopy is a good rule of thumb during vegetative growth. At this distance, the plants get plenty of light to fuel strong growth, but there’s still a buffer to prevent heat or light burn. Always observe your plant—if the leaves closest to the light start curling upward (“tacoing”) or showing burnt tips, you might need to raise the light a bit.
Flowering Stage: Now it’s showtime – buds are developing and your plant wants all the light it can get to fatten them up. In flowering, you can often move lights a bit closer (since the plants are usually taller now and you want to penetrate that canopy). Many growers aim for about 12 to 18 inches (30-45 cm) for LED and HPS during bloom. This gives strong light intensity for big buds. But caution: every light is different. High-end LEDs can be very intense even at 18 inches, so keep an eye out for light burn or bleaching on the top colas. It’s better to err on the side of a little more distance if you’re unsure.
Quick Tip: Use the hand test – place your hand at canopy level under the light. If your hand gets uncomfortably hot after 30 seconds, the light is likely too close for your plants. Also, modern LED grow lights often come with PAR or PPFD charts showing recommended hang heights for each growth stage, so check the manufacturer’s guidelines if you have them.
Remember, these distances are starting points. Every grow space is unique. A big factor is how strong your light is (a 1000W light needs to be farther than a 200W light, for example) and how your specific strain reacts. Always let your plants “tell” you what they need. If you see signs of stress, adjust accordingly. On the other hand, if your plants look healthy and happy, you’re probably at the sweet spot. Keeping the right distance ensures your canopy gets maximum light without the burn, which is key to fast, healthy growth.
Pruning for Canopy: A Gardener’s Secret Weapon

If there’s one “secret” many successful growers swear by, it’s pruning. Pruning is the practice of trimming away certain parts of the plant, and when done right, it’s like turning on a growth turbocharger. When it comes to canopy management, pruning helps you shape the plant and direct its energy where it matters most.
One popular pruning technique for cannabis is “lollipopping”. No, it doesn’t involve any candy – it’s called that because you end up with a plant that has a bare stem (like a lollipop stick) and a bushy top (like the candy). To lollipop, you remove the lower branches and leaves that are sitting under the canopy and not getting much light. Those lower parts usually won’t produce much except tiny, fluffy buds that take energy but don’t give much back. By removing them, you force the plant to focus on the upper canopy buds that do get light. The result? The top buds grow bigger and denser since they’re getting all the love.
Another aspect of pruning is defoliation – plucking or cutting some fan leaves, especially big ones that cast shadows over bud sites. This can be a bit controversial, and you have to strike a balance. Leaves are how the plant makes energy, but too many can overlap and create a jungle where buds are hidden. Many growers will do a strategic defoliation around week 3 of flowering, removing some of the largest fan leaves that block light from reaching buds. It’s like opening up little skylights in your canopy so light can hit all the buds. Just don’t overdo it – as the idiom goes, don’t nip off more than you can chew (okay, we tweaked that idiom)! In other words, nip it in the bud carefully: remove enough to help, but not so much that the plant can’t support its growth.
Pruning is also about maintaining plant health. By removing dead or yellowing leaves, you prevent areas where disease or pests might breed. And when airflow improves from pruning dense areas, you reduce the chances of mold in your canopy. Always use clean, sharp scissors or pruning shears (you don’t want to accidentally infect your plant through a cut). Take your time and work slowly but surely – step back after a few cuts, see how the canopy looks, and then continue if needed. Pruning is as much an art as a science; each strain and plant is a bit different in how much they can handle.
In short, pruning is your secret weapon to sculpt the perfect canopy. It’s like being a hairdresser for your plants: snipping here and there to create a stylish, even, and productive “hairdo” on your cannabis. The first time you prune can feel scary (“I cut off growth, won’t my plant hate me for it?”). But when you see the plant bounce back with even more vigor, you’ll be glad you did it. Just remember the golden rule of pruning: when in doubt, take it out – if a branch or leaf isn’t doing much good, it’s probably safe to prune. Your canopy will be better for it!
Training Techniques for Superior Yields Under Your Canopy

Pruning alone can do wonders, but if you really want to dial in your canopy, training techniques are where it’s at. Think of training as teaching your plant how to grow in the shape you want. Instead of letting it grow straight up, you gently bend, tie, or trim it so that it spreads out wide and flat. This is how you get that dream canopy where every top is at the same height.
Here are a few go-to training techniques used by cannabis growers:
- Topping: This is usually the first training technique growers learn. Topping means cutting off the tip of the main stem (usually after the plant has a few sets of leaves). It sounds drastic, but topping forces the plant to grow two new main branches at the cut instead of one. You’ve essentially made your plant branch out. The canopy effect: the plant becomes shorter and bushier, with two main colas instead of one central cola. You can even top multiple times on a big plant, doubling the number of main branches each time (e.g., one becomes two, two becomes four, etc.). Each topping creates a more spread-out canopy. Just remember to give the plant some time to recover after each top – it’s a high-stress technique (you did just cut off its head, after all!).
- FIM (“Fuck I Missed”): This oddly named technique is basically a variation of topping. Instead of cutting the entire growth tip, you cut most of it, leaving a bit behind. The result is the plant may produce 3-4 new shoots instead of just 2. FIM is slightly less predictable (hence the jokey name), but many growers like it because you potentially get more branches with one cut. It’s also a high-stress move, but if done right, it can create a bushy canopy without as much slowdown as topping sometimes causes.
- Low-Stress Training (LST): As the name implies, this method is gentle on the plant. You don’t cut anything; instead, you bend and tie down branches, encouraging the plant to grow sideways. For example, you can tie the main stem down so the top is lower than some side branches – the plant then thinks those side branches are now tops and they start growing up more. Over time, LST can produce a very even canopy because you keep repositioning and tying stems so that all growing tips stay at the same height. It’s like coaxing the plant along rather than whacking it. LST is great for beginners since it’s hard to seriously harm your plant doing this (just don’t snap the branches).
- ScrOG (Screen of Green): This technique uses a mesh screen or net above your plants. As the plant grows, you gently weave and spread new branches along the screen horizontally, instead of letting them grow upward through it. The screen holds the branches in place, creating a blanket of buds across the entire grow space. ScrOG is super effective at maximizing yields in a given area because it ensures every inch of that screen can fill up with a bud site poking through. It does require patience and regular maintenance (tucking branches under the net every few days during the stretch period), but the end result is a sea of colas all at the same height, getting equal light.
- Super Cropping: This is a form of high-stress training where you actually crush or pinch the inner tissue of a branch to make it pliable, then bend it over. It sounds violent, but done right, the branch doesn’t break open, it just collapses enough to stay bent. The plant heals this “wound” and often the knuckle that forms makes the branch even stronger. Super cropping is useful when a particular branch is too tall – you can bend it down to canopy level without cutting it off. The plant will redirect energy to other areas too, boosting overall growth. It’s a bit advanced, but very handy when you have a stubborn tall branch thumbing its nose at your even canopy.
Each of these techniques can help shape your canopy, and often growers use a combination. For instance, you might top a plant once or twice, then use LST to spread it out, and later use a ScrOG net to support everything in flower. There’s no one-size-fits-all – the “best” approach depends on your grow space, the strain (some plants respond better to training than others), and how much time and effort you want to put in.
To give you a quick comparison of these training techniques and how they affect your canopy, check out the table below:
| Training Technique | How It’s Done | Effect on Canopy & Yield |
|---|---|---|
| Topping | Cut off the main top after a few nodes (growth tips). | Stress: High; Canopy: Bushier (multiple main colas); Yield: More top buds, higher potential yield after recovery. |
| FIM | Cut most of the main top (“almost” topping). | Stress: High; Canopy: 3-4 new tops may form, canopy fuller with slightly less height; Yield: Potentially more colas than topping with a bit less shock. |
| LST | Gently bend and tie down branches over time. | Stress: Low; Canopy: Spreads out horizontally, very even height; Yield: More bud sites get light, often boosting yields (great for small spaces). |
| ScrOG | Use a screen/net to spread branches horizontally. | Stress: Low/Med; Canopy: Extremely flat and wide across the screen; Yield: High yield per area, as nearly every bud becomes a top cola with full light. |
| Super Cropping | Pinch stems to soften and bend them over. | Stress: Med/High; Canopy: Tall branches are tamed to canopy level; Yield: Redirects energy to other buds, preventing one cola from hogging growth, can improve overall yield. |
This table sums it up: each technique has its pros and cons, but all aim to even out your canopy and boost bud production. If you’re new, you might start with one or two methods (like topping + a bit of LST) and see how your plants respond. As you gain experience, you’ll get comfortable mixing techniques to fine-tune your canopy. Remember, each plant is a little different, so what works best can vary. Listen to your plants – they’ll show you what they like (through healthy growth) or what stresses them out (through stunted growth or other issues). With practice, you’ll be training your cannabis like a pro, and your canopy will look like a work of art.
The Role of Airflow in Canopy Management

When focusing on light and training, it’s easy to forget about air, but airflow is a big deal for a healthy canopy. Think of a stuffy room with no ventilation—pretty uncomfortable, right? Your cannabis canopy feels the same if air isn’t moving around.
Here’s why airflow matters so much:
- Prevents Mold and Mildew: Cannabis plants, especially in a dense canopy, create a humid environment under those leaves. Without airflow, moisture can sit on leaves and buds, which is an open invitation for mold (like the dreaded bud rot) and mildew. A gentle breeze keeps things dry on the surface, making it hard for mold to take hold. It’s like hanging your clothes in the breeze to dry—moving air wicks away moisture.
- Strengthens Stems: When air moves your plants (even slightly), it causes micro-strengthening in the stems. In nature, plants deal with wind all the time, which prompts them to grow stronger to resist it. In your grow, a fan that makes your plants gently sway is doing them a favor. Those stems will beef up, better supporting your heavy buds later on. Strong stems = less risk of branches snapping under the weight of big colas. It’s survival of the fittest, and you’re giving your plants a little gym workout.
- Even CO2 and Temperature Distribution: Plants breathe CO2 and release oxygen. In a stagnant space, a leaf can use up the CO2 immediately around it and slow down photosynthesis until fresh air comes. Airflow ensures that fresh CO2-rich air is constantly moving around your leaves, like a conveyor belt delivering plant food. It also helps keep the canopy temperature even, so no hot spots build up right under the lights.
- Pest Deterrence: Many pests (like fungus gnats or spider mites) prefer still air and sheltered spots. A breezy canopy makes it harder for pests to settle in and lay eggs undisturbed. It’s not a foolproof pest control, but it certainly makes life difficult for them, which can reduce infestations.
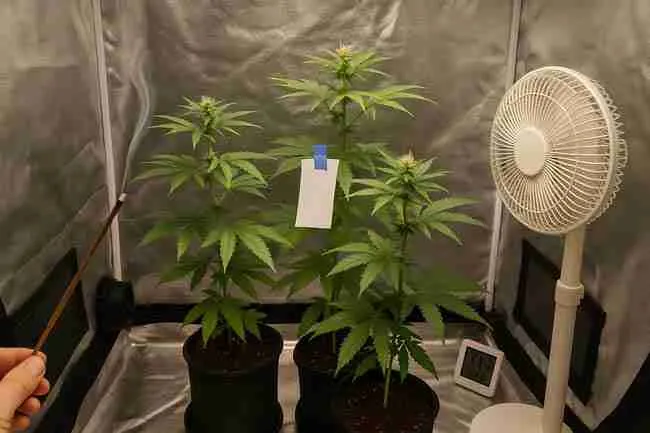
So, how do you ensure good airflow? Most indoor growers use oscillating fans—these are the fans that swivel back and forth, spreading air over a wide area. You might place one fan above canopy level and one below, so the leaves are rustling gently and even the under-canopy area gets some air movement. You don’t need a windstorm; in fact, too strong a blast can stress plants (you’ll see leaves almost pressed down or plants constantly shivering, which is too much). Aim for a gentle rustle of leaves, like a soft breeze on a spring day.
For canopy management specifically, after you’ve pruned and trained, airflow helps keep the canopy healthy. A flat, wide canopy can sometimes act like a wall blocking air, so you might need to adjust fan positions or use small clip-on fans to get airflow into the middle of the canopy. Always check by feeling with your hand: can you feel a light breeze in different parts of the canopy? If not, try repositioning your fans or slightly thinning out overly dense foliage.
Bottom line: Light and nutrients feed your plants, but don’t forget they need to breathe too. Good airflow is like giving your cannabis a breath of fresh air (literally). It complements all your other canopy efforts, ensuring the environment around those leaves and buds is just right for them to flourish.
How High Should the Plants Be Under Your Canopy?

You might wonder, how tall should I let my plants get for an ideal canopy? The answer depends on your grow space and goals, but the key is to aim for a manageable height where light can still penetrate and you have room to work. In indoor growing, height is often limited by your ceiling or tent size and how far your lights can be hung. So managing plant height is crucial.
For indoor growers, a common approach is to switch your plants to flowering (12/12 light cycle) when they’re around half the final desired height. Why? Most cannabis plants (especially non-dwarf varieties) will stretch in the first few weeks of flowering—often doubling in height, sometimes more. For example, if you have a grow tent that’s 6 feet (about 180 cm) tall, and your light and hangers take up a foot, you might only have 5 feet of space for plants. You’d want to start flowering when your canopy is roughly 2 to 2.5 feet tall (60-75 cm). That way, after the stretch, they end up around 4 to 5 feet tall, comfortably fitting without hugging the light. If you waited until they were 4 feet tall to flower, you could end up with 6-8 foot monsters bursting out of your space!
Now, “under your canopy” can also refer to the space beneath the canopy—the lower part of the plants. Many growers will clear out the lower 1/3 of the plant (like we talked about with lollipopping). This means your effective canopy—the part of the plant actively producing buds—is the top 2/3. If your plant is 3 feet tall, maybe only the top 2 feet are canopy and the bottom 1 foot is clean stems. Doing this helps ensure that the canopy you do have is getting all the light and nothing is wasted on the stuff underneath that won’t develop well.
Outdoors, plants can get huge (10 feet tall or more for some sativas!). You might not have such strict height limits, but you still want to manage the canopy. Even in big outdoor bushes, growers often top plants to keep them bushier rather than super tall, so more of the plant gets direct sunlight rather than just the top. Also, consider your ladder needs – if a plant is too tall for you to comfortably prune or inspect, that’s a problem. It’s often better to have a wider plant than a sky-high one.
So as a rule of thumb, grow as high as your light can go. If you can only raise your light to, say, 6 feet, keep your plants a safe distance below that (account for at least 1 foot gap to prevent burn, plus some space for you to maneuver). It’s always easier to manage a plant that ended up a bit short than one that got too tall. You can use training to keep height in check: lots of LST and ScrOG for indoor to make plants grow out, not just up. If something is getting too tall, don’t be afraid to super crop it or tie it down even late in veg.
In summary, there’s no fixed number for “how high” plants should be, but the ideal canopy height is one that fills your horizontal space without outgrowing your vertical space. You want that Goldilocks zone: not too short (wasting potential) and not too tall (causing light/space issues), but just right for your setup. Keep an eye on your plants’ height as they grow, and plan ahead, and you’ll always stay in control of your canopy.
Quick Tips for Achieving an Ideal Cannabis Canopy
Want a quick rundown? Here are some handy tips to help you grow the best cannabis canopy possible:
- Start Early: Begin training when plants are young. It’s easier to shape a canopy from the get-go than to fix a wild one later. A little bend or pinch in the early weeks can prevent a lot of headaches down the road.
- Keep It Even: Always watch for any branch that grows taller than the rest. Don’t let one bud “steal the spotlight.” If you see a diva branch shooting up, tie it down or top it to bring it back in line with the others.
- Regular Pruning: Nip it in the bud (literally) by pruning away useless growth. Remove spindly lower branches and big leaves that block light. This keeps energy focused on the canopy where the main action is.
- Optimal Light Distance: Adjust your lights as your plants grow. Maintain the sweet spot distance so that the entire canopy gets strong light without burning. If in doubt, raise the light a bit and see how plants respond.
- Use a Trellis/Net: Consider a ScrOG net or even a simple trellis to support branches. This not only helps spread the canopy but also holds up heavy buds later. It’s like giving your plant a supportive framework to lean on.
- Promote Airflow: Set up fans to gently breeze through your canopy and under it. Good air keeps your canopy healthy and mold-free. No one likes stale air – not even plants.
- Observe Daily: Take a peek at your canopy every day if you can. Catch problems early. Is one side of the canopy lighter green? Maybe the light is weaker there. Spots on leaves? Maybe pests. Daily check-ins help you act before small issues become big ones.
- Be Patient & Flexible: Every strain and grow is a bit different. If one method doesn’t work well, try another. Pay attention to how your plant responds and adjust your approach accordingly.
- Learn from Each Grow: Over time, you’ll get a feel for canopy management. Each grow you do, look at the canopy at harvest and ask, “How could it have been better?” Maybe next time you’ll top one more time, or prune a bit more, or start training a week earlier. Continuous improvement will make you a canopy master.
FAQ: Cannabis Canopies
Here are answers to some common questions growers have about cannabis canopies:
Q: What is a cannabis canopy exactly?
A: The cannabis canopy is the top layer of your plant(s) where most of the leaves and buds are. It’s like the “roof” of your garden. When people refer to the canopy, they mean all the foliage at the top that catches the light. In a well-grown setup, the canopy is the thick blanket of green you see when looking from above. Managing this canopy means shaping that top layer for even light and growth.
Q: How do I get an even canopy?
A: Getting an even canopy involves training and pruning. Start by topping your plants once they have a few sets of leaves, which encourages side branches to grow. Use low-stress training (tie down branches) so that all the growing tips are at about the same height. If one branch tries to outgrow the others, bend it or pinch it back. Using a ScrOG net can also force your plant to spread out evenly. The key is consistency: a little maintenance each week goes a long way. By the time you’re flowering, you want a nice flat table of buds.
Q: Does canopy management really increase yield?
A: Yes, in most cases. A well-managed canopy means more buds sites get direct light, which usually means those buds grow bigger. If you leave a plant untrained, you’ll often get one big bud and many smaller ones. Training and pruning to create a canopy can turn a couple of those smaller buds into additional big colas. It also helps avoid wasting light. So while it might not turn a 2-ounce plant into a 10-ounce plant without other factors, it can bump up your yields by a significant margin. Plus, the buds you get will be higher quality (denser, better developed) because they weren’t sitting in the shade.
Q: How far should my grow lights be from the canopy?
A: As a general rule, keep strong lights like LEDs or HPS about 18 inches (45 cm) away during veg, and 12-18 inches (30-45 cm) during flowering. For seedlings, start around 24+ inches (60+ cm) if using powerful lights. The goal is to give enough light without burning the plants. Watch your canopy: if leaves start to bleach white or curl, the light is too close. If the plant is stretching (long internodes, sparse leaves), the light might be too far. Always adjust based on what your plants tell you, since different lights and setups vary.
Q: Should I prune fan leaves during flowering?
A: Light pruning of fan leaves in flower can be helpful, but do it carefully. Many growers will remove some big fan leaves around week 3 of flower (once buds have formed) to allow more light to lower buds and improve airflow. You can also pluck a few leaves later if they’re really blocking a bud or beginning to yellow. However, don’t go crazy and strip all the leaves—fan leaves are still the energy factories for your plant. A good approach is to remove leaves that are overcrowding or shading buds, but always leave plenty of healthy leaves so the plant can keep maturing those buds.
Q: What is the difference between Sea of Green (SOG) and Screen of Green (ScrOG)?
A: Both SOG and ScrOG are techniques to maximize your canopy, but they work differently. Sea of Green (SOG) involves growing many small plants close together and flipping them to flower early. The idea is to create a “sea” of small buds, filling the canopy quickly with many plants (each plant might have one main cola). It’s great for quick turnover and using space efficiently with clones. Screen of Green (ScrOG), on the other hand, usually uses fewer plants that are trained longer under a screen or net to create a wide canopy. In ScrOG, each plant spreads out to fill a large area of the screen with multiple bud sites. You veg longer in ScrOG than in SOG, but you use fewer plants. In short, SOG = more plants, less training; ScrOG = fewer plants, more training — both aim to fill the canopy space for max light use.
Q: Is canopy management necessary for outdoor grows?
A: Outdoors, canopy management is a bit different because the sun moves across the sky, naturally giving different angles of light. However, many outdoor growers still top and train their plants to keep them bushy. This helps prevent one giant central cola (which could be prone to mold) and encourages lots of medium-sized colas. It also keeps the plant at a manageable height and improves yield by spreading the plant out. So while outdoor plants will form a canopy on their own, you can definitely improve an outdoor canopy by pruning and topping, especially if you want to avoid super tall plants or help lower branches get more light. Even something as simple as tying down a few branches can increase your outdoor yield.
Q: How do I know if my canopy is too dense?
A: A canopy is too dense if light and air can’t penetrate it at all. Signs include lots of yellowing leaves in the interior (because they aren’t getting light or air) or a humid feeling when you part the leaves (indicating poor airflow). If you reach into your canopy and it’s like a tangled jungle where you can’t even see the soil, it’s probably too dense. The remedy is careful pruning—remove some of those fan leaves and thin out small sucker branches. You want to be able to see a bit of light through the canopy when you look from below, and feel air moving. A slightly open canopy interior is a healthy canopy. Remember, you don’t want to choke out your buds with too many leaves crowding together.
By now, you should have a clear picture of how to create and maintain the perfect cannabis canopy. With practice and patience, you’ll see your plants thrive under that even, light-soaked blanket of green. Every garden is a learning experience, so don’t be afraid to experiment and find what works best for you and your plants. Now go forth and grow those amazing cannabis canopies!