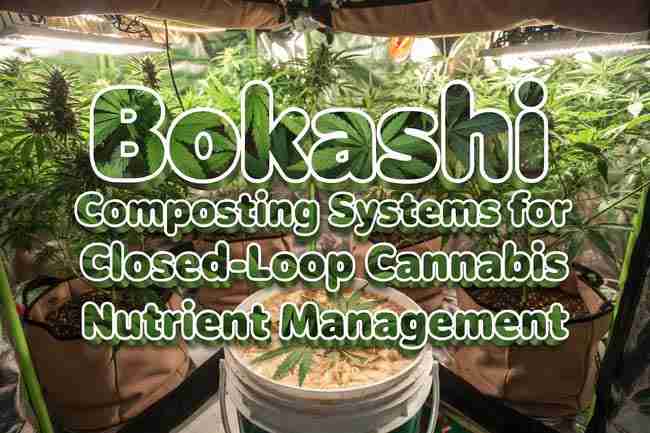
Bokashi Composting Systems for Closed-Loop Cannabis Nutrient Management

Many growers want to reduce waste and create their own nutrients. However, bokashi offers an anaerobic method that works well indoors and produces powerful liquid fertilizer. Moreover, it fits perfectly into small Canadian and United States home setups. You can turn everyday kitchen scraps and garden trimmings into a living fertilizer that feeds your cannabis plants while cutting down on what you send to the landfill.
Furthermore, this post will walk through building or buying a bokashi system and what kitchen and garden waste works best. In addition, it will explain how to dilute and apply the resulting liquid to cannabis plants at different stages. Consequently, readers will create a truly circular growing system. One effective strategy involves combining bokashi with existing soil mixes for gradual improvement. Additionally, the article will share odor-control tips and harvest timing for the fermented material. Above all, it connects sustainable practices back to healthy plants grown from premium cannabis seeds at Green Avenger Seeds.
If you have ever stood in your grow room staring at a full trash bin of veggie peels and coffee grounds while your plants sit in store-bought soil, you already know the feeling. There has to be a better way. Bokashi composting cannabis gives you that better way. It is simple, it stays indoors without stinking up the house, and it hands you two powerful products: a rich fermented solid you mix into soil and a liquid gold you dilute and feed straight to your plants.
What is Bokashi Composting and Why It Changes the Game for Cannabis Growers
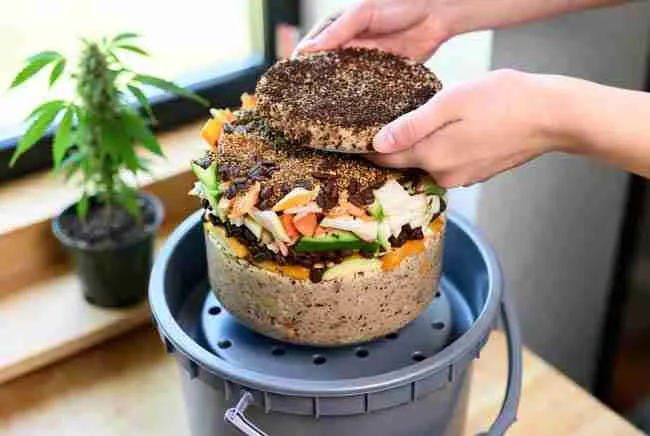
Bokashi is not your typical backyard compost pile. It is an anaerobic fermentation process. That means it happens without oxygen, inside a sealed bucket, using special beneficial microbes. These microbes — mainly lactic acid bacteria, yeasts, and a few phototrophic types — get delivered through bokashi bran. The bran is usually wheat bran mixed with molasses and the microbe culture, sometimes called EM or Effective Microorganisms.
When you add your kitchen scraps to the bucket and sprinkle bran on every layer, the microbes go to work fast. They ferment the waste instead of rotting it. The result after two to four weeks is a pickled-style material that still looks like food scraps but has been pre-digested. You also drain off a liquid called bokashi leachate or bokashi tea that is packed with organic acids, enzymes, and soluble nutrients.
For cannabis growers this matters a lot. The fermentation creates bioavailable forms of nitrogen and other elements that roots can grab quickly. The microbes themselves colonize your soil and root zone, helping with nutrient uptake, fighting off bad bacteria and fungi, and improving soil structure over time. That is the heart of bokashi cannabis nutrients and sustainable cannabis soil building.
You do not need a big outdoor pile or perfect outdoor temperatures. You can run the whole system in a closet or basement in Nova Scotia in the middle of winter. No turning, no smell if you do it right, and you get usable fertilizer in weeks instead of months. That is why so many indoor growers are switching to bokashi composting cannabis for a true closed loop cannabis growing setup.
Building or Buying Your Bokashi System for Small Canadian Home Grows
You have two easy paths: buy a ready-made bokashi bin or build your own with two food-grade 5-gallon buckets. Both work great for one or two people plus a small cannabis garden.
DIY two-bucket method (most popular and cheapest):
- Get two clean 5-gallon buckets with lids.
- Drill 8–12 small holes (about ¼ inch) in the bottom of the inner bucket so liquid can drain.
- Install a cheap spigot or tap near the bottom of the outer bucket so you can drain the leachate without opening everything.
- Optional but smart: put a small plastic grate or piece of window screen in the bottom of the outer bucket to keep the inner bucket from sitting in liquid.
That is it. Total cost under $30 if you already have the buckets. Commercial bins cost more but look nicer and sometimes come with extra features like an air-tight seal or built-in press.
Quick specs to know:
- Bucket size: 5 gallons handles a small household plus cannabis grow waste easily. Go bigger (10–20 gallons) only if you have a big family or lots of garden trimmings.
- Fermentation time: 10–14 days once the bucket is full, plus another 7–14 days if you want the solids more broken down.
- Temperature: Room temperature is perfect (18–24 °C). Too cold slows everything down.
Press the material down firmly after every addition so you squeeze out air and liquid. That anaerobic environment is what makes bokashi different from regular composting.
The Best Kitchen and Garden Waste for Your Bokashi Bin — And What to Skip
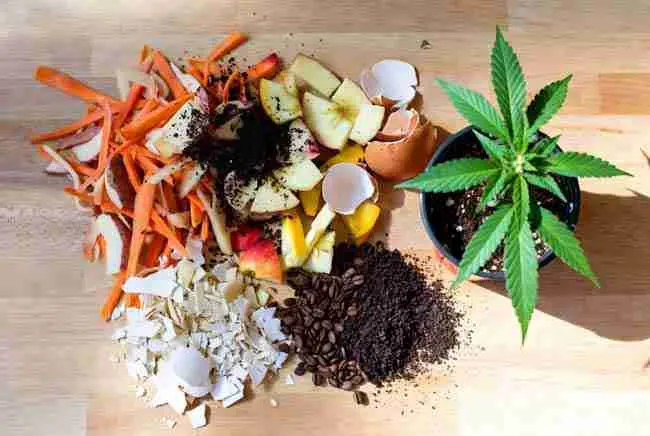
You can put almost any organic kitchen waste in bokashi, which is one reason it is so good for closed loop cannabis growing. Here is what works best and what to avoid.
Great additions (chop or tear into small pieces):
- Vegetable peels, ends, and scraps (carrots, potatoes, onions, garlic, leafy greens)
- Fruit scraps and cores (apples, bananas, berries — go easy on citrus)
- Coffee grounds and tea bags (remove staples)
- Crushed eggshells (great calcium source)
- Garden trimmings and leaves (healthy ones only, no diseased material)
- Small amounts of cooked food, rice, pasta, bread
- Small amounts of meat, fish, and dairy (bokashi handles them because of the acidity — many growers add them in moderation)
Skip or use very sparingly:

- Large bones or big chunks of meat (take too long)
- Oily or greasy foods in big quantities
- Moldy or already rotten food (can overpower the good microbes)
- Lots of liquid or milk (dilutes the fermentation)
- Non-organic matter like plastic, rubber, or synthetic fabrics
You will quickly learn your own rhythm. Most growers do a 50/50 mix of “greens” (veggie/fruit) and “browns” (bran, coffee grounds, shredded paper) and everything ferments beautifully.
Step-by-Step: Starting and Running Your Bokashi Fermentation
Here is exactly how to do it so you get great results every time.
- Sprinkle a thin layer of bokashi bran on the bottom of the inner bucket.
- Add 2–5 cm of chopped kitchen or garden waste.
- Sprinkle another thin layer of bran on top (about 1–2 tablespoons per layer).
- Press everything down hard with a plate, potato masher, or your hands (wear gloves if you like). You want to squeeze out air and liquid.
- Repeat layers until the bucket is full or you are done for the day. Always finish with a layer of bran and press again.
- Put the lid on tight.
- Every 2–3 days open the spigot and drain the liquid that has collected. Do not let it sit and go sour.
- When the bucket is full, leave it sealed for 10–14 days at room temperature. You can keep adding small amounts during this time if you want.
You will notice the smell changes from vinegary to a sweet, pickle-like or slightly alcoholic aroma. That is normal and a good sign the fermentation is working.
Harvesting the Liquid Gold — Bokashi Leachate as Cannabis Fertilizer
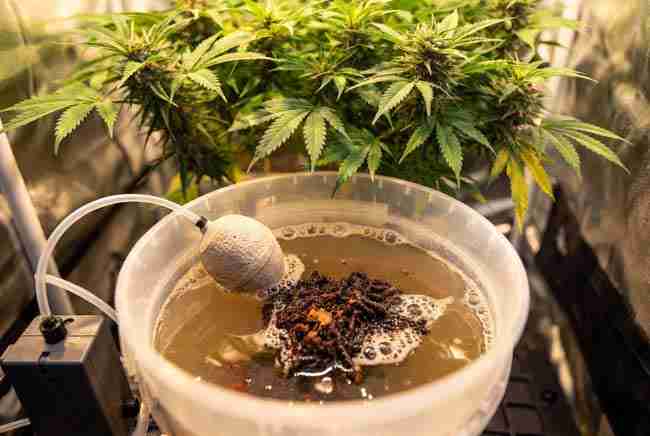
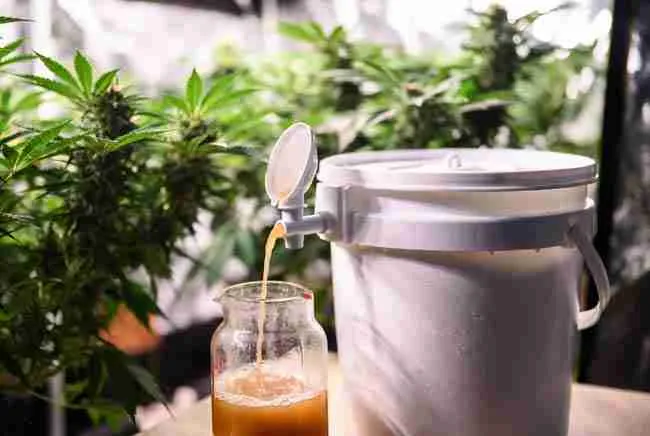
The liquid that drains out is pure plant food. It contains organic acids, enzymes, and soluble nutrients plus a huge load of beneficial microbes. This is the fast-acting part of bokashi cannabis nutrients.
How to collect and store it: Drain every 2–3 days into a clean jar or bottle. Keep it in the fridge if you are not using it right away — it stays good for a few weeks. Some growers dilute it immediately and use it the same day.
Dilution and application rates that actually work for cannabis:
Bokashi Leachate Dilution & Application Guide
| Growth Stage | Dilution (Leachate : Water) | How to Apply | Frequency | Important Notes |
|---|---|---|---|---|
| Seedlings (first 2–3 weeks) | 1:200 or skip liquid entirely | Very light soil drench | Once every 10–14 days | Better to use aged solids in soil mix instead |
| Early Vegetative | 1:100 | Soil drench or compost tea | Once per week | Great for root and leaf growth |
| Late Vegetative | 1:50 – 1:75 | Soil drench | Every 7 days | Plants love it — watch for explosive growth |
| Early Flowering | 1:100 | Soil drench | Every 7–10 days | Helps bud set without burning |
| Late Flowering | 1:150 or stop | Soil drench only | Every 10–14 days | Stop 2–3 weeks before harvest for best flavor |
| Flush period | None | Plain pH’d water | As needed | Use plain water to improve taste and smoothness |
Always test on one plant first. Start weaker and get stronger. The liquid is acidic, so never pour it straight on roots or leaves without diluting.
You can also brew it into a bigger compost tea by adding the diluted leachate plus a handful of worm castings or compost to a bucket of water, aerate for 24–48 hours, and use that as a weekly feed. Many growers say this combination gives the best of both worlds.
Mixing the Fermented Solids into Your Soil for Sustainable Cannabis Soil Building

The solids left after fermentation are not finished compost yet — they are pickled organic matter full of microbes. You have a few great options:
- Bury the solids 20–30 cm deep in your outdoor garden beds or large pots and let them finish breaking down for 2–4 weeks before planting.
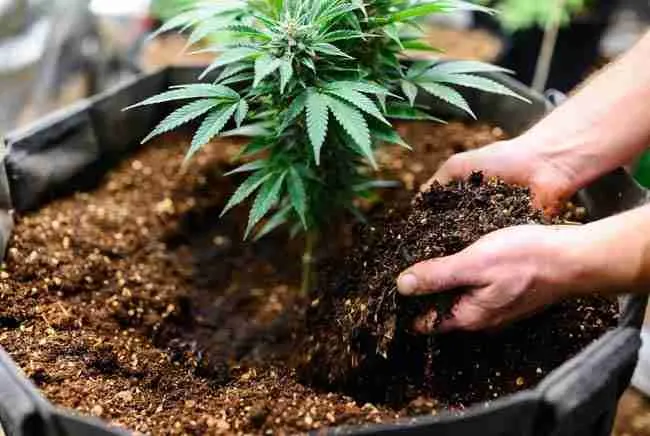
- Mix 5–15% bokashi solids by volume into your regular soil or living soil mix when you build or refresh it. Let the mix sit and “cook” for at least 2–4 weeks with occasional watering.
- Top-dress established plants (after they have 4–6 nodes) by sprinkling 1–2 cm around the base, keeping it 5–8 cm away from the main stem. Lightly scratch it in and water.
- Add a handful to your worm bin or regular compost pile to super-charge it.
The microbes in the bokashi solids wake up when they hit moist soil and start working with your existing biology. Over a few grows you will notice better soil structure, stronger roots, and plants that seem more resilient. That is sustainable cannabis soil building in action.
Pros and Cons of Bokashi Composting Cannabis in Real Home Grows
Pros
- Turns waste into two usable fertilizers in 2–4 weeks
- Works indoors with almost zero smell when done right
- Adds living microbes that improve long-term soil health
- Great for small Canadian spaces and winter growing
- Reduces what you buy and what you throw away
- Can be combined with living soil, no-till, and other organic methods
Cons
- The liquid is acidic so you must dilute it properly or you can burn plants
- Solids need time to age or bury before they are safe right next to young roots
- Not a complete standalone fertilizer — pair it with other amendments for best results
- Initial learning curve on what to add and how much bran to use
- Some people dislike the initial vinegar smell during the first week (it usually sweetens up)
Most growers say the pros far outweigh the cons once you get your system dialed in.
Creating Your Truly Closed Loop Cannabis Growing System
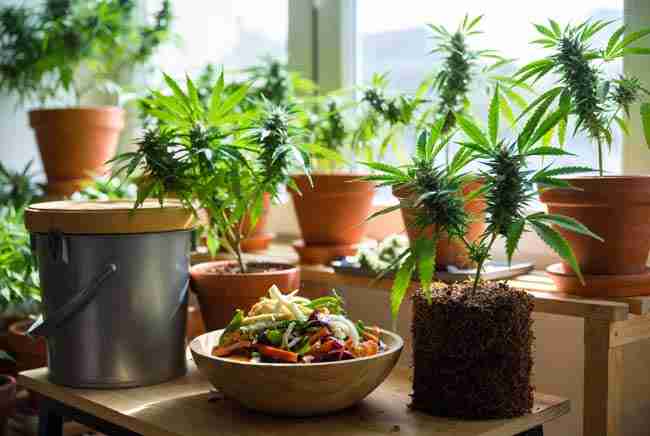
Here is where everything comes together. You grow premium cannabis seeds from Green Avenger Seeds. You harvest, trim, and enjoy. The kitchen and garden waste that used to go in the trash now goes into the bokashi bucket. A few weeks later that same waste is feeding the next generation of plants. You are literally closing the loop.
Add bokashi solids to your soil mix or top-dress. Use the diluted leachate as your weekly feed. Your plants grow stronger with fewer outside inputs. Over time your soil gets richer and more alive. You spend less money on bottled nutrients and feel good about the waste you are no longer creating. That is the real power of bokashi composting cannabis and closed loop cannabis growing.
Odor Control and Troubleshooting Common Bokashi Problems
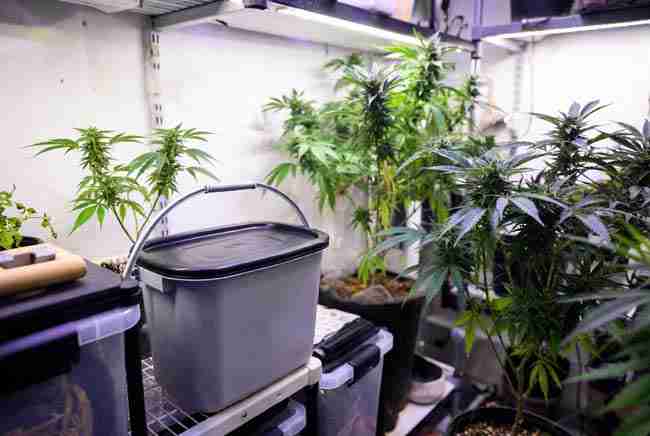
The number one complaint new users have is smell. Here is how to keep it under control:
- Always press the material down firmly to remove air pockets.
- Use enough bokashi bran — it is the inoculant and the deodorizer.
- Keep the lid sealed tight between additions.
- Drain the liquid regularly so it does not sit and turn nasty.
- If it starts smelling truly rotten (not just vinegary), add more bran, press harder, and make sure nothing moldy went in.
Other quick fixes:
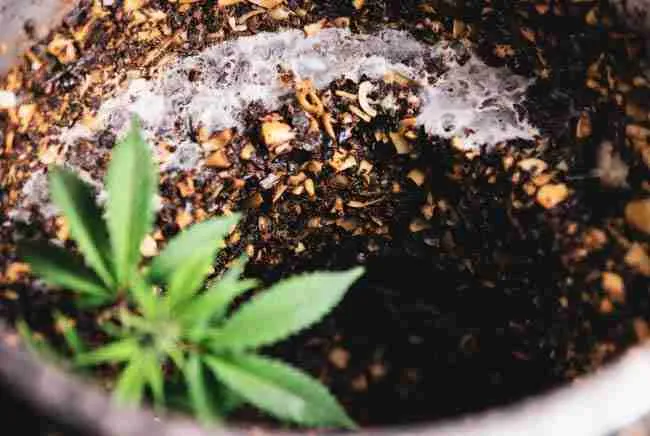
- White mold on top? Normal and harmless — just mix it in next time you add waste.
- Fruit flies? Add a layer of bran on top and keep the lid on.
- Liquid stopped draining? Make sure the holes in the inner bucket are not clogged and you are not over-wetting everything.
FAQ: Your Top Questions About Bokashi Composting Cannabis Answered
Can I use bokashi with hydro or coco grows?
Yes, but mostly through the diluted liquid as a tea or soil drench if you have any soil component. The solids are better suited to soil or living soil mixes.
How much bokashi solids should I add to my soil mix?
Start with 5–10% by volume. You can go up to 15–20% once your plants are established and you know how they react.
Is the liquid safe to use as a foliar spray?
Dilute heavily (1:150 or weaker) and test first. Many growers prefer soil drenches only during flowering to avoid any residue on buds.
Can I put cannabis trimmings or fan leaves in the bokashi bin?
Yes, as long as they are healthy and not full of pests or heavy mold. They add great organic matter.
How long does bokashi last once it is made?
The solids can be stored in a sealed bucket for several months. The liquid is best used within a few weeks (refrigerated).
Will bokashi make my buds taste like pickles or vegetables?
No. The fermentation changes the waste into plant-available forms. When used correctly and with a proper flush, your buds taste clean and true to the strain.
Do I still need other nutrients or amendments?
Bokashi is fantastic but it is not magic. Most growers still use worm castings, rock dust, kelp, or a light organic base fertilizer alongside it for complete nutrition.
Final Thoughts — Start Your Bokashi Journey Today
You do not need a huge operation or fancy equipment. You just need a couple of buckets, some bran, and the scraps you are already making every day. Start small, watch what happens, and adjust. In a few weeks you will have your first batch of bokashi cannabis nutrients and you will wonder why you ever threw that stuff away.
By using bokashi composting cannabis you are giving your plants a living, breathing soil ecosystem instead of just chemical salts. You are cutting waste, saving money, and building real sustainability into your grow. Your Green Avenger Seeds plants will reward you with healthier growth, better aromas, and bigger harvests — all while you feel good about the closed loop you have created.
Grab those buckets this weekend. Your future self (and your plants) will thank you.