15 Steps to Give Cannabis Plants the Best Start Possible

You want cannabis plants the best start, not a sad cup of yellow spaghetti by Friday. Look, the first two weeks are small, however they decide if you get a bush or a rescue mission. A seed does not care about your Pinterest tent. It wants warmth, air at the roots, a little light, and a drink that is not a swimming pool.
This is 15 steps to give cannabis plants the best start possible. Same idea if you call them marijuana plants the best start. You will set the room, pop the seed, water like a grown-up, and leave the bloom bottles on the shelf. Punchy on purpose. Babies do not need a novel. They need you to stop drowning them.
Why the First Two Weeks Make or Break the Run
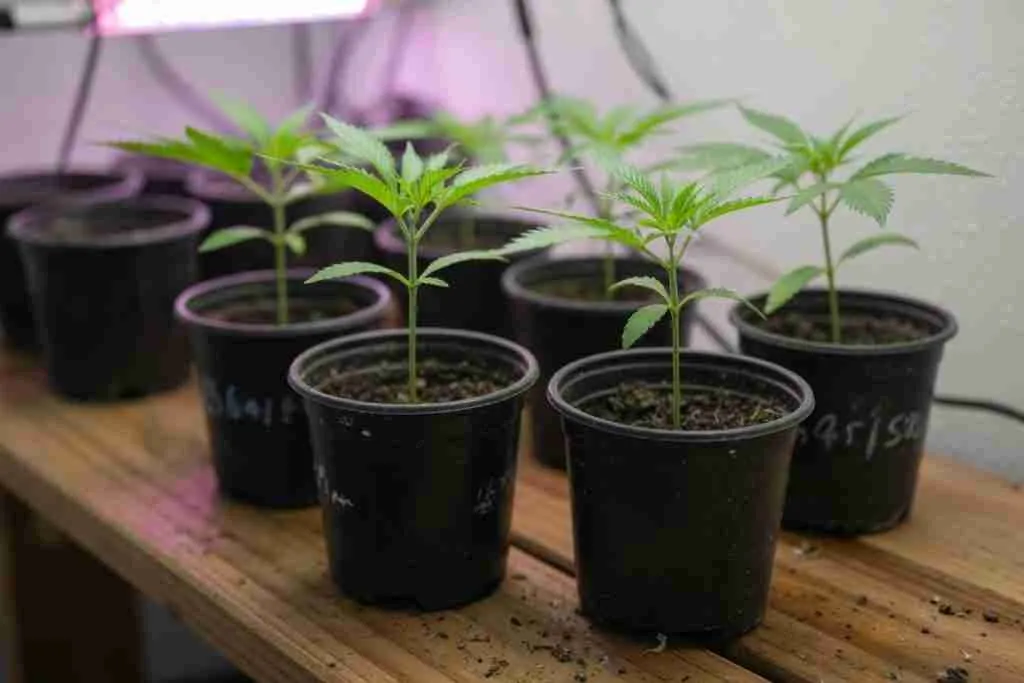
A cannabis seedling is a lunchbox with a taproot. That seed packed enough food for a few days of true leaves. Your job is not to “help” with a gallon of veg juice. Your job is not to kill the roots with love. Sitting in wet mix with no air is how most first plants die, quietly, while you are at work.
A buddy of mine planted in a five-gallon bucket of cheap garden soil, then watered it every morning “just in case.” By day six the stem pinched at the dirt line. Yikes. He thought the seed was junk. The seed was fine. The swamp was not. He started over in a solo cup with holes, waited until the cup felt light, and the next one stood up like it had somewhere to be.
Give cannabis plants the best start and you get a thick stem, medium-green leaves, and roots hunting the cup. Cheap out on the start and you spend veg trying to undo week one. That’s the whole game. If the sprout already looks cooked, start at why cannabis seeds die shortly after germination. Day-by-day timing lives in cannabis seedlings day by day.
Step 1: Start With Seeds That Can Actually Pop
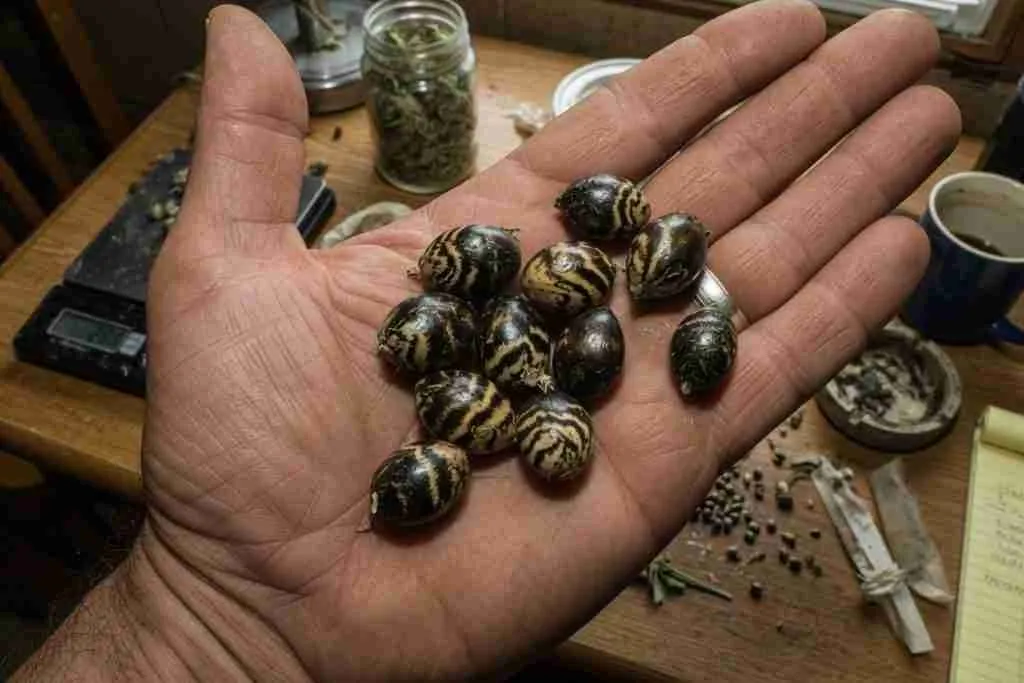
Firm, darker, tiger-stripe shells beat pale green ones. Cracked beans are a gamble. Fresh packs from a shop that dates them beat a baggie from a concert in 2019. You cannot coach a hollow seed into a plant. For a picture-first check, use what good cannabis seeds look like. A first order without the panic is in how to buy cannabis seeds for beginners.
Pick the type on purpose. Feminized photoperiods are the usual home-grow pick if you do not want to hunt males. You control the flip. If week one is messy, you can veg longer and still finish. Autos flower on a clock, so a bad first week steals size you cannot get back. Treat autos like a short fuse. Regular seeds are for breeding and hunting keepers, not for a first tent unless you like tossing boys. Seed type is covered in feminized vs regular cannabis seeds. The auto clock is in how to grow autoflowering cannabis plants. Write the name and the pop date on the cup. Future you will not remember which mystery bean is which.
Store the rest of the pack cool, dark, and dry. A sock drawer next to a radiator is not a vault. You paid for genetics. Do not cook the backups while you practice on the first two.
If a seed floats in a short soak, it might still pop. Do not toss it on a superstition. Give it the same chance as the sinkers, then judge the taproot, not the swim.
Step 2: Set the Room Like a Warm Spring Day First
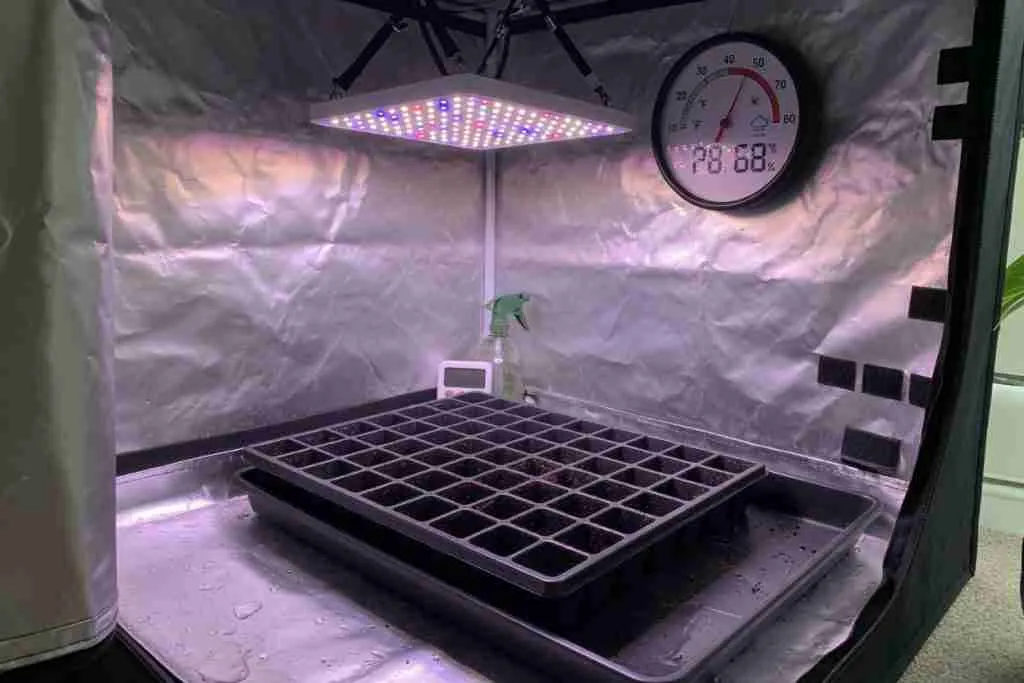
Do not pop seeds in a cold garage and hope. Cannabis seeds like spring: about 72 to 80 F, mix that is damp not soaked, and humidity around 65 to 75 percent once they break soil. A cheap thermo-hygrometer tells the truth. Your “feels fine in a hoodie” is not a sensor.
Root zone matters more than the Instagram thermometer on the tent wall. Concrete floors steal heat. A seedling heat mat under the tray, on a thermostat, beats blasting the room with a space heater. However, cooking the cup at 90 F dries the mix and cooks the taproot. Warm, not a dashboard in July.
Get the lamp on a timer before the seed cracks. When that hook shows, it wants light the same day, not tomorrow after you drive to the hardware store. A windowsill in a Canadian January is a maybe, not a plan. If the baby leans hard toward the glass, it is begging for a real lamp. Give it one before the stem turns into a wet noodle. Indoor setup notes are in the indoor cannabis growers guide.
Step 3: Use a Light Starter Mix, Not Hot Garden Dirt
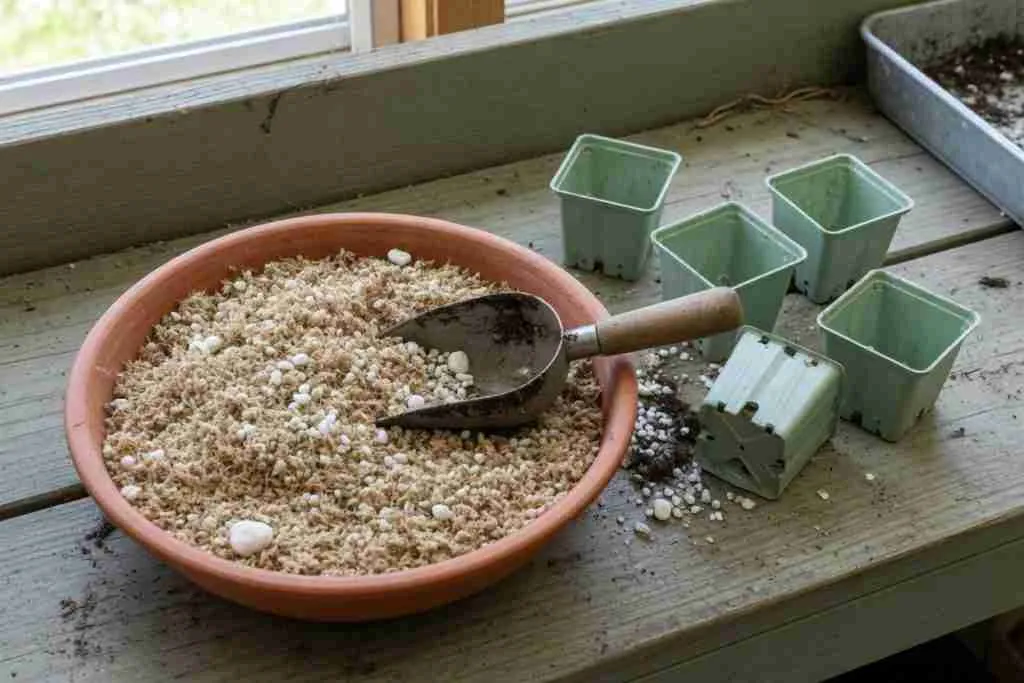
Garden soil and “vegetable” bags packed with feed will burn a baby. You want air. Peat or coco with plenty of perlite. A 70/30 peat-perlite starter is forgiving. Coco drains fast and needs a little cal-mag later. Plugs and cubes are tidy if you already grow that way. Stay in one family. Starting in soil then stuffing the plug into a DWC bucket is a bad magic trick.
If the bag smells like a barn and the label brags about months of food, cut it 50/50 with perlite or skip it. Seedlings do not need a buffet. They need oxygen around a taproot the size of a thread. Hot mix plus daily water is how tips go brown before the second set of leaves even opens. Peat vs coco vs plugs, with recipes, is in cannabis seed-starting mix recipes.
Pre-moisten the mix until it feels like a wrung-out sponge. If you squeeze a handful and it rains, you went too far. If it dusts, it is too dry and peat will shed water like a duck. Wet it, wait ten minutes, then fill the cup. Do not pack it like a snowball. Roots need pockets.
Step 4: Start in a Small Cup With Holes
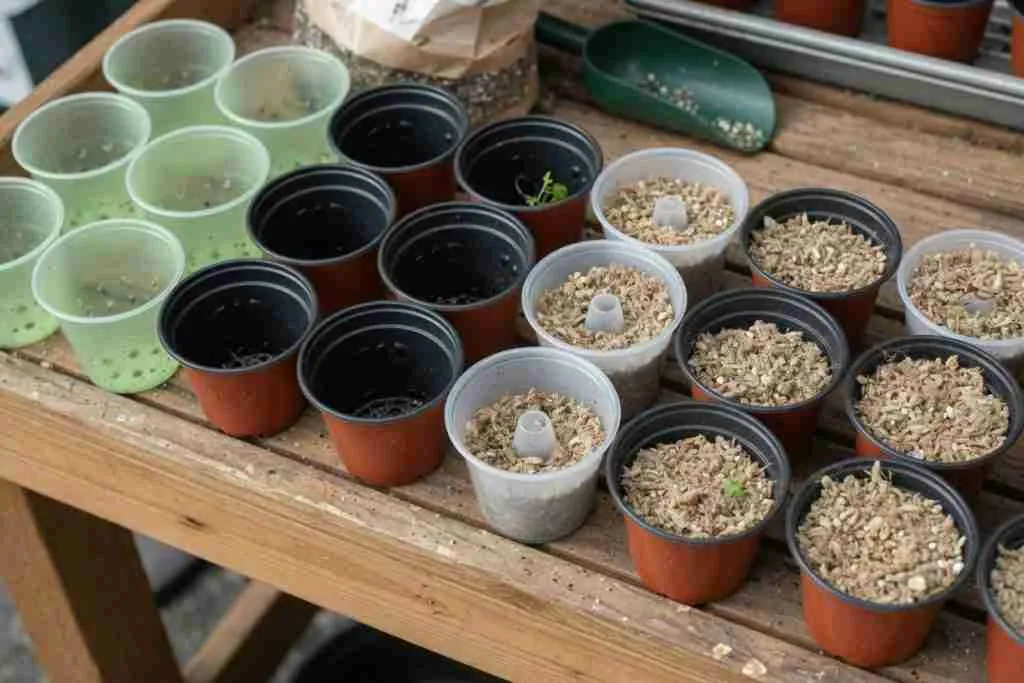
A 12 to 16 ounce cup, or a 4-inch pot, is enough for the first two or three weeks. Holes in the bottom. No saucer of standing water. A five-gallon bucket of wet mix is a swamp with a seed on top. The baby cannot drink a lake. It can drown in one.
Fabric pots breathe, which is nice later. For week one, a cup you can lift with two fingers teaches you the wet-dry cycle faster. Label it. One plant, one cup. Crowding three seeds in a mug and “picking the winner” just tangles taproots.
Step 5: Germinate Without Drowning the Bean
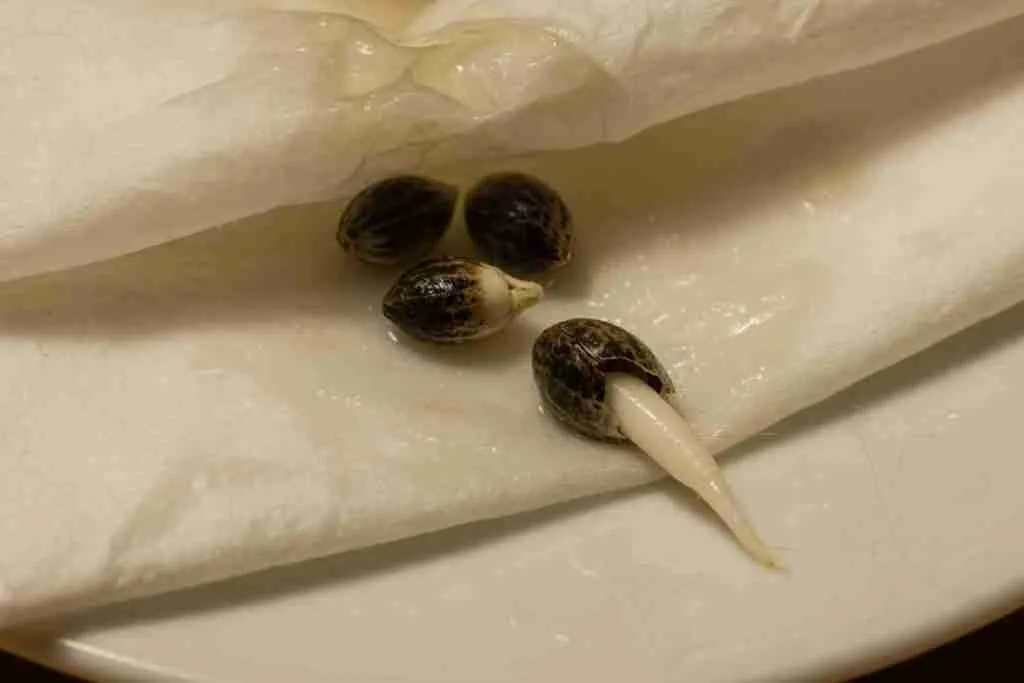
Seeds need moisture, warmth, air, and to be left alone. Soak older hard shells 12 to 18 hours in room-temp water, not a two-day bath. Then paper towel or straight into the cup. Fresh seeds often skip the soak and still crack in 24 to 72 hours. Some take a week. Peek once a day, not every hour like a microwave. Five methods side by side are in top five ways to germinate cannabis seeds.
Paper towel vs planting straight in
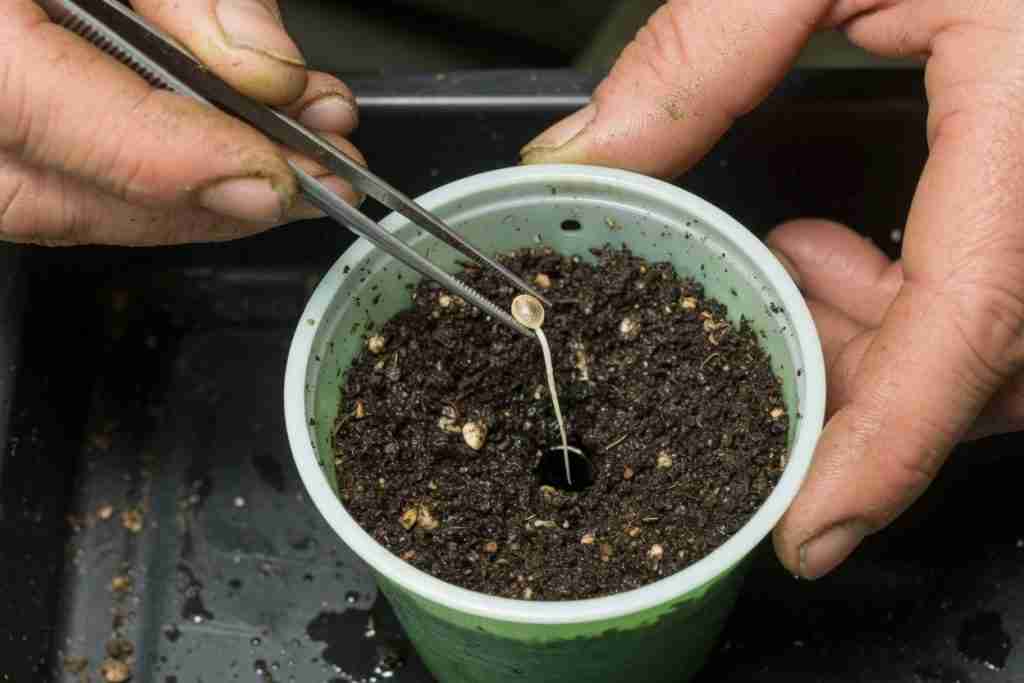
Paper towel shows you the taproot before you commit. Damp towels, two plates, dark warm spot. Plant when the white tip is about a quarter to a half inch. Waiting until it is a two-inch noodle is how you snap it. Direct sow skips the transplant of a fragile root. You poke a hole, drop the seed, and wait. You cannot see the taproot, however you also cannot break it with tweezers. Both work. Pick one and stop mixing methods mid-stream.
Step 6: Plant Taproot Down, Only Knuckle-Deep
Hole about a quarter to a half inch deep. Taproot points down. Crown toward the sky. Cover with loose mix. Do not jam it with your thumb. Too deep and the seedling burns its lunch before it sees light. Too shallow and it dries out or wears the shell as a hat.
Use tweezers on the shell, not on the white root. If the hull sticks on the cotyledons, mist it and wait. Prying a dry shell can rip the baby leaves. Moisture first, patience second, heroics never. The gentle version is in seed hull stuck on cotyledons.
Step 7: Give Gentle Light on an 18/6 Clock
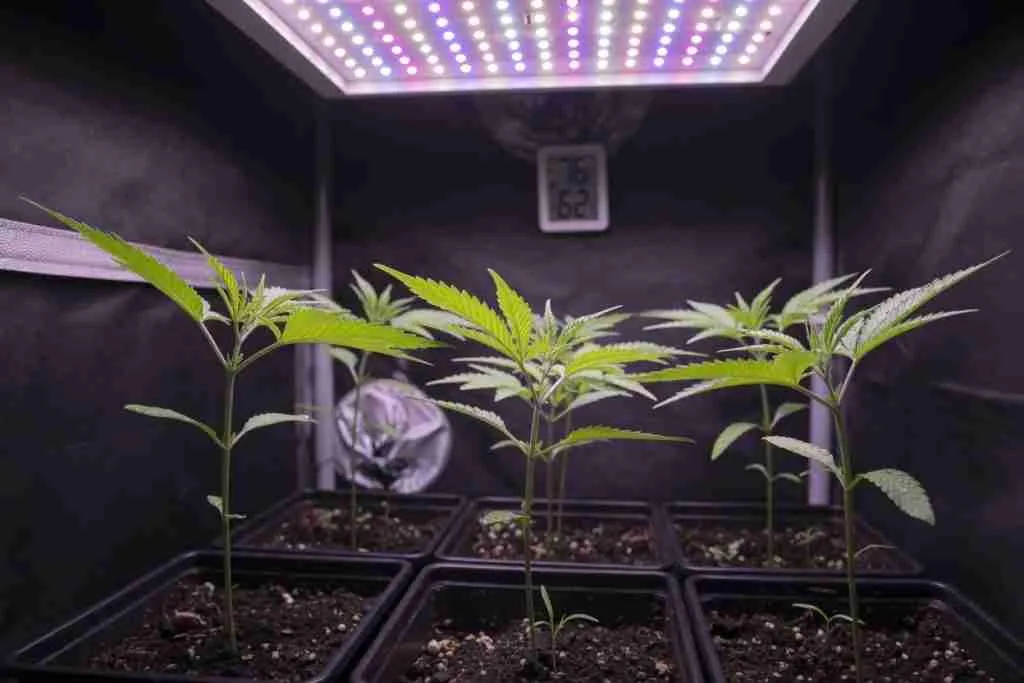
Once the hook is up, it wants light. 18 hours on, 6 off is the default for cannabis plants the best start. That dark stretch helps the plant rest and still keeps photoperiods from thinking it is fall. A dim LED at 24 to 30 inches beats a blasting bar at 8 inches. Target a mild PPFD, about 100 to 250, not flower intensity. A 150 to 220 watt bar can sit closer than a 480 watt beast. If you have a dimmer, start around 30 to 50 percent. If you do not, raise the lamp and watch the leaves, not the watt sticker.
Stretchy pale stems mean the lamp is too far or too weak. Bleached tops and taco leaves mean it is too close or too hot. Move the light, do not dump nitrogen to “fix height.” You cannot shrink internodes that already grew. You can thicken the next ones. Lamp height and the first week are in healthy cannabis seedlings first week. Floppy stems also show up in how to keep a cannabis seedling from bending over.
18/6 vs running lights 24/0
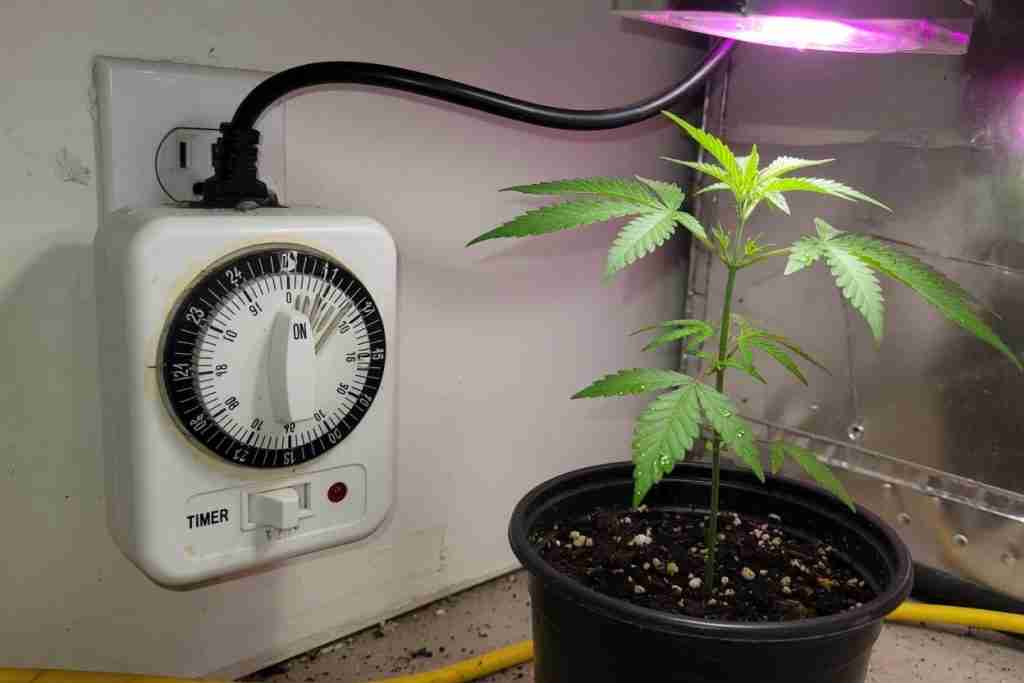
24/0 can work. Plants will grow. However, a six-hour night is cheaper on the bill and easier on a baby that still has to build roots. Autos can live on 18/6 the whole run. Photoperiods must stay on long days until you flip. Put it on a timer so you are not the timer.
Step 8: Water in a Ring and Let the Cup Get Light
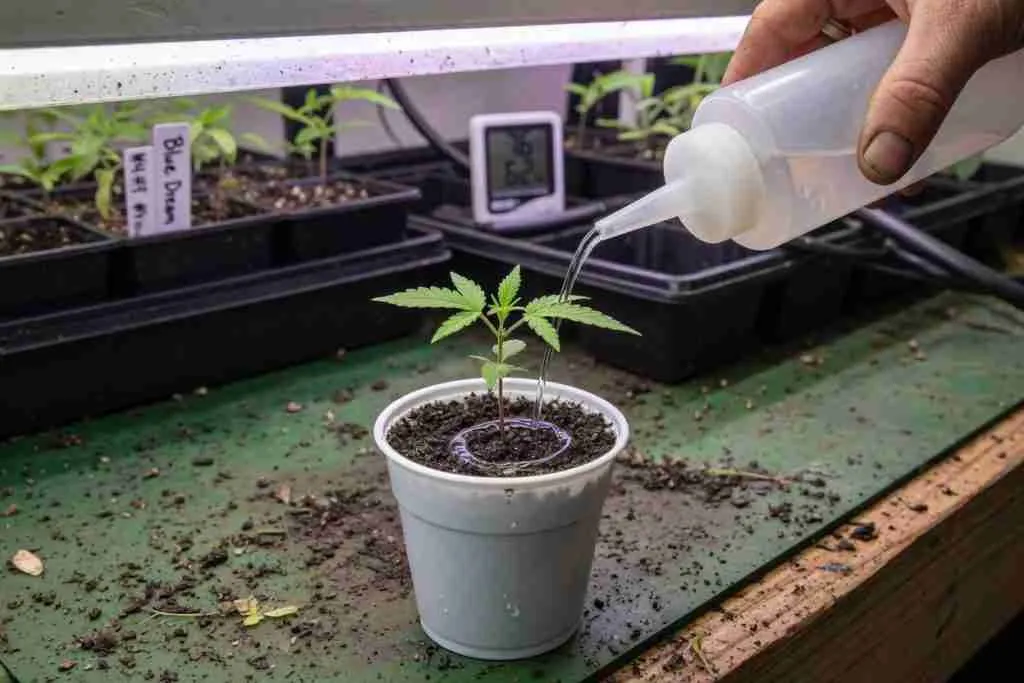
This is the step that saves more plants than any bottle. Water a small ring around the stem, not a flood. Then wait. Seedlings drink almost nothing. In a 16 ounce cup, that first drink after sprout might be 50 to 100 ml, not a pitcher. A cool room can keep a cup wet for three or four days. Overwatering makes droopy yellow leaves that feel soft. People feed that. They should skip a watering. The full watering habit is in how to water cannabis plants. Roots that cannot breathe are covered in keeping cannabis roots healthy.
Bottom watering can work if the mix is even, however a new grower often leaves the cup sitting in a tray of water like a duck pond. Lift it out. Drain. Standing water at the holes is still a swamp. Room-temp water, not fridge-cold, keeps the roots from sulking.
Heavy pot vs crispy pot
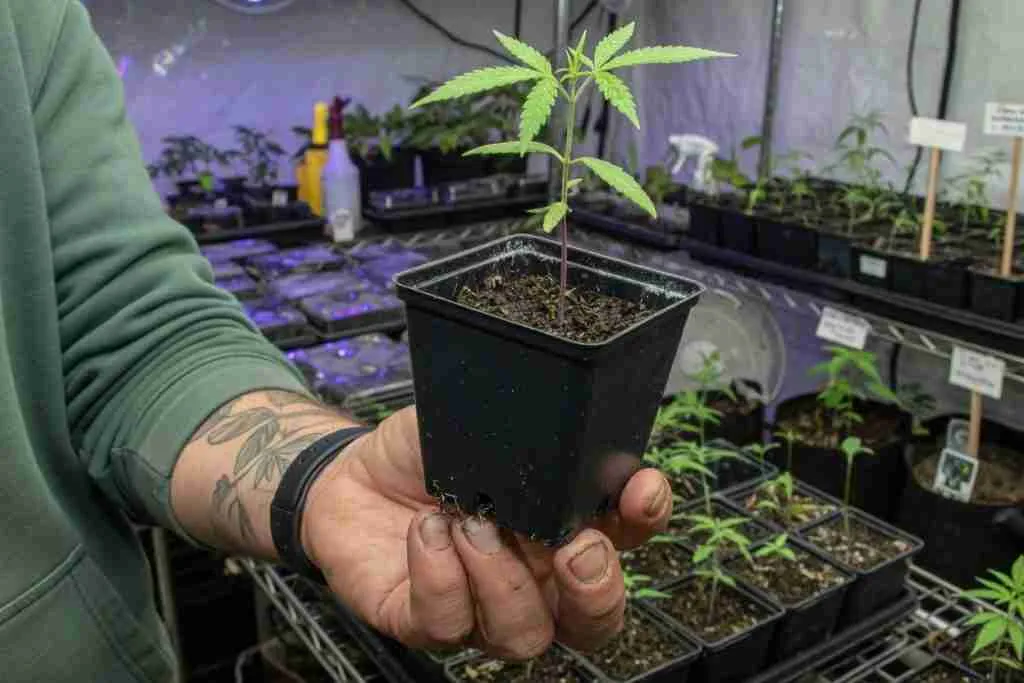
Lift the cup. Heavy and dark on top for days? Wait. Feather-light and the mix is pale? Small drink of room-temp, pH’d water. If the plant perks in an hour after a drink, it was thirsty. If it stays limp in a wet cup, it cannot breathe. That wet-dry cycle is how roots hunt. A calendar is a liar.
Step 9: Use a Humidity Dome, Then Crack It
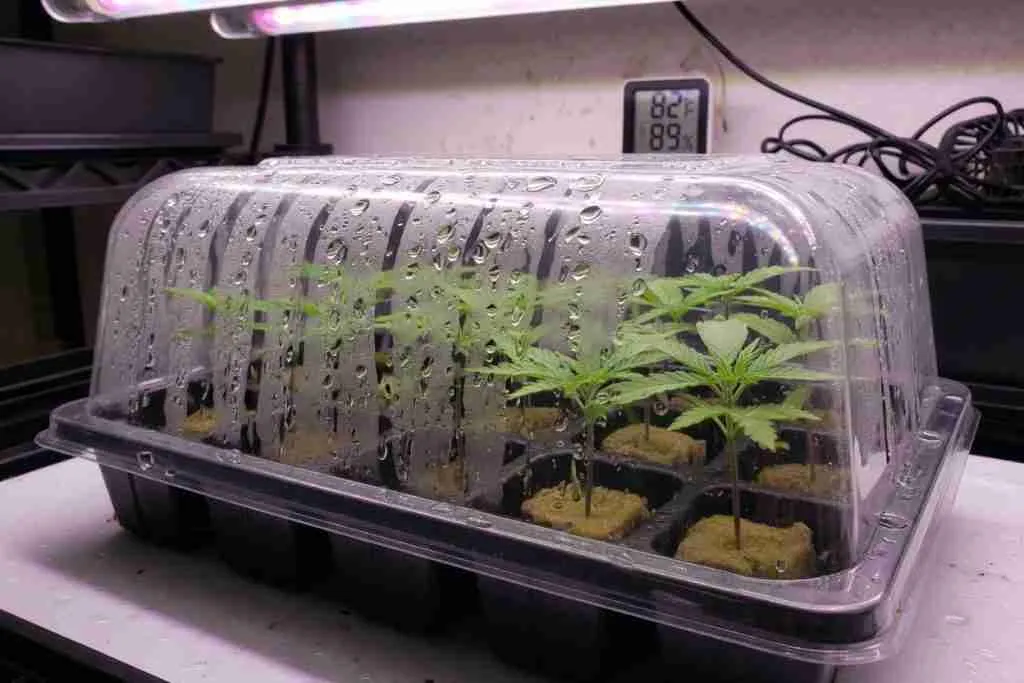
A clear dome or an upside-down cup holds moisture while roots are tiny. Leaves can drink a bit from the air. After the first true leaves, vent it. Stale wet air plus a soft stem is damping-off weather. A little fan in the room, not a gale on the seedling, keeps the air honest. If you skip the dome because your room already sits at 70 percent humidity, that is fine. The dome is a tool, not a religion. When to crack it is in humidity domes and cannabis seedling care.
If the dome rains inside, you are too wet. Wipe it. Open a vent. Drop humidity toward 60 percent as the plant stands up. You are raising a kid, not building a terrarium forever.
Step 10: Hold the Bottles Until True Leaves Show
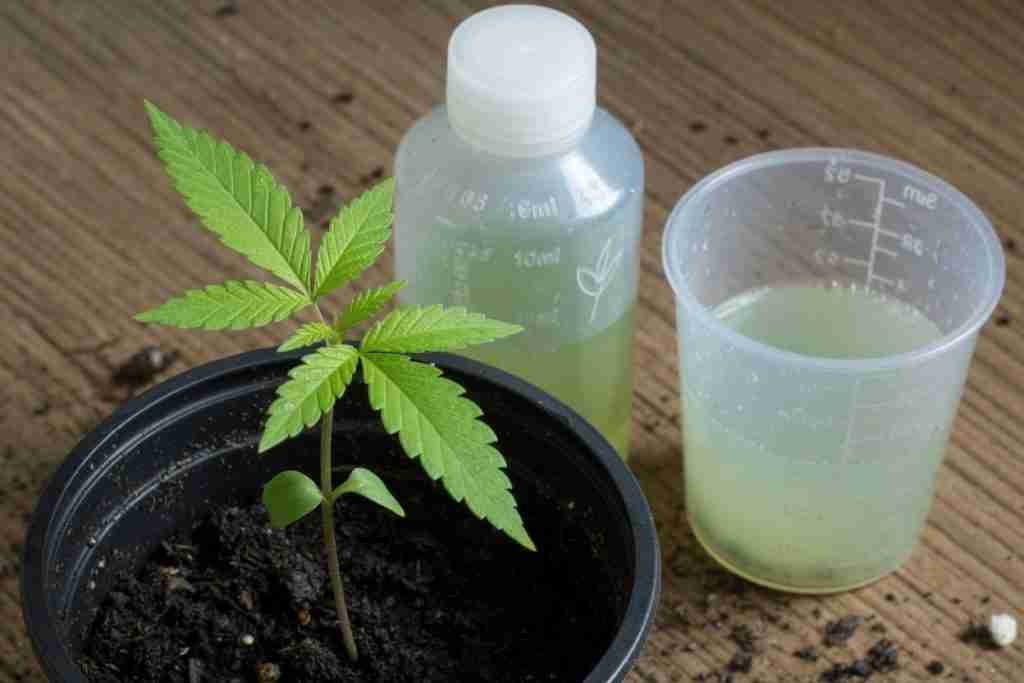
In a decent soil starter, skip nutrients for 7 to 10 days. The seed already packed lunch. In coco or a washed plug, a very light feed around 0.3 to 0.6 EC with cal-mag is enough after true leaves, not before. Full veg nutes on a two-leaf baby toasts the tips overnight.
When you do start, quarter strength. Watch the next set of leaves. Yellow bottoms after two weeks in a dead mix can mean it is time for a sip of nitrogen. Burnt tips mean you already did too much. One mistake at a time. Wait 48 hours after a change. EC by stage is in dialing EC by phase. Later veg nitrogen is a different article: nitrogen for cannabis cultivation.
Step 11: Keep pH in a Range the Roots Can Drink
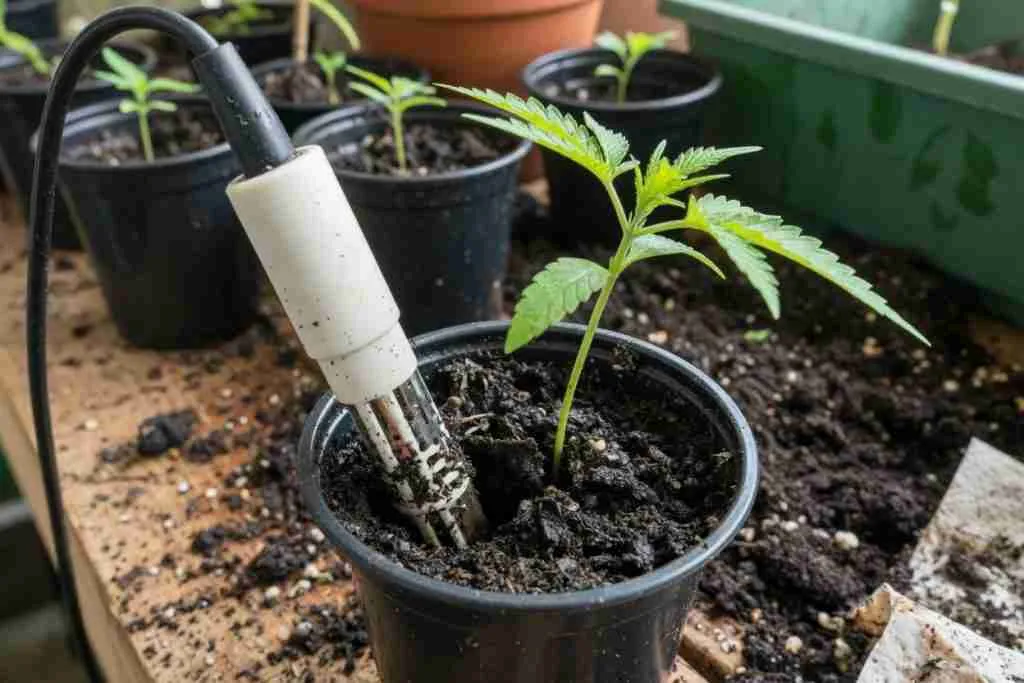
Wrong pH looks like a deficiency even when the mix is full of food. Soil likes about 6.0 to 6.5. Coco and hydro sit a bit lower, about 5.6 to 6.2. A cheap pen beats guessing. Room-temp water. If your tap is wild, that is why the plant went pale while you “did everything right.”
Do not chase every color with a new bottle. Fix pH, then wait for new growth. Old yellow leaves rarely go green again. You are trying to stop the slide. The meter walk-through is pH for growing cannabis. If the baby is already pale, use why are my cannabis seedlings yellowing as the diagnosis chart.
Step 12: Airflow Without Windburn, and Stop Fussing
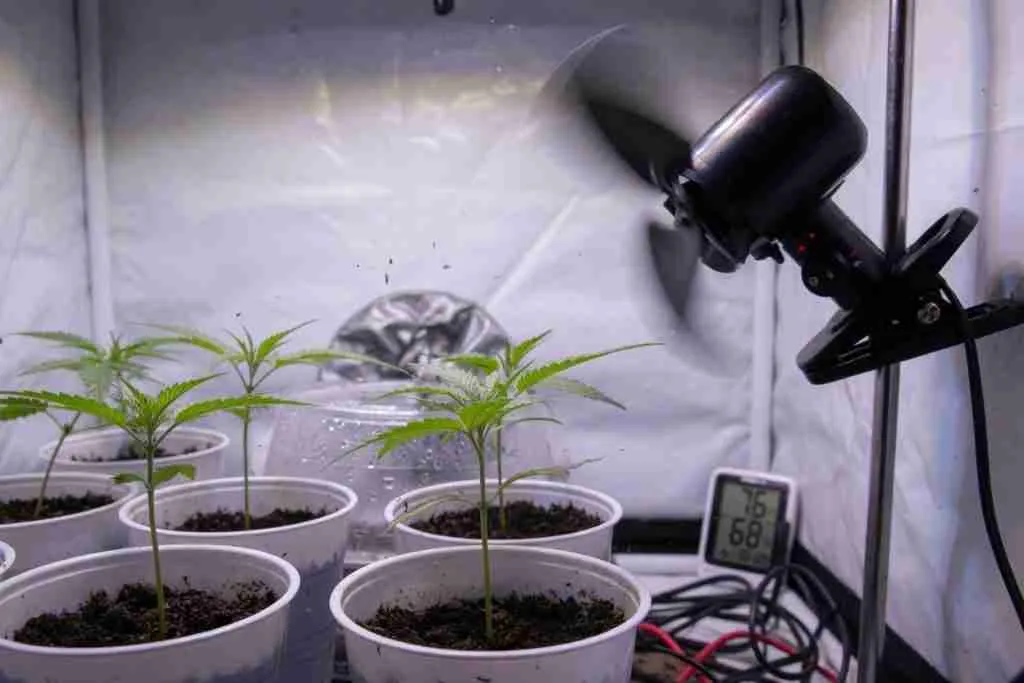
Stale air invites fungus. A hurricane on a two-inch plant leather-jackets the leaves. Aim a small fan at the empty space next to the cups, not at the stems. The plant should barely nod. Thick stems come from light and a little movement, not from you rotating the cup every twenty minutes.
Hands off. Do not transplant three times in a week. Do not pinch every cotyledon. Do not “train” a plant with two nodes. Fussing is a hobby. Roots like boring.
Step 13: Catch Stretch, Yellow, and Damping-Off Early
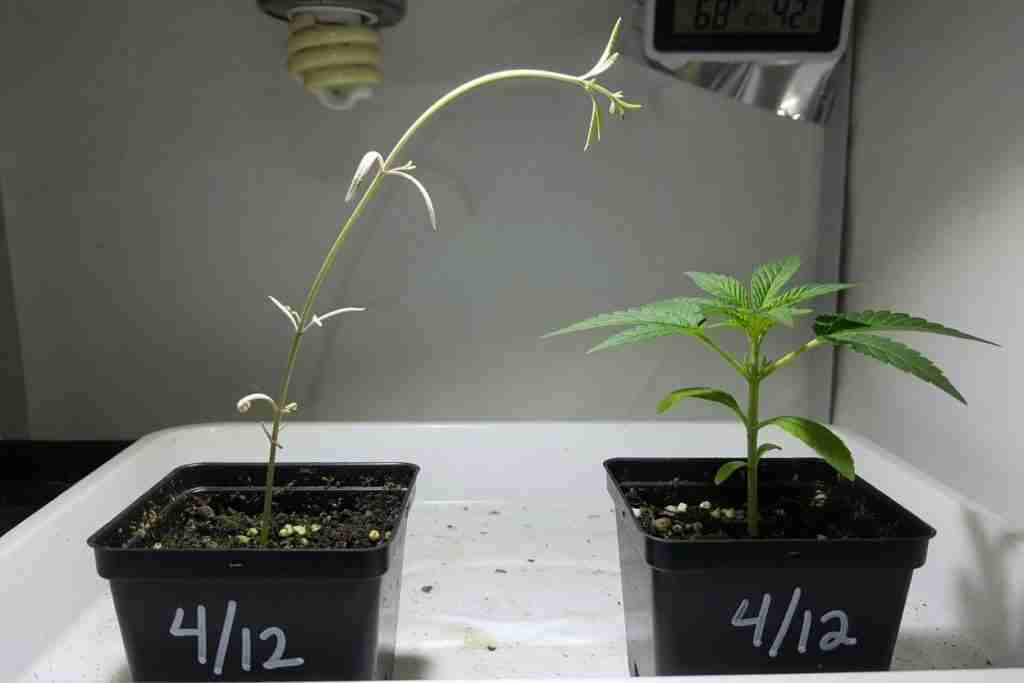
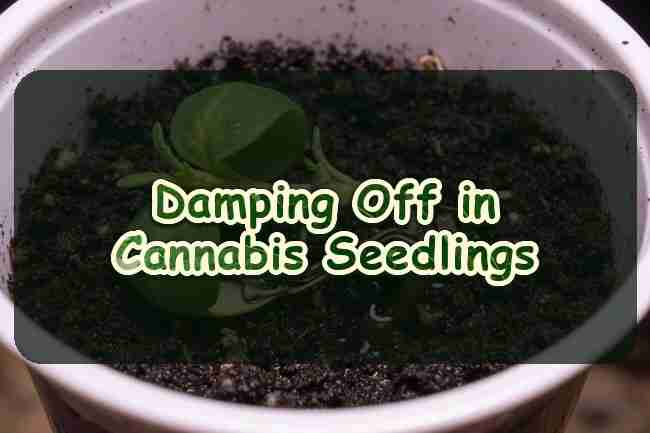
Long internodes and a lean: more light, closer or stronger. Droopy yellow in a heavy cup: stop watering. Crispy wilt in a light cup: small drink. Stem pinches brown at the soil line: damping-off. You may lose that one. Start a fresh seed in a drier, airier cup and keep the fan honest. Stretch help is in keeping a cannabis seedling from bending. Yellow true leaves are in cannabis seedlings yellowing.
A yellow cotyledon with green true leaves is often normal. The seed leaves did their job. True leaves going pale in week one is a problem. Do not strip every faded leaf off a two-week plant. It still needs those solar panels.
Step 14: Transplant When Roots Ask, Not the Calendar
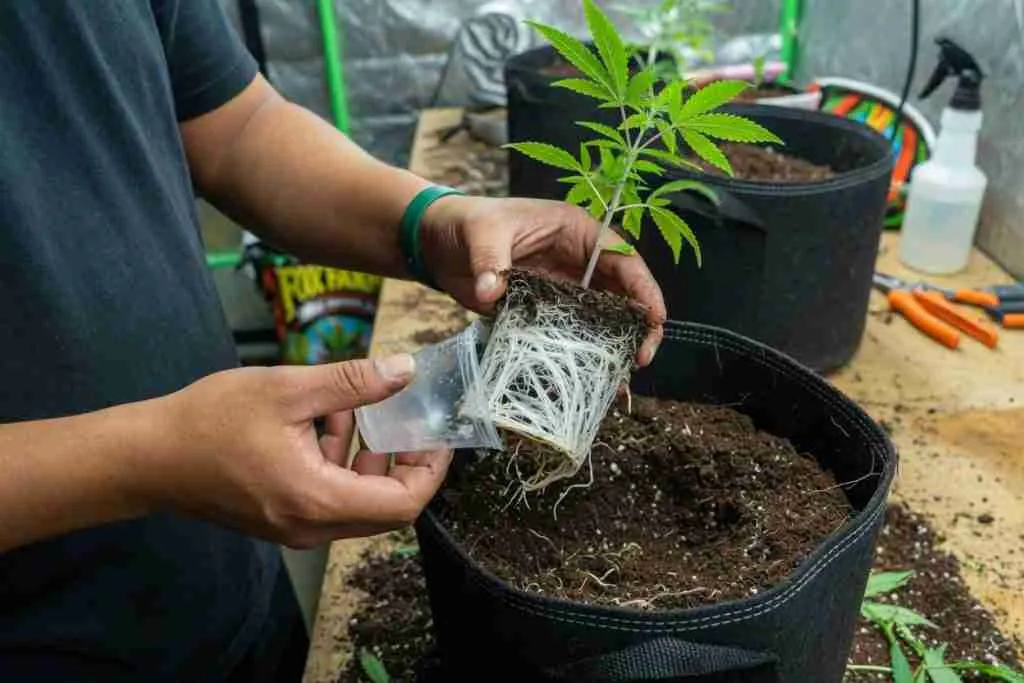
Move up when roots show at the holes or the cup dries in a day and the plant is drinking. Water first so the root ball slides. Bigger pot already filled with the same style of mix, pre-moist. Drop it in, fill the sides, do not bury the stem in a mound. Water once to settle. Then leave it alone.
Autos hate sitting rootbound in a thimble while you wait for “next weekend.” Photoperiods can forgive a stall. Autos spend that stall instead of growing. If you run autos, start in a decent pot or transplant early and only once. A jump from a solo cup to a 3 or 5 gallon is plenty for a home plant. You do not need a trash-can pot to prove a point. The move itself is in transplanting cannabis seedlings.
After the move, expect a day of “thinking.” Leaves may droop a little, then pick up. Do not water again the next morning out of guilt. Same lift-the-pot rule. Same light distance. Changing five things at transplant is how you blame the strain for your hands.
Step 15: Know What a Strong Start Looks Like by Day 14
By two weeks you want a few sets of serrated true leaves, a stem you cannot fold with a mean look, and color that is medium green, not lime and not black-green claws. The plant should stand up without a toothpick crutch. Growth every couple of days. That is cannabis plants the best start, in real life, not in a catalog. Compare your cup to cannabis seedlings day by day.
If it is still a pale noodle, you missed light or water. If it is dark and clawed with burnt tips, you fed too soon. Fix the next week. Do not throw bloom booster at a baby because a forum said “more food more yield.” Yield is a later story. This chapter is roots and a spine.
Specs, Pros, and Cons of a Careful Start
| Spec | Sane target | Why |
|---|---|---|
| Germination temp | 72–80 F (22–27 C) | Faster, more even pops |
| Seed depth | 1/4–1/2 inch | Shallow enough to break soil |
| Starter pot | 12–16 oz cup with holes | Dries between drinks |
| Soil pH | 6.0–6.5 | Lets nitrogen in |
| Coco pH | 5.6–6.2 | Stops fake deficiencies |
| Early EC | Water only in soil, 0.3–0.6 in coco | Tips burn easy |
| Light | 18/6, about 100–250 PPFD | Stocky, not stretchy |
| Humidity | ~65–75% then vent | Baby leaves, then air |
| Day 14 look | 3+ true-leaf sets, thick stem | Ready to veg or pot up |
Pros of giving cannabis plants the best start
- You keep the taproot instead of buying another pack
- Veg is faster because the plant is not recovering
- You learn pot weight before the buckets get heavy
Cons of rushing or overhelping
- A wet cup looks “cared for” and still kills roots
- Hot soil and early bottles burn tips you cannot take back
- Autos will not pause the clock while you figure it out
Cannabis Plants the Best Start FAQ
How long until a seed pops?
Often 1 to 3 days. Some take 7. Keep it warm and barely damp. If nothing happens in two weeks, that bean is probably a dud.
Should I soak every seed?
Optional. Helpful for older hard shells. Do not leave them swimming past a day or so.
When do I transplant?
When roots show or the small cup dries fast and the plant is growing. Not because a calendar app pinged you. Walk through the pot-up in the art of transplanting cannabis seedlings.
Can I start in the final pot?
Yes, if you water a tiny zone around the seed and do not soak the whole bucket. Most new growers overwater a big pot. A cup is the training wheels.
What if the seedling is stretching?
More light, closer or stronger. You cannot unscrew the internodes. You can stop the next ones from looking like a giraffe.
If you only remember three things: small cup, light mix, water when it is light. The other twelve steps hang off those. That is how you give marijuana plants the best start without a degree and without a graveyard of solo cups on the porch. Honest. The plant will not send a thank-you note. It will just keep growing while your neighbor is still googling yellow leaves. That quiet win is cannabis plants the best start: less drama later because you were boring on day three.
Follow the 15 steps, keep your hands in your pockets between checks, and you will give cannabis plants the best start possible without turning week one into a science fair. The plant is not shy. It will tell you with color, posture, and the weight of the cup. Listen to that, not to a bottle with a dragon on it. When you want the next pack, the cannabis seeds store is the catalog door.